I still remember the day I set my oven on fire. Not metaphorically—actual flames shooting out like some sort of culinary fireworks show, all because I tried to make crème brûlée without knowing what I was doing. The sugar topping turned into a blackened mess, the custard underneath was rubbery, and my kitchen smelled like burnt dreams for three days. Fast forward through a dozen failed attempts, countless taste tests, and one particularly memorable dinner party where my friends politely pretended to enjoy my "smoky vanilla surprise," and you'll arrive at this recipe. These vanilla bean crème brûlée cheesecake cupcakes aren't just a dessert—they're redemption in cupcake form, proof that sometimes the best recipes are born from spectacular failures.
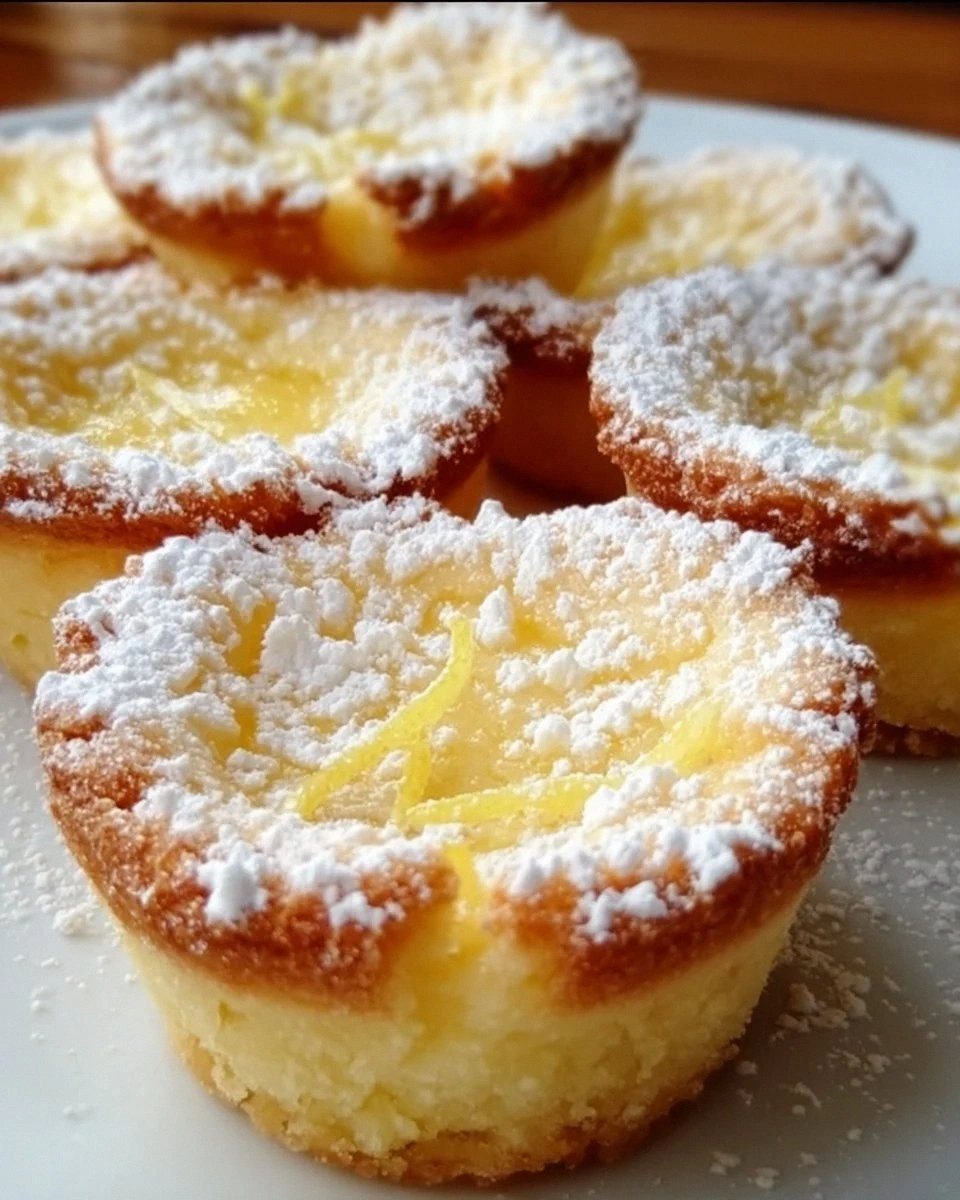
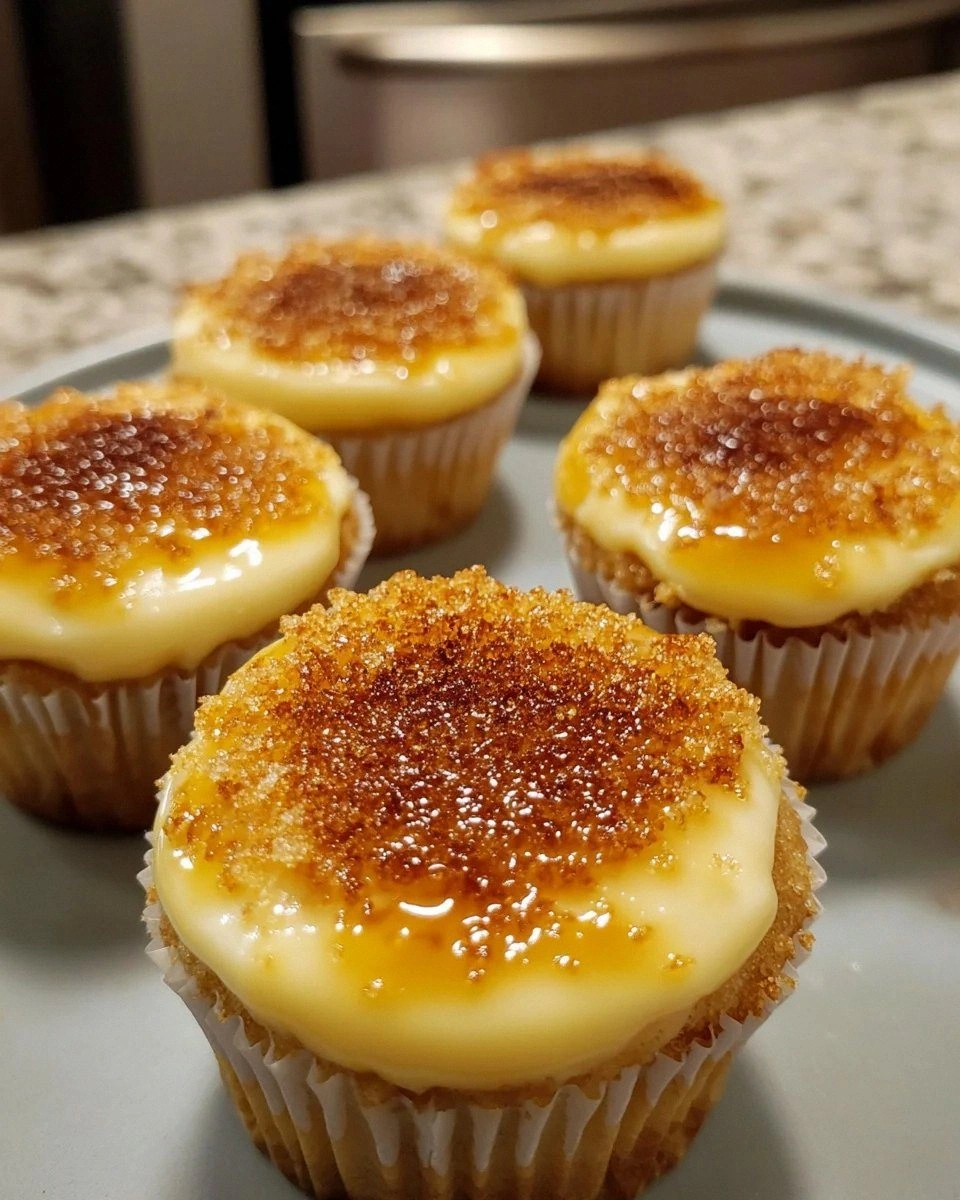
Picture this: a buttery graham cracker base that holds its shape like a determined little foundation, topped with the silkiest vanilla bean cheesecake you've ever tasted. The real magic happens on top, where a paper-thin layer of caramelized sugar creates that signature crack when you tap it with your spoon. That first bite is pure theater—the crunch gives way to creamy vanilla-laced cheesecake, while the cookie base provides the perfect textural contrast. It's like someone took everything you love about French patisserie and American comfort food, then waved a magic wand over the whole thing.
I've made these for bridal showers where guests literally lined up for seconds, for Christmas morning when we needed something special before the chaos of gift-wrapping, and for those Tuesday nights when you just need something extraordinary to happen. The vanilla beans speckle the cheesecake like tiny vanilla constellations, each one bursting with flavor that's both familiar and somehow more intense than anything you'll get from extract alone. I dare you to taste these and not immediately start planning the next occasion to make them.
What makes this version different from every other crème brûlée cheesecake recipe floating around the internet? We're not just dumping vanilla extract into cream cheese and calling it a day. We're using real vanilla beans, creating individual portions that caramelize perfectly, and developing a texture that's lighter than traditional cheesecake but richer than regular crème brûlée. Okay, ready for the game-changer? Let me walk you through every single step—by the end, you'll wonder how you ever made it any other way.
What Makes This Version Stand Out
Vanilla Explosion: Most recipes skimp on vanilla, using a measly teaspoon of extract. We're using an entire vanilla bean, scraped clean, plus a touch of extract to reinforce the flavor. Those tiny black specks aren't just pretty—they're flavor bombs that make the whole dessert taste like vanilla squared.
Individual Perfection: Instead of one large cheesecake that cracks or browns unevenly, these cupcakes ensure every single serving gets the perfect ratio of crunchy brûléed top to creamy cheesecake center. No fighting over the corner piece in this house.
Texture Heaven: The contrast between the shattering sugar glass on top and the velvet-smooth cheesecake underneath creates a textural experience that'll make your taste buds do a happy dance. It's like eating a cloud wrapped in caramelized sunshine.
Foolproof Technique: Most crème brûlée recipes require a water bath and endless patience. These cupcakes use a simple baking method that eliminates the need for culinary acrobatics, making this fancy dessert accessible to even kitchen novices.
Make-Ahead Magic: You can bake these cupcakes up to three days ahead, then caramelize the sugar topping just before serving. Picture yourself pulling these out of the fridge, torching the tops while your guests watch in amazement, then serving dessert that tastes like you spent all day in the kitchen.
Crowd Psychology: There's something about individual desserts that makes people feel special, like you've prepared something just for them. These cupcakes deliver that feeling while being easier to serve than slicing up a whole cheesecake while everyone's watching.
Ingredient Quality: Using real vanilla beans instead of extract elevates this from "nice dessert" to "holy cow, what am I eating?" territory. The difference is so dramatic that once you try it this way, you'll never go back to extract-only versions.
Alright, let's break down exactly what goes into this masterpiece...
Inside the Ingredient List
The Flavor Base
Graham cracker crumbs form the foundation of our cupcake bases, providing that familiar honey-sweet crunch that plays beautifully against the tangy cheesecake. Don't even think about using those pre-crushed crumbs from a can—they taste like cardboard that's been sitting in a warehouse since the Clinton administration. Buy whole graham crackers and crush them yourself in a food processor or by putting them in a zip-top bag and going to town with a rolling pin. The difference in freshness is like comparing a garden tomato to one of those mealy supermarket imposters.
The melted butter acts as the glue that holds our bases together, but it does so much more than that. When it hits the heat of the oven, it mingles with the graham cracker sugars to create a toffee-like flavor that'll have you stealing pieces of the base before you even add the filling. Use real butter, not margarine or those butter substitutes that claim to be "just as good." I once tried to save calories by using a butter substitute, and the result tasted like sadness wrapped in disappointment.
The Texture Crew
Cream cheese is the star here, but not just any cream cheese will do. You want the full-fat brick style, not the whipped stuff in tubs that's been aerated within an inch of its life. Let it come to room temperature before you start mixing—cold cream cheese will give you lumpy cheesecake that looks like it has cottage cheese mixed in. I've made this mistake more times than I care to admit, usually because I got impatient and decided "close enough" was actually close enough. Spoiler alert: it's not.
The eggs provide structure and richness, but they're also the thing that can turn your smooth cheesecake into something resembling scrambled eggs if you add them too quickly. Beat them gently just until the yolks and whites are combined, then add them to your cream cheese mixture slowly, letting each addition incorporate fully before adding more. This isn't the time to show off your kitchen mixer skills by cranking it to high speed.
The Unexpected Star
Here's where most recipes go wrong—they treat vanilla as an afterthought. We're using a whole vanilla bean, split lengthwise and scraped clean, plus those precious seeds get whisked into every bit of our cheesecake batter. Those tiny black flecks are like caviar for dessert lovers, each one bursting with concentrated vanilla flavor that makes extract-only versions taste like vanilla's sad cousin. If you absolutely can't find vanilla beans, use the best vanilla extract you can afford, but know that you're missing out on one of life's great pleasures.
The heavy cream adds luxurious richness without weighing down the cheesecake like sour cream sometimes can. It creates a texture that's lighter than New York-style cheesecake but denser than Japanese cotton cheesecake—perfect for our individual portions. Don't substitute milk or half-and-half here; you need the fat content to create that silky texture that makes people close their eyes when they take a bite.
The Final Flourish
Granulated sugar for the brûlée topping needs to be ultra-fine so it melts evenly and quickly under your kitchen torch. Regular sugar works, but superfine sugar gives you that professional-looking glassy finish that shatters like thin ice when you tap it with your spoon. I've experimented with different sugars—brown sugar burns too quickly, powdered sugar just melts into a sad puddle, and turbinado sugar creates crystals that are too coarse. Stick with regular white sugar and you'll get that perfect caramelized crust every time.
Everything's prepped? Good. Let's get into the real action...
The Method — Step by Step
- Start by preheating your oven to 325°F (160°C). While it's warming up, line a 12-cup muffin tin with paper liners. Trust me on the paper liners—I've tried this with just greasing the tin, and you end up with cheesecake trying to escape like prisoners digging under a wall. The paper gives you clean edges and makes removal a breeze. Pro tip: use decorative liners because these cupcakes deserve to look as good as they taste. The smell of warm vanilla filling your kitchen at this point is just a preview of the magic that's about to happen.
- Mix your graham cracker crumbs with the melted butter until it looks like wet sand at the beach after the tide goes out. You want every crumb coated in butter—that's what creates the toffee flavor and holds everything together. Press about one tablespoon of this mixture into the bottom of each liner, using the back of a spoon or your fingers to pack it down firmly. Don't be shy here; a loose base will crumble when you try to remove the paper later. I learned this the hard way when my first batch looked like they'd been through an earthquake.
- Bake those bases for exactly 5 minutes—no more, no less. This sets them slightly and brings out that wonderful nutty flavor from the butter and graham crackers. Your kitchen will start smelling like you're making the world's best s'mores, which is basically what you're doing minus the chocolate and marshmallow. Let them cool while you make the filling, but don't worry about getting them completely cold. They just need to not be screaming hot when you pour in the cheesecake batter.
- In a large bowl, beat the cream cheese until it's smooth and fluffy, about 2 minutes on medium speed. This is crucial—lumps at this stage will haunt you forever. Scrape down the sides of the bowl at least twice because cream cheese loves to hide in the corners like it's playing hide and seek. Add the sugar gradually, letting it dissolve into the cream cheese before adding more. The mixture should look like thick clouds at this point, pale and tempting enough to eat with a spoon.
- Here's where the vanilla magic happens. Split your vanilla bean lengthwise with a sharp knife, then use the back of the knife to scrape out all those precious seeds. They'll look like tiny black caviar, and they'll smell like heaven opened a bakery. Add these seeds plus the vanilla extract to your cream cheese mixture and beat until fully incorporated. The batter will get slightly thinner and turn a beautiful ivory color with black speckles throughout. If you've never used real vanilla beans before, prepare to have your mind blown by the intensity of flavor.
- Add the eggs one at a time, beating on low speed just until each is incorporated. Overbeating at this stage incorporates too much air, which can cause your cheesecakes to puff up like balloons then collapse into sad little craters. The mixture should be smooth and glossy, like the world's most expensive paint. Stop the mixer and scrape down the bowl one last time to make sure everything is perfectly combined. Your patience here will be rewarded with the creamiest texture imaginable.
- Finally, stir in the heavy cream on low speed until just combined. The batter should be pourable but thick, like a really good smoothie. Give it a taste—yes, it's safe to eat raw eggs when you're the cook and you know where your eggs came from. The flavor should be intensely vanilla with just enough sweetness to make you want more. If it needs more vanilla, add a few drops of extract now because this is your last chance.
- Pour the batter over your cooled graham cracker bases, filling each cup about three-quarters full. You'll have enough for about 10-12 cupcakes, depending on how generous you are with the filling. Tap the pan gently on the counter to release any air bubbles that might be lurking like dessert saboteurs. The batter should settle into a smooth, even layer that looks like liquid silk. At this point, you might be tempted to eat it all with a spoon—resist, because what's coming is even better.
- Bake for 22-25 minutes, until the centers are just set but still slightly jiggly when you gently shake the pan. They'll continue to set as they cool, so don't wait for them to look completely firm. Overbaking is the enemy of creamy cheesecake, turning your elegant dessert into something that tastes like sweet cardboard. The edges should be just pulling away from the liners, and the tops might have the tiniest bit of golden color. Your kitchen will smell like a vanilla bomb exploded in the best possible way.
- Cool completely in the pan, then refrigerate for at least 4 hours or overnight. This is where the magic happens—the flavors meld together, the texture firms up to the perfect consistency, and the vanilla flavor intensifies like it's been studying for a flavor exam. I know waiting is torture, especially when your fridge is calling your name every time you walk past, but good things come to those who wait. Plus, cold cheesecake is infinitely better than warm cheesecake, and that's just science.
That's it—you did it. But hold on, I've got a few more tricks that'll take this to another level...
Insider Tricks for Flawless Results
The Temperature Rule Nobody Follows
Your ingredients should all be at room temperature before you start mixing. I mean everything—the cream cheese, eggs, even the heavy cream if you're really committed to perfection. Cold ingredients don't incorporate smoothly, leaving you with a lumpy batter that looks like it has cottage cheese mixed in. Set everything out on the counter at least an hour before you plan to start baking. Yes, this requires planning ahead, but the silky-smooth results are worth the extra time. I've tried cutting corners here, and the difference is like comparing a luxury car to one of those plastic ride-on toys for toddlers.
Why Your Nose Knows Best
When you're caramelizing the sugar topping, don't just watch it—smell it. The sugar goes through several stages as it melts, and your nose will tell you when it's perfectly caramelized before your eyes can. You want a deep amber color that smells like toasted marshmallows and butterscotch had a baby. If it starts to smell bitter or burnt, you've gone too far and need to start over. This next part is pure magic: the difference between perfectly caramelized sugar and burnt sugar is about fifteen seconds, so stay focused like you're defusing a bomb.
The 5-Minute Rest That Changes Everything
After you caramelize the sugar topping, let the cupcakes sit for exactly five minutes before serving. This does two things: it lets the sugar harden completely so you get that satisfying crack when you tap it with a spoon, and it allows the heat from the torch to dissipate so the cheesecake underneath stays cold and creamy. It's the difference between a good dessert and a great one. A friend tried serving these immediately after torching once, and the sugar was still warm and sticky—more like a sad caramel than the crisp brûlée top we were after. Five minutes feels like an eternity when you're staring at dessert, but your patience will be rewarded.
Creative Twists and Variations
This recipe is a playground. Here are some of my favorite ways to switch things up:
Chocolate Hazelnut Dream
Replace half the graham cracker crumbs with chocolate cookie crumbs and add a tablespoon of Nutella to the cheesecake batter. Top with chopped toasted hazelnuts before adding the sugar for brûlée. The combination of chocolate, hazelnut, and vanilla creates a flavor profile that tastes like the world's most sophisticated candy bar. People will ask if you studied pastry in Paris, and you can just smile mysteriously because the real secret is a jar of supermarket Nutella.
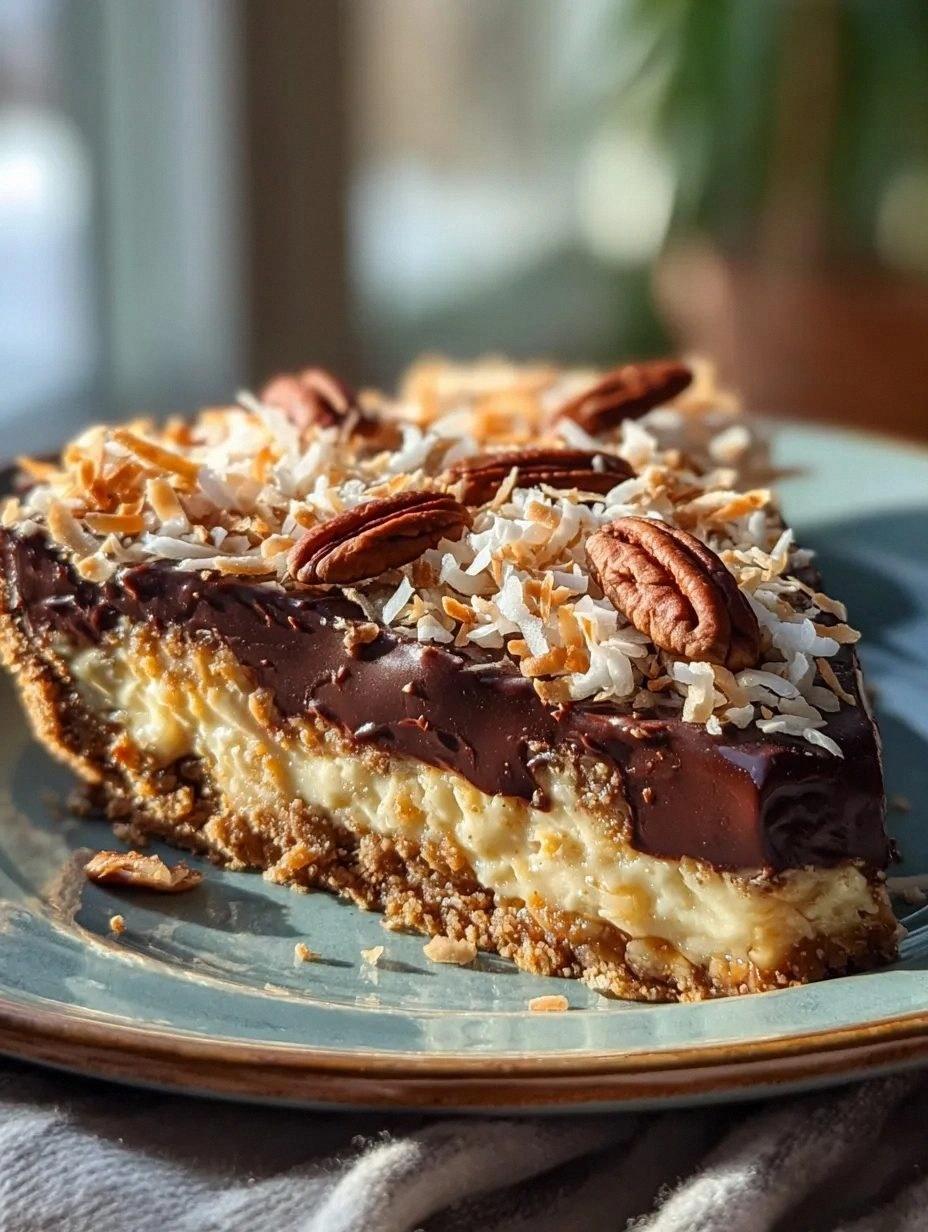
Coconut Paradise
Add 1/4 cup of cream of coconut to the batter and replace half the graham crackers with crushed coconut cookies. Toast some coconut flakes and sprinkle them on top after caramelizing the sugar. The coconut flavor complements the vanilla beautifully, creating a tropical twist that makes you feel like you're on vacation even if you're eating these in your kitchen on a Tuesday night. If you've ever struggled with coconut desserts that taste artificial, this version will restore your faith in what coconut can be.
Espresso Elegance
Dissolve 2 teaspoons of instant espresso powder in the heavy cream before adding it to the batter. The coffee flavor enhances the vanilla rather than competing with it, creating a sophisticated flavor that tastes like the best vanilla latte you've ever had. It's subtle enough that people will know there's something special but can't quite put their finger on what it is. The slight bitterness balances the sweetness perfectly, making these dangerously easy to eat.
Salted Caramel Sensation
Add 1/2 teaspoon of flaky sea salt to the graham cracker base and drizzle each cupcake with a tiny bit of caramel before adding the sugar topping. The salt enhances all the other flavors and creates that addictive sweet-salty combination that makes it impossible to stop at just one. Use good sea salt here—the cheap iodized stuff will make your dessert taste metallic and sad. This is the version that disappears first at every party, usually with people asking for the recipe before they've even finished chewing.
Lemon Lavender Luxury
Add the zest of one lemon and 1/2 teaspoon of culinary lavender to the batter. The bright citrus cuts through the richness of the cheesecake while the lavender adds a floral note that makes these taste like eating in a French garden. Be careful with the lavender—a little goes a long way, and too much will make your dessert taste like soap. This version is perfect for spring brunches or any time you want to feel fancy without actually having to wear real pants.
Pumpkin Spice Paradise
Add 1/4 cup of pumpkin puree and 1 teaspoon of pumpkin pie spice to the batter, reducing the heavy cream slightly to compensate for the extra moisture. These taste like fall in cupcake form, with the warm spices complementing the vanilla in ways that'll make you understand why pumpkin spice became such a phenomenon. The pumpkin adds a subtle earthiness that keeps these from being too sweet, making them perfect for Thanksgiving when you want something impressive but not too heavy after a big meal.
Storing and Bringing It Back to Life
Fridge Storage
Store the cupcakes (before adding the brûlée topping) in an airtight container in the refrigerator for up to 5 days. Place a piece of plastic wrap directly on the surface of each cupcake to prevent them from drying out or absorbing other flavors from your fridge. Nobody wants cheesecake that tastes like last night's garlic chicken. The flavors actually improve after the first day as the vanilla has time to meld with the cream cheese. I've made these on Sunday and served them on Friday, and people still raved about how fresh they tasted.
Freezer Friendly
These cupcakes freeze beautifully for up to 2 months. Wrap each one individually in plastic wrap, then place them in a freezer bag with all the air squeezed out. Thaw overnight in the refrigerator, still wrapped, to prevent condensation from forming on the surface. Don't try to rush the thawing process—microwaving will turn your smooth cheesecake into a rubbery mess that tastes like sadness. Once thawed, they're just as good as fresh, making these perfect for making ahead for special occasions when you don't want to be stressed about dessert.
Best Reheating Method
Here's the thing—you don't actually reheat these. The cheesecake should be served cold, but the brûlée topping should be added just before serving. If you need to refresh them after refrigeration, let them sit at room temperature for 15 minutes to take the chill off slightly. Add the sugar and torch it just before you're ready to serve. If you've already caramelized the sugar and need to store leftovers, the topping will soften in the fridge but still taste delicious. It's not as crisp, but it's better than throwing away perfectly good cheesecake.