Picture this: it’s 2 a.m., the kitchen lights are flickering low, and a sudden, unstoppable craving for chocolate invades every corner of your brain. I was half‑asleep, half‑wired on caffeine, when my roommate dared me to bake something that would make even the most seasoned baker weep with joy. I grabbed the first thing I could find—two massive chocolate biscuits that looked like they were forged in a midnight cocoa factory. The result? A disaster of soggy crumbs that tasted like a chocolate‑scented cardboard box. I was devastated, but also determined. I vowed to crack the code of the perfect double‑chocolate cookie, one that would be both massive enough to satisfy a sweet tooth the size of a small child and dense enough to melt in your mouth like a velvety dream.
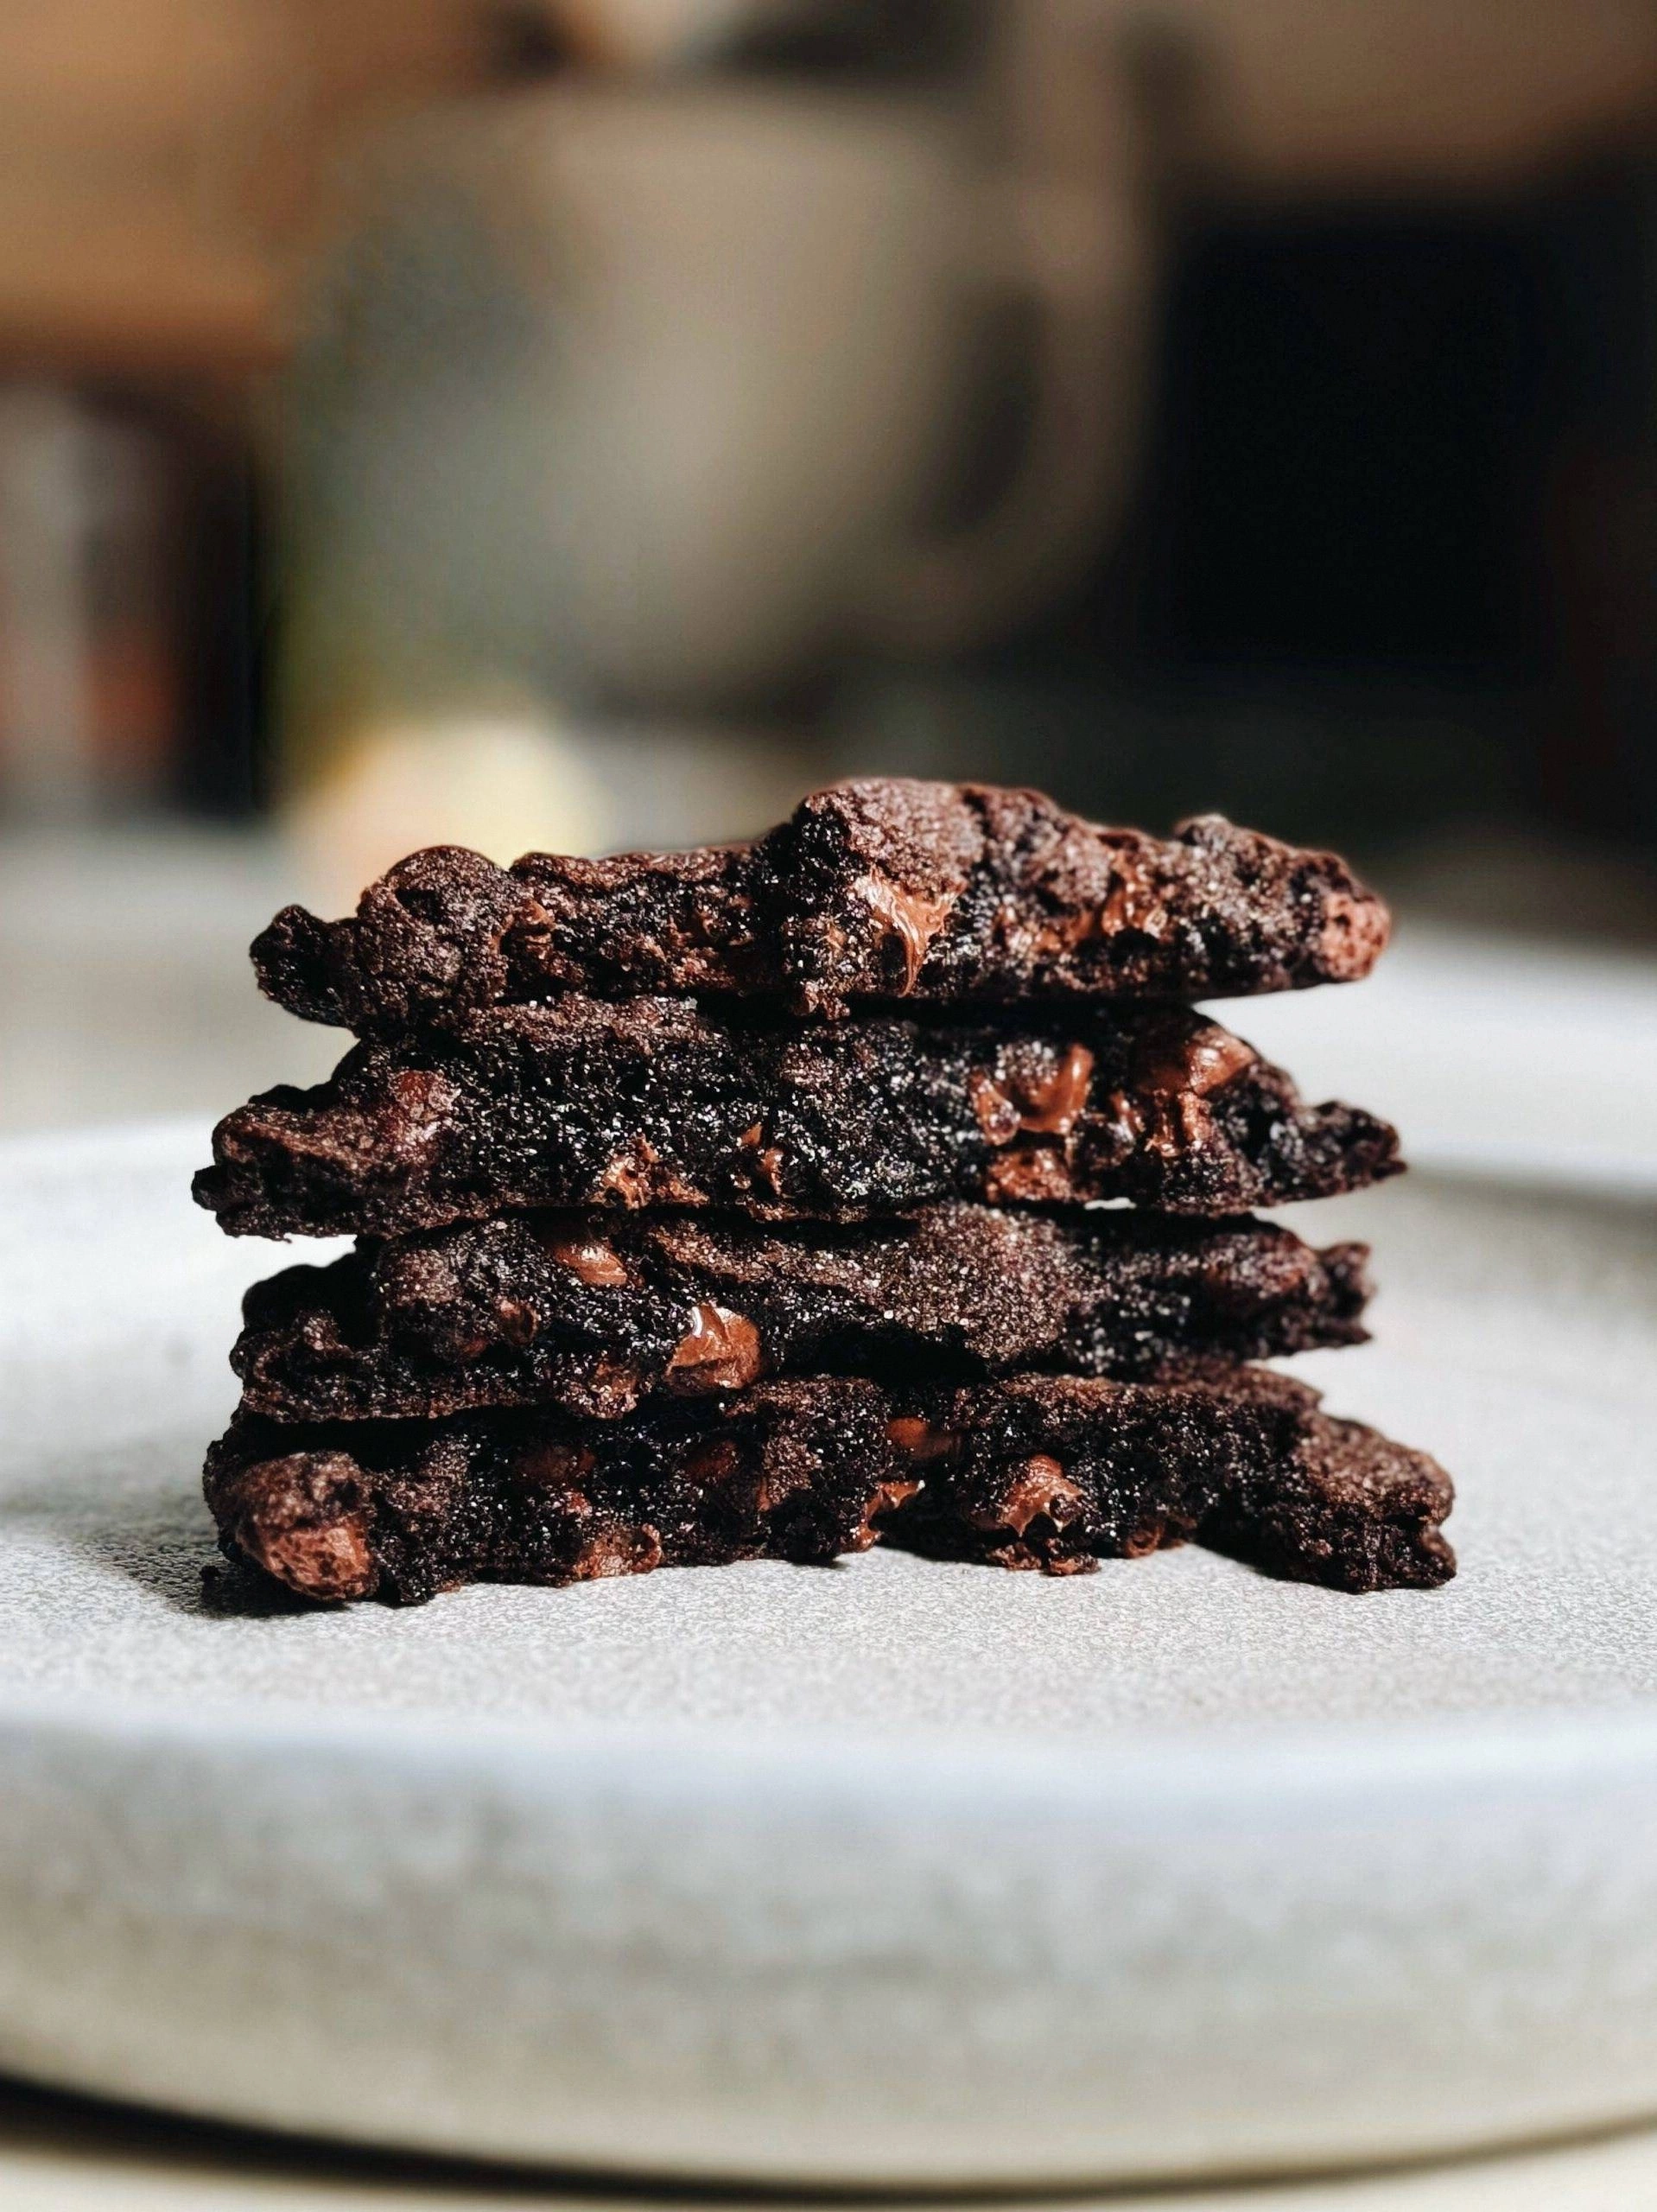
The next weekend I set up a makeshift laboratory in my kitchen, armed with a digital scale, a trusty whisk, and a healthy dose of stubborn optimism. The air filled with the intoxicating aroma of butter melting into sugar, a scent that reminded me of grandma’s kitchen during the holidays. I could hear the faint crackle of the oven preheating, a steady hum that felt like a promise. My hands were slick with melted butter, the dough thick and glossy, and I could feel the anticipation building like static before a thunderstorm. When the timer finally chimed, the cookies emerged—golden edges, a glossy crust, and a center that was still soft enough to give under the slightest press.
What made these behemoth treats different from every other double‑chocolate cookie you’ve ever seen? First, the ratio of cocoa to flour is meticulously balanced to give each bite a deep, almost earthy chocolate flavor without turning the cookie into a dry brick. Second, I introduced a secret ingredient—espresso powder—that amplifies the chocolate notes without adding any coffee flavor, like a hidden amplifier in a rock‑concert. Third, the dough is chilled for an hour before baking, allowing the butter to solidify just enough to create those coveted crispy edges while keeping the center chewy. Most recipes overlook this crucial step, resulting in flat, cookie‑like discs; not this one.
And here’s the kicker: I discovered that using melted butter instead of softened butter creates a glossy, crackly top that shatters like thin ice when you bite into it. This simple swap turned an ordinary cookie into a show‑stopping dessert that looks as impressive as it tastes. I dare you to taste this and not go back for seconds. Let me walk you through every single step — by the end, you’ll wonder how you ever made it any other way.
What Makes This Version Stand Out
- Intense Flavor: The combination of unsweetened cocoa, dark chocolate chunks, and a whisper of espresso powder creates a chocolate depth that’s almost savory, making each bite unforgettable.
- Chewy Core: The chilled dough and melted butter lock in moisture, ensuring the center stays soft and gooey, while the edges become crisp and caramelized.
- Simple Technique: No fancy equipment required—just a bowl, a spatula, and a trusty oven. The method is straightforward enough for beginners yet refined for seasoned bakers.
- Show‑Stopping Size: These aren’t your average cookies; they’re huge, thick, and perfect for sharing—or for stealing the entire batch when nobody’s looking.
- Ingredient Quality: Using high‑quality cocoa powder and real chocolate chunks elevates the taste dramatically, turning a simple treat into a gourmet experience.
- Make‑Ahead Friendly: The dough can be refrigerated for up to 24 hours, and the baked cookies freeze beautifully, so you can have chocolate bliss anytime.
- Universal Appeal: Whether you’re feeding kids, impressing friends, or indulging solo, these cookies win over every palate with their balanced sweetness and rich chocolate punch.
- Time‑Efficient: From prep to plate, you’re looking at under an hour total, making it a perfect weekend project that doesn’t dominate your day.
Inside the Ingredient List
The Flavor Base
All‑purpose flour forms the structural backbone of the cookie, providing the necessary gluten network to hold everything together. I recommend using a finely milled flour for a smoother texture; if you substitute with whole‑wheat, expect a denser crumb and a hint of nuttiness. Skipping the flour isn’t an option—without it, the dough collapses into a gummy mess that won’t hold shape.
Unsweetened cocoa powder is the soul of this recipe. Opt for a Dutch‑process cocoa for a richer, smoother chocolate flavor that’s less acidic. If you only have natural cocoa, you’ll still get great results, but the taste will be slightly brighter. A pinch of espresso powder is the secret weapon that intensifies the chocolate without adding a coffee taste—think of it as a silent partner that makes the chocolate sing.
The Texture Crew
Butter, melted, is the star that creates the glossy, crackly exterior. Using melted butter instead of softened butter changes the cookie’s top layer from flat to a subtle, caramel‑kissed sheen. If you’re allergic or vegan, replace with coconut oil, but expect a faint coconut aroma that will mingle with the chocolate.
Brown sugar and granulated sugar work together to balance moisture and crispness. The molasses in brown sugar contributes to chewiness, while the granulated sugar caramelizes on the edges, giving you those satisfying snap‑crackle moments. Swapping brown sugar for more white sugar will produce a drier, crisper cookie that lacks depth.
The Unexpected Star
Espresso powder, just a half‑teaspoon, acts like a flavor enhancer. It doesn’t make the cookie taste like coffee; instead, it deepens the cocoa’s richness, similar to how a pinch of salt can brighten a dessert. If you don’t have espresso powder, a pinch of instant coffee granules works in a pinch.
Chocolate chips and dark chocolate chunks provide texture contrast. The chips melt into gooey pockets, while the chunks stay semi‑solid, offering that delightful bite‑size crunch. Using low‑quality chips will result in a waxy texture; always aim for at least 60 % cocoa solids for best results.
The Final Flourish
Vanilla extract adds a subtle aromatic note that rounds out the chocolate’s bitterness, creating a harmonious flavor profile. Real vanilla beans can be used for an even richer taste, but a high‑quality extract works just fine. Finally, a pinch of sea salt on top just before baking accentuates the chocolate’s depth, much like a conductor highlighting the violins in an orchestra.
If you’re watching sugar intake, you can reduce the granulated sugar by a quarter; the cookies will still be sweet enough thanks to the brown sugar and chocolate. Remember, each ingredient plays a critical role; altering one without understanding the chemistry can turn your masterpiece into a kitchen nightmare.
Everything's prepped? Good. Let's get into the real action...
The Method — Step by Step
Preheat your oven to 350°F (175°C) and line two large baking sheets with parchment paper. While the oven warms, place a large mixing bowl on the counter and whisk together the flour, cocoa powder, baking soda, and salt. The dry mixture should look like a dark, velvety sand—if you see any lumps, give it a quick sift. This step ensures even distribution of leavening agents, preventing those dreaded “pockets” where the cookie doesn’t rise properly.
In a separate saucepan, melt the butter over low heat until it’s just liquid, then remove from heat and let it cool slightly—about 2‑3 minutes. Add the brown sugar and granulated sugar, stirring until the mixture becomes glossy and smooth. This is where the magic begins; the sugar dissolves just enough to create a slightly caramelized base, which later translates to those crisp edges you love.
Kitchen Hack: Use a silicone spatula to scrape every last bit of butter‑sugar mixture from the pan—those golden flecks are flavor gold.Beat in the eggs one at a time, ensuring each is fully incorporated before adding the next. Then stir in the vanilla extract and espresso powder. You’ll notice the batter thickening slightly; that’s the protein from the eggs binding everything together, creating a sturdy yet tender structure.
Gradually fold the dry ingredients into the wet mixture, using a wooden spoon or a sturdy silicone spatula. Mix until just combined—over‑mixing will develop excess gluten, leading to a tough cookie. The dough should be thick, slightly sticky, and dark as midnight. If it feels too dry, add a splash of milk (about 1‑2 tbsp); if it’s too wet, sprinkle in a little extra flour.
Now comes the chocolate love affair: gently fold in the semi‑sweet chocolate chips and dark chocolate chunks. The dough will become speckled with glossy chocolate pieces, each promising a molten burst when baked. This is the moment where the cookie truly becomes “double chocolate.”
Cover the bowl tightly with plastic wrap and place it in the refrigerator for exactly 60 minutes. This chilling step solidifies the butter, preventing the cookies from spreading too much, and allows the flavors to meld. I dare you to skip this step—your cookies will turn into flat, sad discs rather than towering chocolate cliffs.
Watch Out: Leaving the dough out at room temperature for more than 15 minutes can cause the butter to soften, leading to excessive spreading.After chilling, scoop the dough onto the prepared baking sheets using a large ice‑cream scoop (about ½ cup per cookie). Space them at least 4 inches apart; these are huge cookies, not tiny morsels. Gently flatten each scoop just a touch with the back of a spoon—this helps them bake evenly without losing their impressive height.
Slide the trays into the preheated oven and bake for 12‑14 minutes, or until the edges are set and lightly browned while the centers still look slightly undercooked. The aroma at this stage is intoxicating—a blend of toasted butter, deep cocoa, and faint espresso. The cookies will continue to set as they cool, so resist the urge to over‑bake.
Kitchen Hack: Rotate the baking sheets halfway through baking to ensure even color on both sides.Remove the cookies from the oven and let them rest on the sheets for 5 minutes before transferring to a wire rack. This short cooling period allows the interior to finish setting while the exterior stays crisp. Once on the rack, watch the chocolate gleam as it cools—this visual cue tells you they’re ready. Serve warm for that oozy chocolate center, or let them cool completely for a firmer bite.
That's it — you did it. But hold on, I've got a few more tricks that'll take this to another level...
Insider Tricks for Flawless Results
The Temperature Rule Nobody Follows
The oven temperature is a silent dictator in the cookie world. If your oven runs hot, the edges will burn before the center sets; if it runs cool, the cookies will spread too much. Invest in an inexpensive oven thermometer and aim for exactly 350°F (175°C). This small investment can be the difference between a cookie that snaps like a fresh twig and one that crumbles like dust.
Why Your Nose Knows Best
Never rely solely on a timer; trust the scent. When the butter‑sugar mixture starts to caramelize, you’ll detect a nutty, toasty aroma that signals the perfect moment to add the chocolate chips. Similarly, once the cookies are in the oven, the moment the kitchen fills with a deep chocolate perfume, you know they’re nearing perfection. Your nose is a built‑in sensor that can save you from under‑ or over‑baking.
The 5‑Minute Rest That Changes Everything
Allowing the baked cookies to rest on the sheet for five minutes before moving them is not just a habit—it’s a science. The residual heat continues to cook the interior, completing the set without drying out the edges. Skipping this step yields a cookie that looks perfect but falls apart when you try to lift it.
Chocolate Chunk Placement Strategy
When folding in the chocolate chunks, try to keep them in slightly larger pieces rather than fully mini‑chipping them. Larger chunks stay semi‑solid during baking, offering a satisfying bite contrast. If you prefer a fully melty interior, increase the proportion of chips and reduce chunks.
Freezer‑Friendly Dough Hack
After chilling, you can portion the dough into individual balls and freeze them on a parchment sheet. Once frozen, transfer to a zip‑top bag. When you’re ready to bake, pop a couple straight into the oven—no thawing needed. This trick turns your kitchen into a cookie factory, perfect for last‑minute cravings.
Creative Twists and Variations
This recipe is a playground. Here are some of my favorite ways to switch things up:
Nutty Crunch
Swap half of the chocolate chips for toasted hazelnuts or pecans. The nuts add a buttery crunch that contrasts beautifully with the soft chocolate interior. Ideal for those who love a bit of texture beyond just melt‑in‑your‑mouth chocolate.
White Chocolate Dream
Replace the dark chocolate chunks with white chocolate chunks and keep the cocoa base. The result is a marbled cookie where the dark cocoa and sweet ivory swirl together, offering a sophisticated flavor pairing reminiscent of a coffee shop’s specialty pastry.
Spicy Mocha
Introduce a pinch of cayenne pepper and a dash of cinnamon alongside the espresso powder. The subtle heat awakens the chocolate, creating a “spicy mocha” experience that’s perfect for chilly evenings.
Minty Fresh
Fold in a tablespoon of crushed peppermint candies or a few drops of peppermint extract. The mint cuts through the richness, delivering a refreshing twist that’s especially popular around the holidays.
Fruit‑Infused
Stir in dried cherries or cranberries for a sweet‑tart contrast. The dried fruit adds chewiness and a burst of acidity that balances the deep chocolate flavor, making each bite a complex adventure.
Gluten‑Free Version
Swap the all‑purpose flour for a 1:1 gluten‑free flour blend. Add a teaspoon of xanthan gum to mimic gluten’s binding power. The texture will be slightly more crumbly but still satisfyingly chewy.
Storing and Bringing It Back to Life
Fridge Storage
Place the cooled cookies in an airtight container lined with parchment paper. They’ll stay fresh for up to five days. If you’re stacking them, insert a sheet of wax paper between layers to prevent sticking.
Freezer Friendly
Wrap each cookie individually in plastic wrap, then seal them in a zip‑top freezer bag. They’ll keep for up to three months. When you’re ready to indulge, let them thaw at room temperature for 15 minutes, then give them a quick 10‑second blast in a 300°F oven to revive that fresh‑out‑of‑the‑oven crisp.
Best Reheating Method
For a quick revival, place a cookie on a microwave‑safe plate, sprinkle a tiny splash (about 1 tsp) of water on the side, and microwave for 8‑10 seconds. The steam generated brings back that soft, gooey center while the outer crust regains its slight snap.