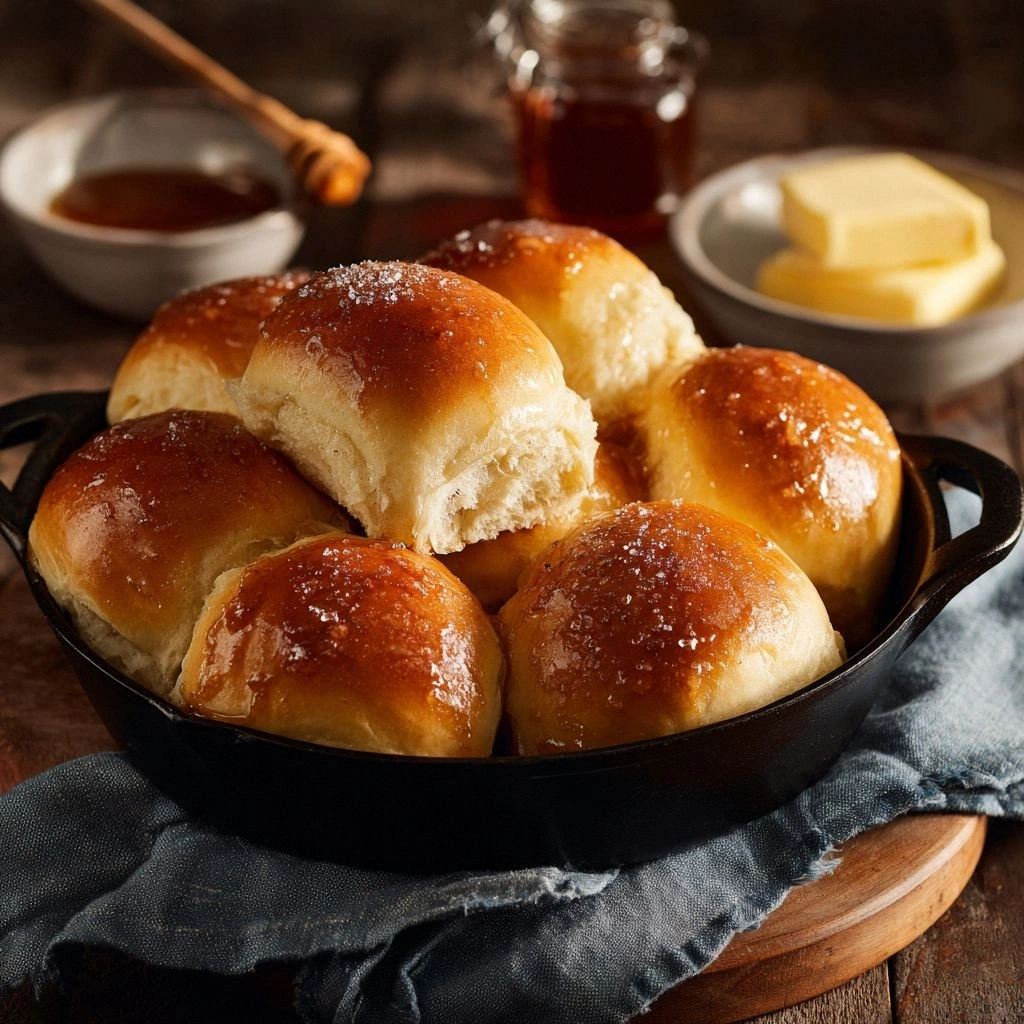
Picture this: you’re in the middle of a weekend cook‑out, the grill’s sizzling, the crowd’s humming, and suddenly the craving for something warm, fluffy, and utterly comforting hits you like a sudden gust of wind. That moment, that craving, was the spark that led me to hunt down the original Texas Roadhouse rolls recipe, and let me tell you, the result is a game‑changer. The aroma of freshly baked dough fills the kitchen, the sound of butter sizzling as it glides over the rolls, the sight of golden tops that crackle when you bite—each of these senses collides into a single, unforgettable experience. If you’re like me and you’ve ever settled for store‑bought rolls that taste like cardboard, this is your escape.
I’m not just talking about the taste; this version is a symphony of texture—soft, airy interior, a buttery crust that’s crisp yet tender, and a subtle sweetness that lingers. The secret? A blend of high‑quality flour, a touch of sugar, and the right amount of yeast that creates that unmistakable “roadhouse” rise. And here’s a tease: the final brushing of melted butter isn’t just for flavor—it’s the golden ticket that turns ordinary into extraordinary.
If you’ve ever tried to recreate these rolls and felt the dough stuck to the counter, or the rolls didn’t rise, you’re not alone. The trick is in the balance of wet and dry, the temperature of the milk, and a little patience during the rise. I’ll walk you through every single step, from the first whisk to the final butter glaze, so that by the end you’ll wonder how you ever made them any other way. Trust me, this is hands down the best version you’ll ever make at home.
And because I love a good challenge, I dare you to taste these and not go back for seconds. That sizzle when the dough hits the pan? Absolute perfection. I’ll keep it real—this recipe is a playground for your kitchen, and I’m here to show you how to master it.
What Makes This Version Stand Out
Flavor: The subtle sweetness from sugar balances the savory yeast, creating a flavor profile that’s both comforting and slightly indulgent. This is the difference between a plain roll and a roll that feels like a hug.
Texture: The dough is kneaded just enough to develop gluten without becoming tough, giving you a soft, pillowy center that contrasts with a buttery, slightly crisp crust. The result is a roll that practically melts in your mouth.
Ease: No complicated techniques—just a few simple steps and a reliable rise. The process is straightforward enough for a novice, yet still delivers restaurant‑quality results.
Speed: From start to finish, you’re looking at under an hour. That’s fast enough to fit into a busy schedule while still delivering a fresh, warm product.
Versatility: These rolls can be served as a side to any meal, stuffed, or even turned into mini sliders for a party. The basic recipe is a blank canvas.
Quality: Using high‑grade butter and fresh yeast ensures that every bite is rich and flavorful. The butter glaze adds a glossy finish that’s both inviting and delicious.
Make‑ahead Potential: You can prepare the dough ahead of time, refrigerate, or freeze it, making it ideal for busy families or large gatherings.
Alright, let’s break down exactly what goes into this masterpiece…
Inside the Ingredient List
The Flavor Base
The foundation of any great roll is the flour. I use all‑purpose flour because it offers the right balance of protein for gluten development without being too heavy. The sugar, though only a quarter cup, activates the yeast and adds a subtle sweetness that enhances the bread’s flavor profile. Salt is essential; it not only seasons the dough but also controls yeast activity, ensuring a steady rise. If you’re aiming for a slightly sweeter roll, you can double the sugar, but be careful—too much can inhibit yeast.
The Texture Crew
Warm milk is the secret to that airy interior. The temperature should be around 110°F; if it’s too hot, the yeast will die, and if it’s too cool, the yeast won’t activate. Water is added to keep the dough moist and to help dissolve the yeast. A tablespoon of active dry yeast is enough to give the dough lift, but if you’re using instant yeast, reduce the amount by half. The melted butter adds richness, coats the dough, and contributes to that golden crust. The egg acts as a binder and gives the rolls a tender crumb.
The Unexpected Star
Brushing the rolls with melted butter before baking is more than just a finishing touch. It creates a glossy, slightly caramelized surface that’s visually appealing and adds a buttery flavor that’s hard to resist. Some people like to add a pinch of cinnamon or nutmeg for a warm twist, but the classic recipe stays simple. If you’re vegan, you can replace butter with a neutral oil and use a plant‑based egg substitute.
The Final Flourish
After baking, a light dusting of powdered sugar or a drizzle of honey can elevate the rolls to dessert status. For savory meals, a sprinkle of coarse sea salt or a dash of garlic powder on top can add an extra layer of flavor. Remember that the key is balance—too much seasoning can overwhelm the delicate dough.
Everything's prepped? Good. Let's get into the real action…
The Method — Step by Step
- In a small bowl, combine the warm milk, sugar, and yeast. Stir until the yeast dissolves and let sit for 5–7 minutes. You’ll see a frothy layer form on top—this means the yeast is alive and ready to work. This step is critical; skip it and you’ll end up with flat rolls.
- In a large mixing bowl, whisk together the flour and salt until evenly distributed. The salt should be evenly dispersed to avoid pockets of intense flavor that can overpower the dough. This is the dry foundation that will hold everything together.
- Create a well in the center of the dry mixture and pour in the yeast mixture, water, melted butter, and egg. Mix with a wooden spoon until a shaggy dough forms. Then, transfer the dough onto a lightly floured surface and knead for 8–10 minutes until it’s smooth and elastic. This kneading process develops gluten strands that give the rolls their structure. Tip: If the dough feels too sticky, sprinkle a little more flour, but don’t overdo it or the rolls will be dense.
- Place the dough in a greased bowl, cover with a damp towel or plastic wrap, and let it rise in a warm spot for about 1 hour or until doubled in size. The rise is where the magic happens; the dough expands, creating pockets of air that give the rolls their fluffiness. If your kitchen is drafty, move the bowl to a warmer area or use the oven turned off with the light on.
- Once the dough has doubled, gently punch it down to release the air. Divide it into 12 equal portions, shape each into a round roll, and place them on a parchment‑lined baking sheet, spaced about 2 inches apart. This spacing allows the rolls to expand without sticking together. Watch Out: If you’re shaping the rolls too tightly, they’ll flatten during the second rise.
- Cover the shaped rolls with a clean kitchen towel and let them rise for another 30–45 minutes. You’ll notice the rolls puff up again, a sign that they’re ready for the oven. This second rise is essential for achieving that perfect rise and airy crumb.
- Preheat your oven to 375°F (190°C). Brush each roll with melted butter, which will give them a shiny, golden crust. Place the baking sheet in the oven and bake for 18–22 minutes, or until the tops are a deep golden brown and the rolls sound hollow when tapped. The butter brush also adds a subtle buttery flavor that enhances the overall taste.
- Remove the rolls from the oven and let them cool on a wire rack for at least 10 minutes before serving. This resting period allows the interior to set and the flavors to meld. If you’re serving them warm, you can keep them in a covered container to retain moisture. And that’s it— you did it! But hold on, I've got a few more tricks that'll take this to another level…
Insider Tricks for Flawless Results
The Temperature Rule Nobody Follows
Many home bakers overlook the importance of milk temperature. If the milk is too hot, the yeast dies; too cool, it won’t activate. The ideal range is 105–110°F. Use a kitchen thermometer to check, or test with your finger—warm, not hot. This small step guarantees a robust rise every time.
Why Your Nose Knows Best
During the first rise, pay attention to the aroma. A pleasant, yeasty scent indicates the dough is developing correctly. If you smell nothing, the yeast might be dead, or the dough didn’t have enough time. Trust your nose; it’s a reliable indicator of success.
The 5-Minute Rest That Changes Everything
After shaping, let the rolls rest for 5 minutes before covering them for the second rise. This brief pause allows the dough to relax, making it easier to shape and preventing it from shrinking back during the second rise.
Brushing Is More Than Cosmetic
Using melted butter for brushing adds flavor and creates a glossy, golden crust. Some bakers add a touch of honey or maple syrup for a subtle sweetness. If you prefer a crunchy crust, sprinkle a few grains of coarse sea salt on top before baking.
Cooling on a Wire Rack Is Key
Cooling the rolls on a wire rack prevents steam from condensing on the bottom, which would make the crust soggy. If you’re serving them immediately, you can keep them warm in a low oven (200°F) covered with foil, but avoid overcooking.
Creative Twists and Variations
This recipe is a playground. Here are some of my favorite ways to switch things up:
Cheddar Crunch Roll
Add 1/2 cup shredded sharp cheddar to the dough before kneading. The cheese melts into the roll, creating pockets of gooey goodness that pair perfectly with a hearty stew.
Herb Infused Roll
Stir 2 teaspoons of dried rosemary and 1 teaspoon of dried thyme into the dry ingredients. The aromatic herbs give the rolls a savory kick, ideal for a Mediterranean feast.
Sweet Cinnamon Swirl
Mix 2 tablespoons of brown sugar and 1 teaspoon of ground cinnamon into the dough. Roll the dough into a log, slice, and bake. The result is a sweet, cinnamon‑infused roll that feels like a dessert.
Garlic Butter Roll
Blend 2 cloves of minced garlic into the melted butter before brushing. This gives the rolls a savory, garlicky flavor that pairs wonderfully with roasted meats.
Gluten‑Free Version
Replace all‑purpose flour with a 1:1 gluten‑free blend. Use a pinch of xanthan gum to help structure the dough. The texture may differ slightly, but the flavor remains delicious.
Mini Slider Roll
Cut each roll in half horizontally, fill with your favorite slider ingredients (e.g., pulled pork, coleslaw, BBQ sauce), and bake again for 5 minutes. These mini sliders are perfect for a party or a casual dinner.
Storing and Bringing It Back to Life
Fridge Storage
Store leftover rolls in an airtight container at room temperature for up to 3 days. If you notice they’re drying out, place a damp paper towel in the container to maintain moisture.
Freezer Friendly
Wrap each roll individually in plastic wrap and place them in a freezer bag. They’ll keep for up to 3 months. When you’re ready to eat, thaw overnight in the refrigerator, then toast or warm in the oven.
Best Reheating Method
To revive frozen rolls, preheat the oven to 350°F (175°C). Place the rolls on a baking sheet and bake for 10–12 minutes, or until warm and crisp. Add a splash of water to the pan to create steam, which will keep the crust from drying out.