I still remember the night I burned a pot of soy sauce on a Sunday evening, the kitchen filled with a smoky haze that made me question every cooking decision I’d ever made. That disaster was the spark that lit my obsession with flavor, a burning curiosity that turned into a relentless quest for the perfect seasoning. After countless experiments, I finally discovered the secret that turns ordinary chicken into a mouth‑watering masterpiece: homemade salt and pepper, not the bland, pre‑made mix we all settle for. It’s a simple, audacious tweak that packs a punch, and I’m here to walk you through every single step so that by the end, you’ll wonder how you ever made it any other way.
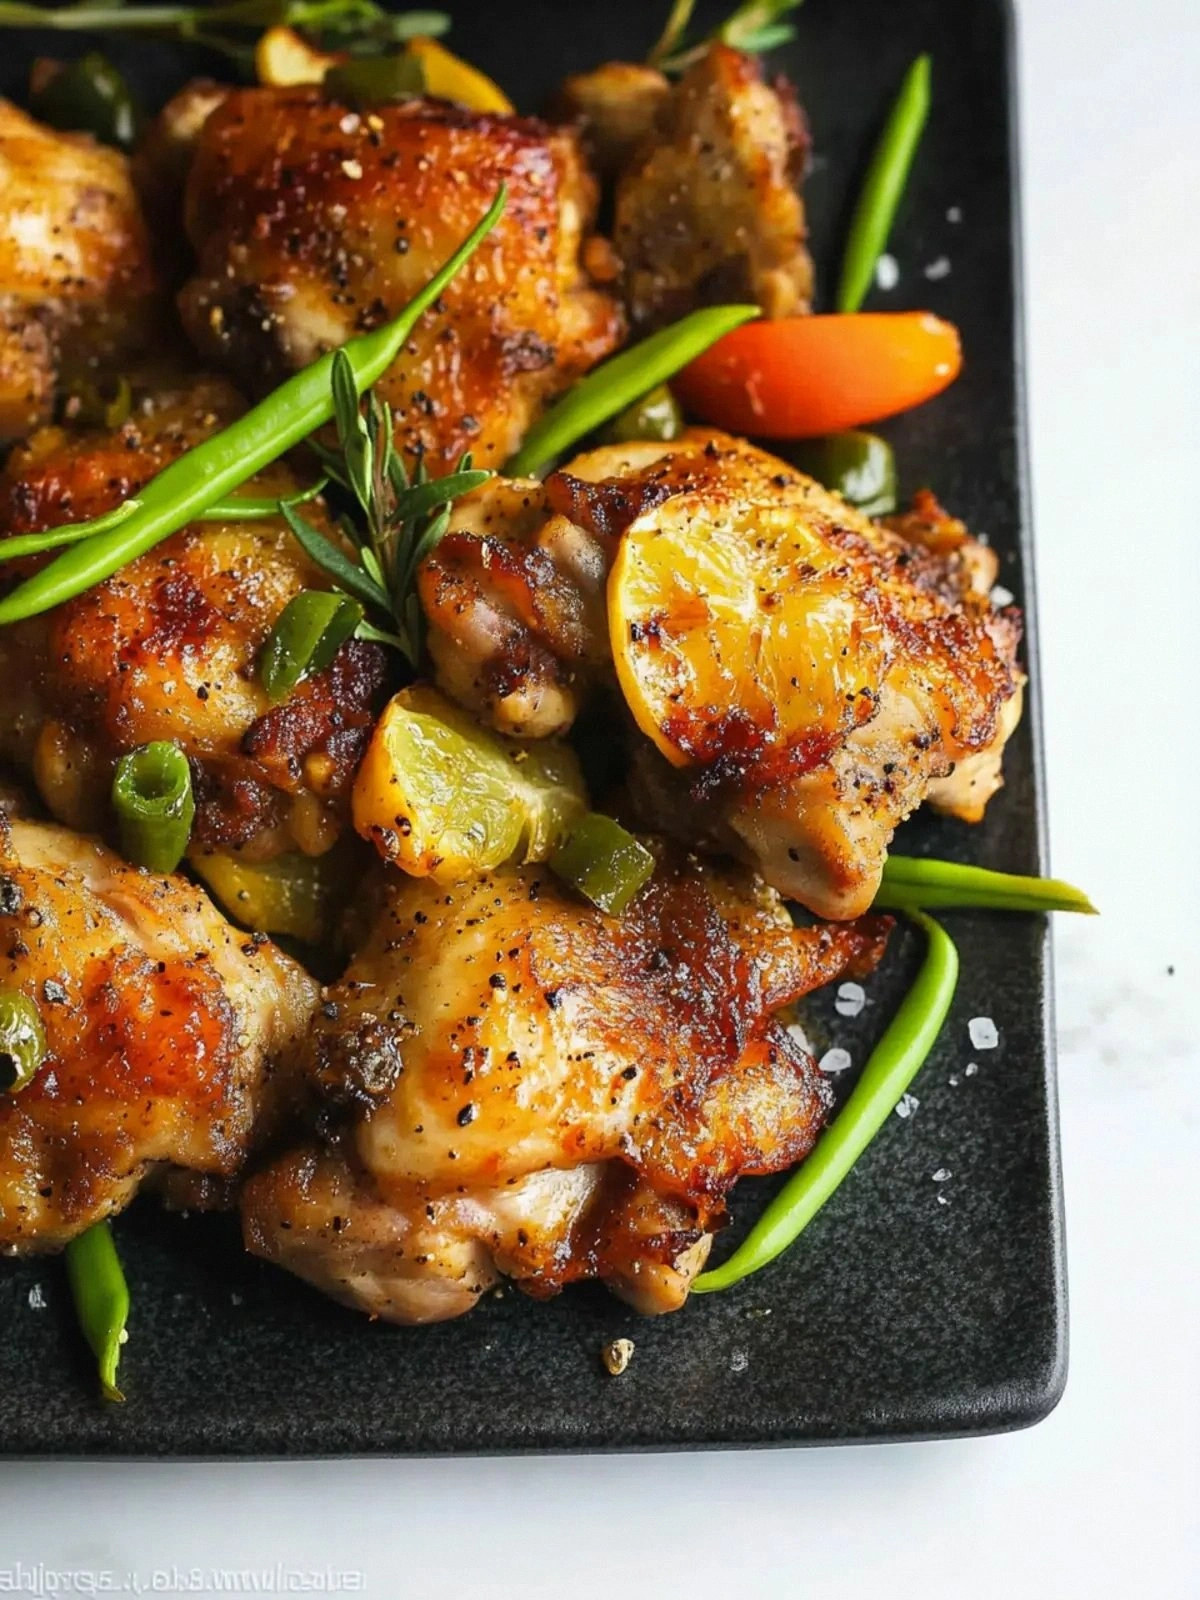
Picture this: you’re slicing a fresh batch of boneless, skinless chicken thighs, the aroma of crisped onions already teasing your senses. The sizzling oil sings a bright, golden rhythm as the chicken hits the pan, the sound of a crackle that signals the start of something delicious. The first bite delivers a crisp, caramelized crust that shatters like thin ice, followed by a juicy, tender interior that practically melts in your mouth. The homemade salt and pepper coating adds a nuanced depth—each pinch of black pepper and a whisper of Chinese five‑spice dancing on your palate. And the best part? It’s all done in under an hour, no fancy gadgets, just a few pantry staples and a dash of confidence.
Most recipes for chicken with salt and pepper rely on pre‑made blends that taste flat and uninspired. They miss the subtle warmth that only fresh, ground spices can bring. This version is hands down the best you’ll ever make at home because it balances the savory, the spicy, and the aromatic with surgical precision. The secret is a homemade seasoning mix that’s light, bright, and layered, plus a technique that locks in moisture while giving you a crust that’s as beautiful as it is tasty. I dare you to taste this and not go back for seconds—once you’ve had a bite, you’ll never settle for store‑bought again.
If you’ve ever struggled to get the right balance of flavor and texture, you’re not alone. The trick is simple: use fresh, high‑quality ingredients, and let the seasoning do the heavy lifting. I’ll be honest—I ate half the batch before anyone else got to try it. But that’s exactly why I’m sharing this recipe: so you can avoid that kitchen failure and instead create a dish that impresses guests, satisfies cravings, and feels like a triumph. Stay with me here—this is worth it.
What Makes This Version Stand Out
- Flavor: The homemade blend of salt, black pepper, and Chinese five‑spice creates a depth that pre‑made mixes can’t match, delivering a nuanced, aromatic experience that lingers on the tongue.
- Texture: A light coating of cornflour ensures a crisp, golden crust that snaps with every bite, while the oil infusion keeps the meat moist and succulent.
- Simplicity: The recipe uses only twelve ingredients, most of which you already have on hand, making it an accessible yet impressive dish.
- Uniqueness: The addition of fresh onions, green and red peppers, and spring onions elevates the dish, turning it from a simple chicken dinner into a vibrant, colorful plate.
- Crowd‑Pleaser: The bold yet balanced flavor profile is guaranteed to wow family and friends, making it a go‑to for casual gatherings or dinner parties.
- Ingredient Quality: Using high‑grade vegetable oil and fresh, unprocessed spices maximizes flavor and ensures consistent results every time.
- Cooking Method: The two‑stage searing technique locks in juices, while the finishing step with aromatics brings a fragrant finish.
- Make‑Ahead Potential: The dish can be prepared ahead of time and reheated without losing its crispness or flavor, ideal for busy schedules.
Alright, let’s break down exactly what goes into this masterpiece…
Inside the Ingredient List
The Flavor Base
The cornerstone of this dish is the homemade seasoning blend. By combining 8 grams of salt, 7 grams of ground black pepper, and 7 grams of Chinese five‑spice, you create a balanced flavor profile that’s bright yet robust. Each component plays a distinct role: salt elevates the natural umami of the chicken, black pepper adds a subtle heat, and Chinese five‑spice brings a warm, floral undertone that lingers. If you skip the five‑spice, the dish loses its aromatic depth, becoming a flat, one‑dimensional flavor.
The Texture Crew
Cornflour is the secret to that coveted crunch. Coating the chicken thighs in 100 grams of cornflour before searing creates a light, airy crust that crisps beautifully. If you use flour instead, the result will be heavier and less crisp. For an extra touch of crunch, you can add a pinch of sesame seeds to the coating; they add a nutty flavor that pairs wonderfully with the peppery seasoning.
The Unexpected Star
Fresh vegetables aren’t just garnish—they’re flavor boosters. The 1 large onion, 2 green peppers, 2 red chillies, and 4 spring onions add sweetness, heat, and a pop of color that make the dish visually stunning. Each vegetable releases its own unique aroma during cooking: onions give a mellow sweetness, green peppers add a mild crunch, red chillies inject a bright heat, and spring onions finish with a fresh, sharp note. If you’re not a fan of chillies, replace them with a milder pepper or omit them entirely; the dish will still shine.
The Final Flourish
A splash of 5 milliliters of salt and pepper seasoning at the end of cooking ties everything together, giving the dish a final burst of savory depth. This small addition is often overlooked but can make the difference between a good dish and an unforgettable one. The 15 milliliters of vegetable oil used in the finishing step help to meld all flavors and create a silky coating that coats the chicken like velvet. Skipping this step will leave the dish feeling a little dry and less cohesive.
Everything's prepped? Good. Let's get into the real action…
The Method — Step by Step
- First, combine the salt, black pepper, and Chinese five‑spice in a small bowl. Toss the 450‑gram boneless skinless chicken thighs in the seasoning until every surface is evenly coated. This step is crucial because the seasoning has to cling to the chicken; if it doesn’t, you’ll end up with bland bites. Let the chicken sit for 10 minutes to absorb the flavors, or refrigerate for up to an hour if you’re planning ahead.
- Meanwhile, heat 250 milliliters of vegetable oil in a large skillet over medium‑high heat. The oil should shimmer but not smoke; if it starts to bubble, lower the heat slightly. This high‑heat searing is what gives the chicken its signature crisp crust. When the oil is ready, add the seasoned chicken thighs, skin side down, and let them cook undisturbed for 4–5 minutes until the skin turns golden and releases easily from the pan.
- Flip the chicken and sear the other side for another 3–4 minutes. The internal temperature should reach 165°F (74°C) for safe consumption. While the chicken cooks, dice the onion, slice the green and red peppers into thin strips, and chop the spring onions into 1‑inch pieces. These vegetables will add brightness and texture to the final dish.
- Once the chicken is nearly cooked through, lower the heat to medium and add 15 milliliters of vegetable oil to the pan. This second oil splash helps to deglaze the pan, lifting the caramelized bits that are full of flavor. Add the onion, green pepper, and red chilli to the skillet, sautéing for 2–3 minutes until the vegetables soften but still retain a slight bite.
- Now it’s time for the final flourish: sprinkle the 5 milliliters of salt and pepper seasoning over the mixture. Stir everything together, ensuring the seasoning is evenly distributed. The aroma should become richer, with the peppery notes rising to the top like a fragrant cloud. Let the mixture simmer for an additional 2 minutes, allowing the flavors to meld.
- Remove the pan from heat and sprinkle the chopped spring onions over the top. The fresh onions add a crisp, green contrast that balances the richness of the chicken. Gently toss the entire dish to coat the chicken and vegetables with the seasoned sauce.
- Serve immediately, plating the chicken on a warm dish and spooning the aromatic sauce over it. The result is a dish that looks as good as it tastes, with a glossy coating that glistens under the kitchen light.
- If you’re prepping ahead, let the dish cool to room temperature before refrigerating in an airtight container. When ready to serve, reheat in a skillet over medium heat for 5 minutes, adding a splash of water if the sauce has thickened.
That’s it — you did it. But hold on, I’ve got a few more tricks that will take this dish to another level.
Insider Tricks for Flawless Results
The Temperature Rule Nobody Follows
Many cooks underestimate the importance of oil temperature. The oil should be hot enough that a small drop of water sizzles instantly but not so hot that it burns. A quick test: flick a tiny bit of the seasoning into the oil; if it sizzles immediately, you’re good. This ensures the chicken gets a crisp crust without absorbing excess oil.
Why Your Nose Knows Best
Before you add the final seasoning splash, pause and sniff the pan. A fragrant, nutty aroma indicates that the caramelized bits are ready. If the scent feels flat, let the pan cook a minute longer. Your nose is the best indicator of readiness.
The 5‑Minute Rest That Changes Everything
After cooking, let the chicken rest for five minutes before slicing. This allows the juices to redistribute, keeping the meat moist and preventing the sauce from running off the surface. It also gives the seasoning time to settle into the meat.
Use a Splatter Guard for Clean Cooking
Oil splatters can be a major nuisance and a safety hazard. A splatter guard not only keeps your stovetop clean but also prevents burns and keeps the oil from splattering onto your kitchen walls. It’s a small addition that pays off big time.
Serve with a Fresh Herb Sprinkle
A light dusting of chopped cilantro or parsley right before serving adds a bright, herbal contrast that lifts the dish. It also provides a pop of color that makes the plate Instagram‑ready.
Creative Twists and Variations
This recipe is a playground. Here are some of my favorite ways to switch things up:
Spicy Sriracha Glaze
Swap the 5 milliliters of salt and pepper seasoning for a tablespoon of Sriracha mixed with a teaspoon of honey. The result is a sweet‑heat glaze that pairs beautifully with the peppery crust.
Herb‑Infused Chicken
Add a handful of fresh thyme or rosemary to the seasoning mix. The herbs bring an earthy depth that complements the Chinese five‑spice and brightens the overall flavor profile.
Gluten‑Free Variation
Replace cornflour with a gluten‑free blend such as rice flour or a commercial gluten‑free all‑purpose mix. The texture remains crisp, and the dish stays fully compliant with gluten‑free diets.
Vegetarian Version
Use firm tofu or tempeh in place of chicken thighs. The tofu will absorb the seasoning and develop a crispy exterior when seared, delivering a plant‑based twist that still delivers the same flavor punch.
Asian Fusion Twist
Add a splash of soy sauce and a dash of sesame oil in the final step. The umami and nutty flavors will transport the dish into an Asian‑inspired realm, perfect for a themed dinner.
Low‑Carb Alternative
Omit the cornflour entirely and instead coat the chicken in a mixture of almond flour and crushed pork rinds. This gives a crunchy texture while keeping the carb count low.
Storing and Bringing It Back to Life
Fridge Storage
Store the cooked dish in an airtight container in the refrigerator for up to 3 days. Ensure the container is sealed tightly to prevent the sauce from drying out. When ready to eat, reheat on the stovetop over medium heat, stirring occasionally until warmed through.
Freezer Friendly
For longer storage, divide the dish into portion‑sized containers and freeze for up to 2 months. Thaw overnight in the refrigerator before reheating. The texture remains crisp if you add a splash of water before reheating to create steam.
Best Reheating Method
The secret to reheating without losing crispness is to use a skillet with a lid. Heat the skillet over medium, add the dish, cover, and let it steam for 5 minutes. The lid traps steam, keeping the chicken moist while the lid allows the crust to stay crunchy.