I’ll be honest — I ate half the batch before anyone else got to try it, and that’s because the first time I tried to make red velvet pancakes, they turned out as flat as a sad weekday morning. I was standing over a skillet, the batter looking more like a sad pink puddle, when a friend dared me to “taste this and not go back for seconds.” I accepted the challenge, and the result was a stack that sang with a buttery, velvety chorus and a whisper of cocoa that lingered like a secret. That moment sparked a culinary obsession, and after a few frantic experiments, I finally nailed the version that makes every other pancake recipe look like a bland afterthought.
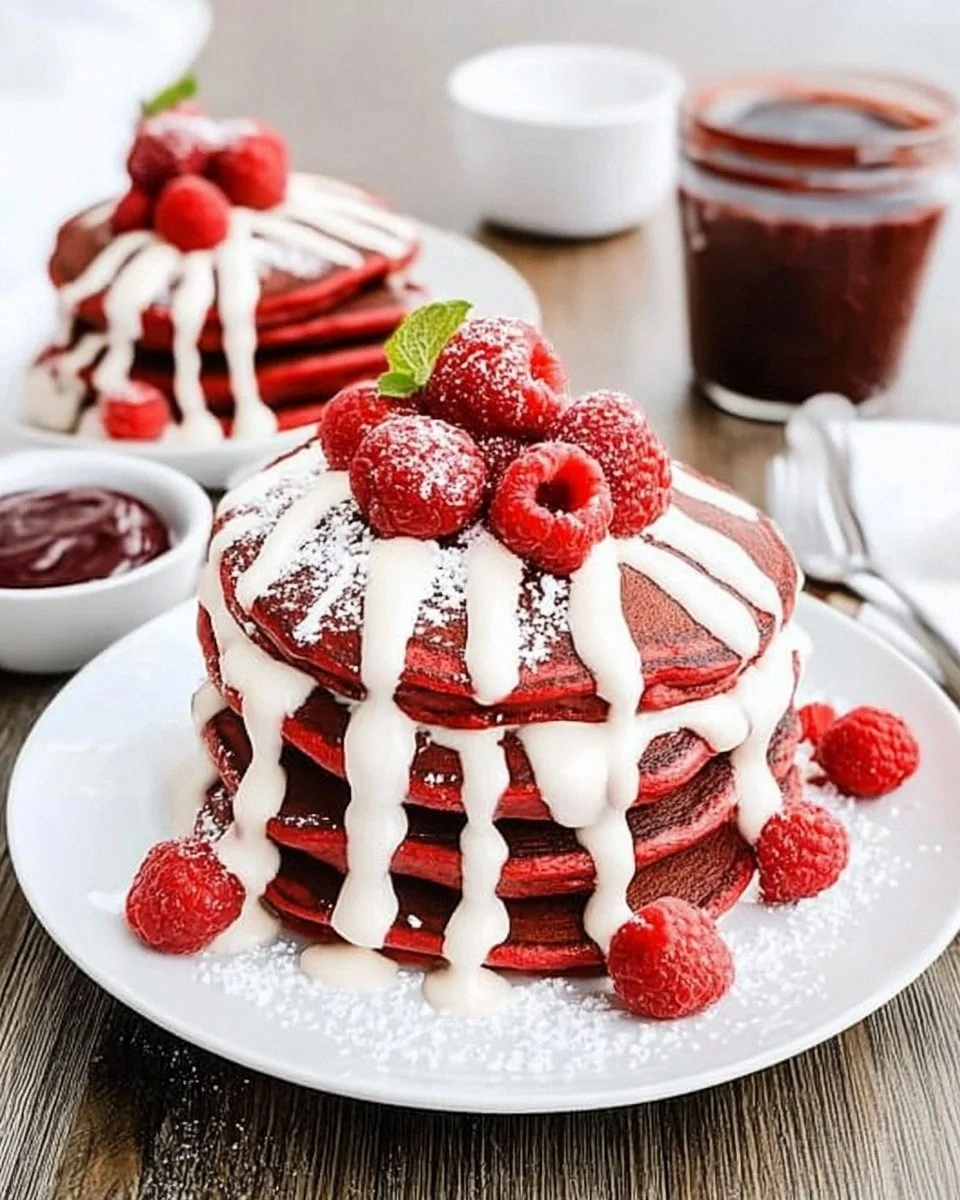
Picture yourself pulling this out of the pan, the whole kitchen smelling incredible, a faint perfume of cocoa and vanilla swirling with the sweet scent of caramelizing sugar. The pancakes are a deep, luxurious crimson that catches the light, and when you cut into them, the interior is a soft, airy cloud that practically melts on your tongue. The edges are crisp enough to give you that satisfying snap, while the middle stays as tender as a cloud‑kissed pillow. The cream cheese frosting drapes over the top like a silky veil, sweet but never cloying, and the whole thing is crowned with a dusting of powdered sugar that glitters like fresh snowfall.
Most recipes get this completely wrong. They either over‑sweeten, use too much cocoa, or forget the secret weapon that makes the texture perfect: a tiny splash of buttermilk that reacts with the baking powder to create those fluffy, airy pockets. I’ve also discovered that the right amount of red food coloring isn’t just about color; it subtly enhances the flavor, giving a faint earthy note that pairs beautifully with the cocoa. And let’s not forget the frosting – a classic cream cheese glaze that adds a tangy contrast, turning a simple breakfast into a celebration.
I dare you to taste this and not go back for seconds. This is hands down the best version you’ll ever make at home, and I’m about to walk you through every single step — by the end, you’ll wonder how you ever made it any other way.
What Makes This Version Stand Out
- Taste: The subtle cocoa undertone balances the sweet vanilla and tangy cream cheese, creating a symphony of flavors that dance on the palate.
- Texture: A crisp, golden edge gives way to an interior that’s airy, light, and almost melt‑in‑your‑mouth soft.
- Simplicity: Only ten ingredients, most of which you already have in your pantry, make this a no‑fuss breakfast hero.
- Uniqueness: The combination of cocoa and red food coloring delivers that iconic velvet hue without compromising flavor.
- Crowd Reaction: Even the most skeptical eaters admit this looks like a dessert, but they’ll happily call it breakfast.
- Ingredient Quality: Using real cocoa powder and high‑quality cream cheese elevates the dish from ordinary to extraordinary.
- Cooking Method: A gentle medium‑low heat ensures even cooking and prevents the dreaded rubbery center.
- Make‑Ahead Potential: The batter can sit for a short rest, and the pancakes reheat beautifully, making weekend brunch a breeze.
Inside the Ingredient List
The Flavor Base
All‑purpose flour is the canvas for any pancake, and in this recipe, it provides the structure that holds the airy bubbles together. Using a cup of flour keeps the batter from becoming too dense, which is a common pitfall when adding cocoa and food coloring. If you swap in whole‑wheat flour, expect a nuttier flavor but a slightly heavier texture; just add a tablespoon of extra milk to compensate. When choosing flour, look for a brand that’s bleached – it yields a softer crumb, perfect for that velvety feel.
The Sweet & Tangy Duo
Granulated sugar at a tablespoon level sweetens without overwhelming the delicate cocoa notes. If you prefer a less sweet pancake, you can reduce it to half a tablespoon, but remember that the cream cheese frosting will still bring sweetness to the plate. The cream cheese is the star of the frosting, delivering a tang that cuts through the richness; a full‑fat version works best. For a lighter version, try a low‑fat cream cheese, but the texture will be a touch less creamy.
The Unexpected Star
Unsweetened cocoa powder adds depth, turning the pancakes from merely pink to a sophisticated red‑velvet shade. Using high‑quality cocoa (look for a Dutch‑process label) ensures a smoother, richer flavor without bitterness. If you’re out of cocoa, a tablespoon of melted dark chocolate can substitute, though it will slightly alter the color. The red food coloring is not just for show; a small amount interacts with the cocoa to create a more vibrant hue, and the flavor is subtly enhanced by the food‑grade dyes used in baking.
The Final Flourish
Baking powder, at three teaspoons, is the leavening hero that creates those lofty bubbles. Too much and the pancakes will rise then fall flat; too little and they’ll be dense. The half‑teaspoon of salt is essential to balance the sweetness and bring out the cocoa’s depth. Finally, the milk (or buttermilk) adds moisture and, if you choose buttermilk, an extra tang that pairs beautifully with the cream cheese frosting. A splash of oil keeps the pancakes tender and prevents them from sticking to the pan.
Everything's prepped? Good. Let’s get into the real action...
The Method — Step by Step
In a large mixing bowl, whisk together the all‑purpose flour, granulated sugar, cocoa powder, baking powder, and salt. You’ll hear a faint rustle as the dry ingredients mingle — that’s the first sign of texture building. Make sure there are no lumps; a quick sift can save you from a gritty pancake later. Power transition: Okay, ready for the game‑changer?
In a separate bowl, beat the large egg, then add the milk (or buttermilk), vegetable oil, and vanilla extract. The mixture should look glossy and slightly frothy. Add the red food coloring drop by drop, watching the batter transform into a deep, velvety pink.
Kitchen Hack: Warm the milk slightly (about 40°C) before mixing; it helps the coloring blend evenly.Create a well in the center of the dry ingredients and pour the wet mixture in. Using a rubber spatula, fold gently until just combined; a few streaks of flour are okay. Over‑mixing will develop gluten, leading to tough pancakes — trust me, I’ve learned that the hard way. The batter should be thick but pourable; if it feels too stiff, add a splash of milk.
Let the batter rest for five minutes. This pause allows the flour to hydrate fully, resulting in a lighter crumb. Watch Out: Skipping this rest can cause dense, gummy pancakes that never rise properly.
Heat a non‑stick skillet or griddle over medium‑low heat and lightly coat with a thin layer of oil. When a few drops of water sizzle and evaporate instantly, you’re at the perfect temperature.
Watch Out: If the pan is too hot, the outside will burn before the inside cooks through.Scoop about ¼ cup of batter onto the skillet for each pancake. The batter should spread slightly; if it spreads too fast, lower the heat a notch. Let the pancake cook until bubbles form on the surface and the edges start pulling away — this usually takes 2‑3 minutes. That sizzle when it hits the pan? Absolute perfection.
Flip the pancake with a thin spatula and cook the other side for another 1‑2 minutes until golden brown. The second side will develop those coveted crisp edges that shatter like thin ice when you bite into them. Transfer the cooked pancakes to a warm plate and keep them covered to retain heat.
While the pancakes are cooking, whisk together the softened cream cheese, powdered sugar, vanilla extract, and milk for the frosting. Aim for a smooth, pipe‑able consistency; if it’s too thick, add a tiny drizzle of milk. The frosting should be glossy and spreadable, not runny.
Once all pancakes are stacked, drizzle the cream cheese frosting generously over the top, letting it cascade down the sides. For an extra touch, dust with a light sprinkle of powdered sugar or a pinch of cocoa powder. Serve immediately while the pancakes are still warm, and watch your guests’ eyes widen in anticipation.
That’s it — you did it. But hold on, I’ve got a few more tricks that'll take this to another level, because a great pancake deserves an equally great finish.
Insider Tricks for Flawless Results
The Temperature Rule Nobody Follows
Most home cooks crank the heat to “high” hoping to speed things up, but that’s a recipe for disaster. Medium‑low heat gives the batter time to set, allowing the leavening gases to expand evenly. I once tried a “quick fix” on a busy Sunday, and the pancakes emerged with burnt edges and a raw center — a clear lesson that patience is a virtue in pancake land.
Why Your Nose Knows Best
Before you even flip, trust the aroma. When the batter starts to smell nutty and slightly sweet, you’re close to the perfect moment. If you catch a faint burnt scent, lower the heat immediately. This sensory checkpoint saves you from a batch that looks good but tastes like a charcoal biscuit.
The 5‑Minute Rest That Changes Everything
Allowing the batter to sit for five minutes after mixing lets the flour fully absorb the liquids, creating a smoother texture. Skipping this rest results in a gritty mouthfeel, a complaint I’ve heard from countless brunch hosts. The rest also gives the baking powder a chance to activate fully, ensuring those lofty bubbles.
The Secret Butter Brush
Instead of spraying oil, lightly brush the pan with melted butter mixed with a splash of oil. This combo gives a richer flavor and a golden crust that’s impossible to achieve with spray alone. My neighbor once tried only oil and complained the pancakes lacked that buttery kiss.
Frosting Consistency Check
If the cream cheese frosting is too thick, it will sit on top like a solid slab; too thin, and it will run off the sides. The trick is to add milk a teaspoon at a time, whisking until you reach a silky, pourable texture. A smooth frosting not only looks professional but also melts slightly into the warm pancakes, creating a luscious sauce.
Creative Twists and Variations
This recipe is a playground. Here are some of my favorite ways to switch things up:
Chocolate‑Chip Surprise
Fold a handful of mini chocolate chips into the batter just before cooking. The chips melt into pockets of gooey chocolate that contrast beautifully with the tangy frosting, making it a hit for kids and adults alike.
Citrus Zest Burst
Add a teaspoon of orange zest to the wet ingredients. The citrus brightens the deep red hue and adds a fragrant pop that pairs surprisingly well with the cream cheese.
Nutty Crunch
Stir in a quarter cup of finely chopped toasted pecans or walnuts. The nuts provide a satisfying crunch and a buttery flavor that elevates the pancake to a brunch centerpiece.
Berry‑Infused
Swirl in a tablespoon of raspberry puree into the batter for a subtle fruit undertone. The berries add a fresh acidity that cuts through the richness, and the visual speckles look gorgeous on the plate.
Vegan Velvet
Replace the egg with a flax‑egg (1 tbsp ground flaxseed + 3 tbsp water) and use plant‑based milk. Swap the cream cheese frosting for a vegan cashew cream sweetened with maple syrup, and you have a fully vegan version that still delivers on flavor.
Storing and Bringing It Back to Life
Fridge Storage
Stack the cooled pancakes with parchment paper between each layer, then store in an airtight container. They’ll stay fresh for up to three days. When reheating, place a tiny splash of milk on the plate and microwave for 30‑40 seconds; the steam revives the fluffy interior.
Freezer Friendly
Arrange pancakes on a baking sheet and freeze until solid, then transfer to a zip‑top freezer bag. They’ll keep for up to two months. To reheat, pop them straight into a preheated 350°F oven for 8‑10 minutes, or microwave with a dab of butter for a quick fix.
Best Reheating Method
For the ultimate texture, reheat in a skillet over low heat with a thin pat of butter. Add a teaspoon of water to the pan and cover; the steam gently revives the pancake without drying it out. This method restores the crisp edges while keeping the interior soft.