I was standing in a kitchen that smelled of burnt sugar and regret, trying to salvage a batch of pie crusts that had turned into a sad, soggy mess. My friend, a self‑proclaimed pastry savant, dared me to turn that disaster into something edible, and I accepted with a grin that could have lit the entire room. The challenge was simple: take the heart‑warming nostalgia of a pecan pie and the indulgent creaminess of cheesecake, fuse them into bars that could double as dessert, snack, or even a show‑stopping centerpiece for any gathering. I knew I had to outshine every other recipe that claimed to be the ultimate pecan pie cheesecake, and I was ready to prove it.
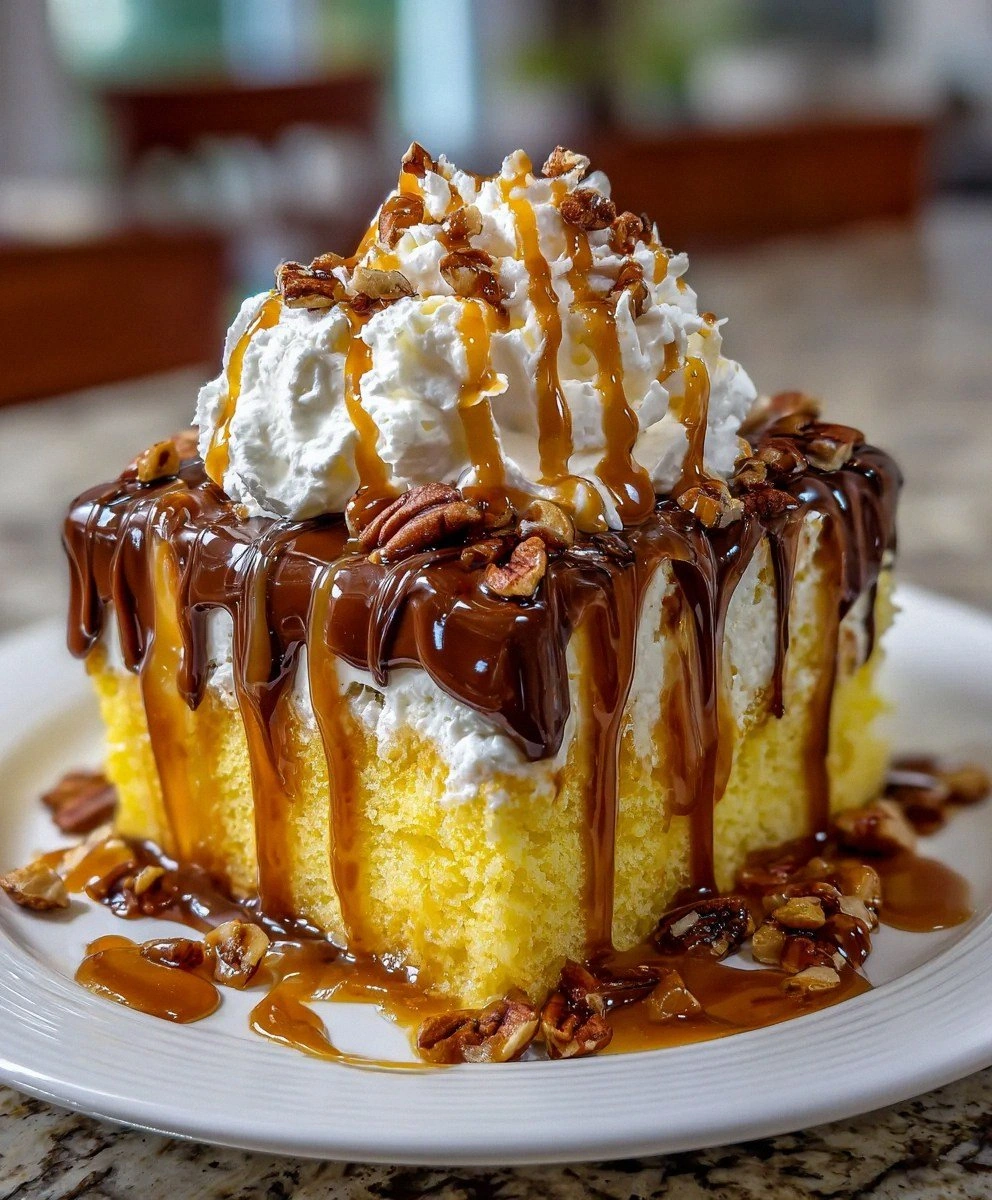
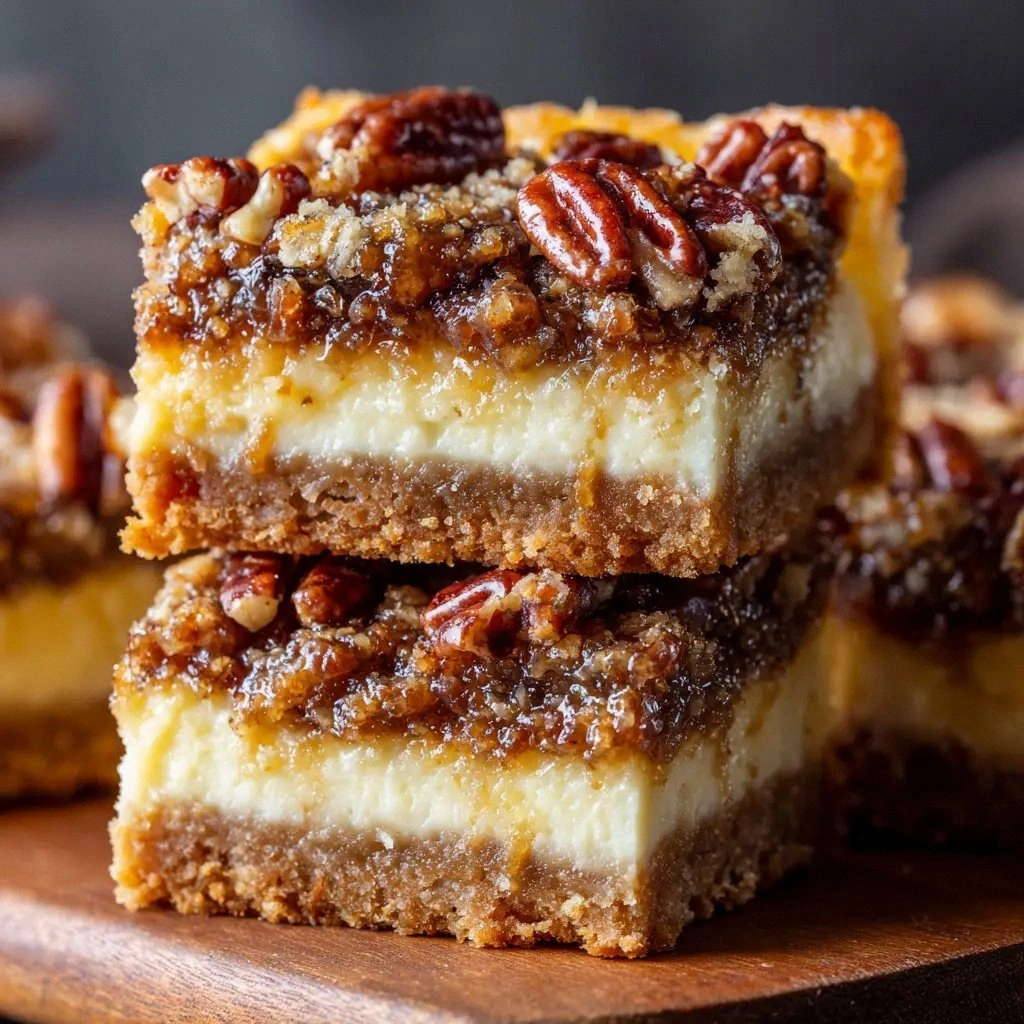
Picture the moment the first bar slides onto your plate: a golden crust that crackles like crisp autumn leaves, a silky filling that shimmers with a honeyed sheen, and a crunchy pecan crown that shatters like thin ice under your fork. The aroma is a heady blend of toasted butter, vanilla, and caramelized sugar, rising like a warm hug that beckons you to dig in. The first bite delivers a velvety texture that melts in your mouth, followed by a buttery crunch that echoes the sound of a satisfied sigh. The finish lingers with a subtle nutty aftertaste, a reminder that every ingredient has played its part in this symphony of flavors. If you’re skeptical, I dare you to taste this and not go back for seconds.
What sets this version apart isn’t just the flawless balance of sweet and savory—it’s the meticulous layering of textures that feels like a secret handshake between your tongue and your memories. The crust is buttery and flaky yet firm enough to hold the decadent filling without warping, while the pecans are toasted to a perfect caramelized depth that adds a smoky undertone. The honey and heavy cream infusion in the filling gives it a silky mouthfeel that rivals any commercial cheesecake, yet the addition of sour cream keeps it from becoming too dense. The result is a bar that feels indulgent but remains approachable, a crowd‑pleaser that can be served at a holiday party or a quiet Sunday brunch. This is hands down the best version you'll ever make at home.
And here’s the kicker: I’ve included a trick that most recipes get completely wrong—a secret step that locks in the moisture and ensures each bite stays perfectly creamy without becoming soggy. Picture yourself pulling this out of the oven, the whole kitchen smelling incredible, and knowing you’ve cracked the code that other bakers keep chasing. Stay with me here—this is worth it. Let me walk you through every single step, and by the end, you’ll wonder how you ever made it any other way.
What Makes This Version Stand Out
- Flavor Depth: The combination of light brown sugar, honey, and a splash of heavy cream creates a caramelized sweetness that’s richer than your average dessert.
- Texture Contrast: The buttery crust provides a flaky foundation, while the toasted pecans add a satisfying crunch that breaks the creamy surface.
- Ingredient Quality: Using room‑temperature cream cheese and fresh pecans ensures the filling stays silky and the nuts maintain their natural oils.
- Make‑Ahead Friendly: Once baked, the bars can be refrigerated or frozen, making them ideal for busy weeknights or holiday prep.
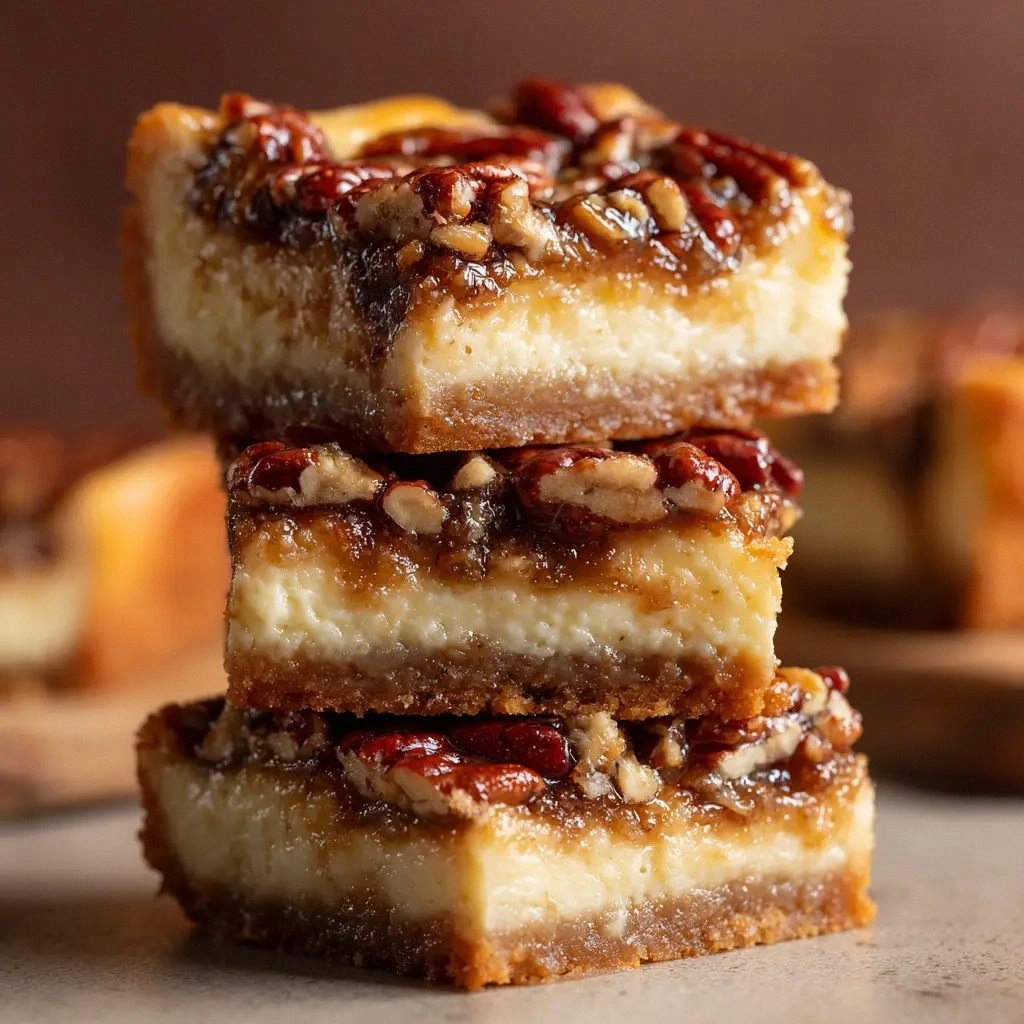
- Visual Appeal: The glossy honey glaze on the top gives a professional finish that looks as good as it tastes.
- Versatility: It can double as a dessert, a snack, or even a savory appetizer when paired with a sharp cheddar.
Inside the Ingredient List
The Flavor Base
The light brown sugar is more than just a sweetener; it’s the backbone of the crust’s caramelized aroma. Packed to the brim, it caramelizes in the butter, creating a subtle molasses note that lingers on the palate. If you skip it, the crust will taste flat and the filling will lack the necessary depth. A quick swap? Try demerara sugar for a slightly crunchy texture and a hint of molasses.
The vanilla extract is the unsung hero that ties the sweet and nutty elements together. A teaspoon of pure vanilla elevates the entire flavor profile, giving the bars an almost aromatic perfume that wafts through the kitchen. If you’re in a pinch, a splash of almond extract can add a new dimension, though it will shift the flavor profile slightly.
The Texture Crew
All‑purpose flour is the silent binder that holds the crust together. It’s a simple ingredient, but the key is to keep it cold and avoid over‑mixing, which can lead to a tough crust. If you want a gluten‑free version, a blend of rice and tapioca starch works well, but you’ll need to reduce the flour by about 10%.
Unsalted butter is the fat that gives the crust its buttery richness. Using cold butter ensures a flaky texture, while a touch of salt balances the sweetness. For a dairy‑free alternative, coconut oil can replace butter, though the flavor will shift slightly.
The heavy cream added to the filling is the secret to that silky mouthfeel. It lightens the density of cream cheese, creating a velvety texture that melts in your mouth. If you’re aiming for a lighter version, replace the heavy cream with whole milk and a splash of lemon juice to maintain acidity.
The Unexpected Star
Honey is the unsung hero that brings a floral sweetness and a glossy sheen to the bars. Its natural sugars caramelize in the oven, creating a golden glaze that’s both visual and flavor‑rich. If honey is off the menu, a drizzle of maple syrup will give a slightly different but equally delightful twist.
The pecan halves are the final flourish that delivers the quintessential holiday crunch. Roughly chopped ensures each bite has a unique bite, and toasting them beforehand enhances their nutty aroma. If you’re allergic to nuts, roasted almonds or toasted walnuts can serve as a suitable substitute.
The Final Flourish
Sour cream is the subtle acidity that balances the richness of the cream cheese and butter. It also keeps the filling from becoming overly dense, giving it a light, airy quality. A vegan alternative? Greek yogurt works well, but be sure to use a full‑fat variety for best results.
The egg acts as a binder, ensuring the filling sets properly while adding a slight richness. If you’re avoiding eggs, a tablespoon of flaxseed meal mixed with three tablespoons of water can mimic the binding properties. This trick is especially handy for those with dietary restrictions.
Everything’s prepped? Good. Let’s get into the real action.
The Method — Step by Step
- Preheat your oven to 350°F (175°C) and line a 9×13 inch pan with parchment paper, leaving an overhang on all sides for easy removal. This ensures the bars set evenly and can be lifted without sticking. While the oven warms, combine the flour, brown sugar, and salt in a large bowl, whisking until the mixture is uniform. This dry blend will be the foundation of your crust. I’ve found that adding a pinch of baking powder can give the crust a slightly lighter lift, but it’s optional.
- Cut the cold butter into small cubes and add it to the dry mixture. Using a pastry cutter or your fingertips, cut the butter into the flour until the mixture resembles coarse crumbs with some pea‑size pieces remaining. The goal is to keep the butter cold; if it melts, the crust will become greasy. If you’re using a stand mixer, pulse on low speed until the mixture is crumbly.
- Press the dough firmly into the prepared pan, forming an even layer. Use the back of a spoon or your palm to compact the dough, ensuring it’s packed tightly to avoid air pockets. Once the crust is in place, use a fork to poke small holes across the surface; this prevents it from puffing up during baking. Bake the crust for 18 minutes, or until it’s golden brown and fragrant. Remove from the oven and let it cool slightly while you prepare the filling.
- In a separate bowl, beat the softened cream cheese until smooth and creamy. Add the granulated sugar and continue beating until the mixture is light and fluffy. This aeration is crucial for a silky filling. Then stir in the egg, sour cream, vanilla extract, and heavy cream, mixing until fully incorporated.
- Fold in the toasted pecan halves, ensuring they’re evenly distributed throughout the filling. The nuts should be visible and provide a delightful crunch in every bite. If you prefer a more uniform texture, you can pulse them in a food processor to a coarse grind.
- Pour the filling over the cooled crust, smoothing the top with a spatula. The filling should cascade slightly over the edges, creating a rustic look that’s both charming and appetizing. For a more dramatic presentation, drizzle a thin stream of honey over the top before baking.
- Return the pan to the oven and bake for an additional 30–35 minutes, or until the edges are set and the center has a slight wobble. The bars should emit a warm, buttery aroma that makes your kitchen feel like a holiday cabin. Remove from the oven and allow them to cool completely on a wire rack before cutting into bars.
- Once cooled, lift the bars out of the pan using the parchment overhang. Slice them into uniform rectangles or squares, depending on your preference. Store the bars in an airtight container at room temperature for up to 3 days, or refrigerate for up to a week. For longer storage, freeze them in a single layer before transferring to a freezer bag.
- When you’re ready to serve, let the frozen bars thaw at room temperature for about 30 minutes. If you prefer a warm treat, pop them in a preheated 350°F oven for 5 minutes to revive their crispness. Serve with a dollop of whipped cream or a drizzle of caramel sauce for an extra indulgent touch.
That’s it—you did it. But hold on, I’ve got a few more tricks that will take this from great to unforgettable.
Insider Tricks for Flawless Results
The Temperature Rule Nobody Follows
While most bakers rely on the oven’s temperature setting alone, the real secret lies in preheating the pan. Place the pan in the oven while it preheats; this ensures an even crust and prevents the bars from sinking. If you’re using a cast‑iron skillet, let it sit in the oven for 10 minutes before pouring the filling.
Why Your Nose Knows Best
During baking, trust your nose over your timer. The first scent of caramelized sugar and toasted butter signals that the crust is perfectly golden. If the aroma feels underdeveloped, give it a few extra minutes; if it’s too strong, lower the oven temperature by 25°F to avoid burning.
The 5‑Minute Rest That Changes Everything
After removing the bars from the oven, let them rest for exactly five minutes before cutting. This pause allows the filling to set fully, preventing a mess of gooeyness when you slice. It also gives the honey glaze a chance to thicken slightly, creating a glossy finish.
Keep the Pecan Crunch Alive
If you’re planning to store the bars for a week or more, keep the pecans separate and add them just before serving. This preserves their crunch and prevents them from becoming soggy. A quick toss in a dry skillet over medium heat for a minute will revive their crispness.
A Quick Cooling Trick
If you’re in a hurry and need the bars to cool faster, place the pan on a cooling rack set over a tray of ice water. The water will not touch the bars but will absorb heat, reducing the cooling time dramatically. Just be sure the pan is sturdy enough to handle the sudden temperature change.
Creative Twists and Variations
This recipe is a playground. Here are some of my favorite ways to switch things up:
Maple‑Glazed Bars
Swap the honey for a generous drizzle of pure maple syrup. The maple’s earthy sweetness pairs beautifully with pecans, creating a fall‑in‑love flavor profile. Finish with a sprinkle of sea salt for a balanced sweet‑salty finish.
Chocolate‑Infused Delight
Add ½ cup of melted dark chocolate to the filling for a rich, bittersweet twist. The chocolate coats the pecans, turning each bite into a decadent bite of chocolate‑pecan heaven. Dust with cocoa powder for an elegant look.
Citrus Zest Surprise
Grate the zest of one lemon or orange into the filling for a bright, zesty lift. The citrus sharpens the sweetness and adds a fresh, aromatic layer that keeps the bars from feeling heavy. Pair with a dollop of lemon curd for an extra zing.
Spiced Pumpkin Variation
Incorporate ½ cup of pumpkin puree and a pinch of cinnamon, nutmeg, and ginger into the filling. This transforms the bars into a cozy, holiday‑season staple that’s perfect for Thanksgiving or Christmas. The pumpkin adds moisture and a subtle sweetness that complements the pecans.
Vegan Edition
Replace cream cheese with a vegan cream cheese alternative, use coconut oil for the crust, and substitute the egg with a flaxseed meal mixture. The result is a plant‑based version that still delivers on flavor and texture. Serve with a drizzle of agave syrup for a sweet finish.
Storing and Bringing It Back to Life
Fridge Storage
Place the bars in an airtight container and refrigerate for up to 7 days. The cold environment slows down the breakdown of the honey glaze, preserving its glossy finish. When you’re ready to serve, let the bars sit at room temperature for 15 minutes to soften slightly.
Freezer Friendly
Wrap each bar individually in parchment paper, then stack them in a freezer bag. This prevents the bars from sticking together and allows you to pop out a single bar whenever you crave a sweet treat. They can be stored for up to 3 months without compromising quality.
Best Reheating Method
To revive frozen bars, preheat your oven to 350°F (175°C) and bake for 5 minutes. For a quick snack, microwave on low power for 15–20 seconds. Add a tiny splash of water before reheating; it steams the bars back to perfection, keeping them moist and fresh.