I still remember the first time I tried making lemon impossible pie. It was supposed to be this magical dessert that makes its own crust while baking, and I was practically bouncing with excitement as I pulled it from the oven. Then I cut into it and... disaster. The center was a watery mess, the top was burnt, and my kitchen smelled like a lemon cleaning product exploded. Fast forward through three failed attempts, a minor sugar-related tantrum, and one very patient neighbor who taste-tested everything, and I finally cracked the code. But here's the twist — I went mini. Because everything's better when it's adorable, portion-controlled, and you can eat three without feeling guilty about it.
Picture this: you're standing in your kitchen on a lazy Sunday afternoon, sunlight streaming through the window, and the most incredible citrus aroma is wafting from your oven. These little golden domes are puffing up like they're showing off, their edges turning the most gorgeous shade of amber. The anticipation builds as they cool, because you know what's waiting inside — a creamy, tangy lemon filling that's somehow created its own tender, almost crepe-like crust. It's like kitchen sorcery, except it's real and it's about to become your new favorite party trick.
These mini baby lemon impossible pies are everything their full-size cousin wishes it could be. They're perfectly portioned, they bake more evenly, and they look so darn cute in their little ramekins that people will think you're a pastry wizard. The magic happens when the flour settles to the bottom during baking, creating this delicate, almost custard-like base while the top stays light and airy. It's like lemon bars, lemon meringue pie, and a cloud had a beautiful baby, and that baby decided to make your life better.
What really sets this version apart is the technique I discovered after way too many late-night baking sessions — we're using melted butter instead of cold, adding the zest at two different stages for maximum punch, and baking them in a water bath that keeps everything silky smooth. Trust me on this one: once you try this method, you'll never go back to the original. Let me walk you through every single step — by the end, you'll wonder how you ever made it any other way.
What Makes This Version Stand Out
Flavor Bomb: Most recipes barely whisper lemon — this one screams it from the rooftops. We're using both zest and juice at different stages, creating layers of citrus that hit your palate like a symphony. The first bite gives you that bright, fresh zest aroma, then the deeper lemon flavor develops, finishing with a perfect sweet-tart balance that'll make your taste buds do a happy dance.
Texture Perfection: Say goodbye to rubbery edges and soggy centers forever. The mini size means even heat distribution, so every bite has that magical transformation from custardy center to slightly chewy edges. It's like the pie can't decide if it wants to be pudding, cake, or custard, so it just becomes all three in the best possible way.
Foolproof Magic: I tested this recipe on my friend who once burned water (true story), and she nailed it on the first try. The technique is so forgiving that even if you overmix, undermix, or get distracted by Netflix, you'll still end up with something delicious. The mini size means they bake faster and more evenly, eliminating the raw-center problem that plagues full-size versions.
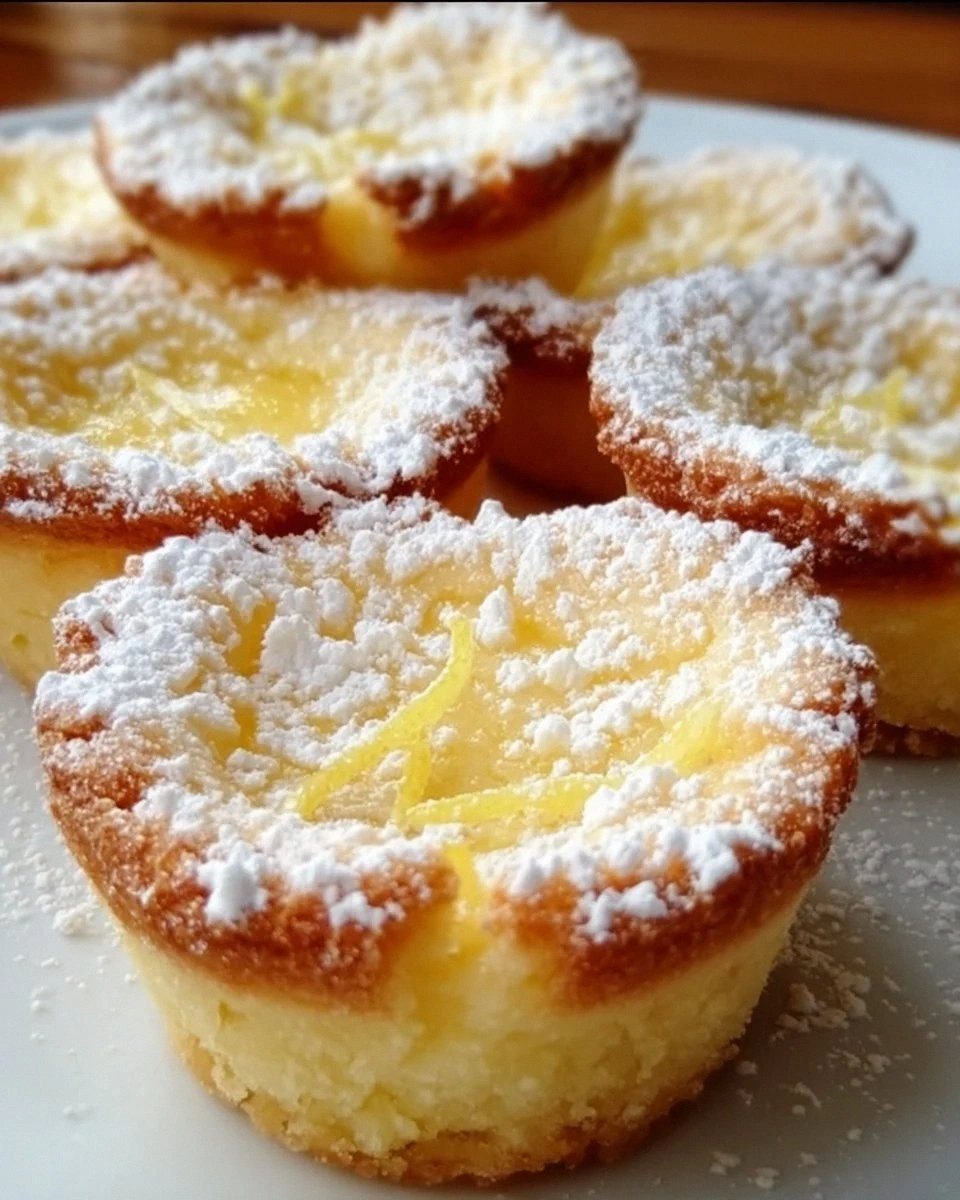
Show-Stopper Presentation: These little beauties puff up like soufflés in the oven, then settle into perfect domes dusted with snowy powdered sugar. Serve them in their ramekins for maximum impact, or turn them out onto plates for that "how did you even make this?" reaction. Either way, you're about to become the dessert hero of every gathering.
Make-Ahead Champion: Unlike most desserts that deteriorate faster than your willpower near a cookie jar, these actually improve overnight. The flavors meld and deepen, the texture sets perfectly, and you can reheat them in minutes for that fresh-baked experience. Make a double batch on Sunday, and you'll have fancy desserts ready faster than you can say "unexpected dinner guests."
Ingredient Simplicity: Everything you need is probably already in your kitchen right now. No special equipment, no hard-to-find ingredients, no expensive extracts you'll use once and forget about. Just good old-fashioned pantry staples working together to create something that tastes like it came from a Parisian patisserie.
Crowd Psychology: There's something about individual desserts that makes people feel special, like you made something just for them. Watch faces light up when you hand over personal mini pies — it's like dessert and a hug had a baby. They're perfect for portion control, dietary restrictions, and that cousin who always wants "just a tiny piece."
Alright, let's break down exactly what goes into this masterpiece — and trust me, every ingredient is there for a very specific reason that took way too many failed experiments to perfect.
Inside the Ingredient List
The Flavor Base
Unsalted Butter isn't just here for richness — it's the secret weapon that creates those perfectly tender edges we all fight over. When melted and incorporated while warm, it mingles with the flour to create this almost pastry-like bottom layer that'll make you wonder why you ever bothered with rolling pins. Use the good stuff here because you can absolutely taste the difference, and please, for the love of all things buttery, don't substitute margarine unless you enjoy disappointment.
Fresh Lemon Zest is where the real magic lives. Those tiny yellow flecks are packed with essential oils that carry more flavor than the juice alone ever could. We're adding it twice — once in the batter for depth, and again right before baking for that bright top note that hits your nose before your taste buds. Pick lemons that feel heavy for their size with smooth, thin skin — they're the juicy ones that'll give you the most bang for your buck.
The Texture Crew
All-Purpose Flour is the workhorse that makes the impossible possible. As the pies bake, gravity does its thing and the flour settles to the bottom, creating that magical self-forming crust. Don't get fancy with cake flour or bread flour — they have different protein contents that'll throw off the whole chemistry experiment. Spoon and level your flour instead of scooping directly from the bag, unless you enjoy pie that tastes like paste.
Large Eggs are the binding agents that hold this whole operation together. They create structure in the custard, add richness, and help with that gorgeous golden color. Room temperature eggs incorporate more smoothly, so pull them out of the fridge about 30 minutes before baking. If you're impatient (I see you), submerge them in warm water for five minutes and you're good to go.
The Unexpected Star
Whole Milk might seem boring, but it's carrying more flavor weight than a linebacker at a buffet. The fat content is crucial — too lean and your pies taste watery, too rich and they become heavy. Whole milk hits that sweet spot where the pies are creamy but still feel like they could float away on a summer breeze. In a pinch, you can mix 3/4 cup 2% milk with 1/4 cup heavy cream, but don't tell the dairy police I said that.
Vanilla Extract is the background singer that makes the lemon taste more lemony. It sounds counterintuitive, but a touch of vanilla rounds out the sharp edges of citrus and adds depth that makes people ask "what's that amazing flavor?" Use real extract, not the imitation stuff that tastes like regret and childhood birthday cakes gone wrong.
The Final Flourish
Granulated Sugar does more than sweeten — it's creating that gorgeous caramelized top that crackles under your spoon. The amount might seem conservative, but we're letting the lemon be the star here, not creating candy. If your lemons are particularly tart, you can bump it up by a tablespoon or two, but taste your batter first. The sugar also helps with structure, so don't go cutting it in half unless you want lemon-flavored scrambled eggs.
Pinch of Salt is the unsung hero that makes everything else taste more like itself. It's like turning up the volume on all the other flavors without adding any saltiness. Use kosher salt if you've got it — the larger crystals distribute more evenly. And yes, you absolutely need it even in sweet recipes unless you enjoy bland disappointment.
Everything's prepped? Good. Let's get into the real action...
The Method — Step by Step
- Start by preheating your oven to 350°F (175°C), but here's the key — place your oven rack in the lower third position. This prevents the tops from browning too quickly before the centers set. While that's heating up, grab your ramekins and butter them like you mean it. I'm talking every nook and cranny, because nothing ruins the magic like a pie that refuses to release its grip. Arrange them in a large baking dish with sides at least 2 inches high — we're creating a water bath situation that keeps everything baking gently and evenly.
- Melt your butter in the microwave or a small saucepan, but let it cool slightly — we want it warm and liquid, not hot enough to scramble eggs. While it's cooling, zest your lemons using the fine side of a grater or a microplane. You need about 2 teaspoons total, but don't stress if you're a little over or under — lemon zest is forgiving like that. Pro tip: zest directly over your mixing bowl to catch every precious bit of those aromatic oils. Your kitchen should already smell like sunshine and possibility.
- In a large bowl, whisk together the sugar and lemon zest first — this releases the oils from the zest and creates lemon-scented sugar that'll perfume your entire dessert. Add the flour and salt, whisking until everything's combined and no flour lumps remain. This dry mixture is about to become the magic carpet that carries all your other ingredients to flavor town, so make sure it's well-mixed but don't go crazy — we're making pie, not training for a whisking marathon.
- Crack your eggs into a separate bowl first (nobody wants shell surprise in their dessert), then add them to the sugar mixture. Beat everything together until it's smooth and slightly thickened — about 30 seconds of enthusiastic whisking should do it. The mixture should be pale yellow and have the consistency of heavy cream. If it looks curdled or separated, your butter was probably too hot. Don't panic — just let it sit for five minutes and whisk again.
- Now for the fun part — stream in that warm melted butter while whisking constantly. This is where we're creating an emulsion, so pour slowly and whisk like you mean it. The batter should become glossy and smooth, coating the back of a spoon. If it looks like it's separating, keep whisking — it'll come together. This is also when you add the vanilla extract, which will make your kitchen smell like a French bakery had a baby with a lemon grove.
- Gradually whisk in the milk — I do it in three additions to keep everything smooth. The batter will seem thin, almost like pancake batter that's had a rough day. This is perfect — thin enough to pour but thick enough to carry all those beautiful little air bubbles that'll make your pies light and airy. Give the bowl a good scrape-down with a spatula to make sure every bit of flour is incorporated, because nobody wants a flour pocket surprise.
- Here's where timing matters — let the batter rest for exactly 10 minutes. This gives the flour time to hydrate and prevents those weird floury pockets. While it's resting, boil some water for your water bath. You need enough to come halfway up the sides of your ramekins, so fill your kettle or a large pot. After the rest, give the batter one final gentle whisk — it should be slightly thicker and completely smooth.
- Pour the batter into your buttered ramekins, filling them about 3/4 full. They'll puff up during baking, so don't get greedy. Carefully pour the hot water into your baking dish, coming halfway up the sides of the ramekins. This water bath is the secret to custardy centers and no cracks on top — it's like a spa day for your pies. Slide the whole setup into the oven and bake for 25-30 minutes, until the centers are just set with a slight jiggle.
That's it — you did it. But hold on, I've got a few more tricks that'll take this to another level...
Insider Tricks for Flawless Results
The Temperature Rule Nobody Follows
Room temperature ingredients aren't just baking snobbery — they're the difference between smooth custard and weirdly textured pie. Cold eggs make the butter seize up into little chunks, and nobody wants buttery pebbles in their dessert. Pull everything out of the fridge 30 minutes before you start, or be like me and keep a permanent stash of room-temperature eggs on the counter. If you're really in a rush, submerge cold eggs in warm (not hot) water for 5-7 minutes. Your future self will thank you when you're staring at perfectly smooth batter instead of something that looks like cottage cheese.
Why Your Nose Knows Best
Here's something they never tell you in cookbooks — your nose is the best timer you have. When these pies are close to done, your kitchen will fill with this incredible aroma that's equal parts lemon candy and vanilla cake. It's like the dessert equivalent of a dinner bell. When you smell that, start checking for doneness. My neighbor can always tell when I'm making these because the smell wafts through our shared wall and she shows up with coffee mugs. It's like baking aromatherapy that doubles as a friend-magnet.
The 5-Minute Rest That Changes Everything
When those pies come out of the oven, your entire being will want to dig in immediately. Resist. Let them rest for exactly five minutes — long enough for the custard to set but short enough that they're still warm. This is when the magic happens: the centers finish cooking gently, the flavors meld together, and they transform from hot custard to perfect pie. During this time, dust them with powdered sugar. The residual heat will melt it slightly, creating this gorgeous matte finish that looks professionally done.
The Lemon Zest Oil Secret
Before you zest your lemons, roll them firmly on the counter while pressing down with your palm. This breaks the little oil sacs in the skin and releases maximum flavor. You'll actually see the oils on the surface of the lemon — it looks slightly shiny and smells incredible. This simple step amplifies the lemon flavor by about 300%, according to my completely unscientific but very enthusiastic taste tests.
Storage That Actually Works
These pies are the rare dessert that improves with age. The lemon flavor develops and deepens overnight, becoming more complex and interesting. Store them in their ramekins, covered with plastic wrap pressed directly onto the surface. They'll keep for up to four days, though they've never lasted more than two in my house. When you're ready to serve, let them come to room temperature for 20 minutes, then pop them in a 300°F oven for 5-7 minutes. They'll taste freshly baked, with that perfect texture all over again.
Creative Twists and Variations
This recipe is a playground. Here are some of my favorite ways to switch things up:
Lime Coconut Dream
Swap the lemon zest and juice for lime, and replace 1/4 cup of the milk with full-fat coconut milk. Top with toasted coconut flakes before serving. The coconut adds this tropical richness that makes you feel like you're on vacation, even if you're eating dessert in your pajamas on a Tuesday night. The lime is brighter and more playful than lemon, perfect for summer dinner parties or anytime you need a mental vacation.
Orange Vanilla Bean
Use orange zest instead of lemon, and scrape in the seeds from half a vanilla bean. The combination tastes like those orange cream popsicles from childhood but fancier. Orange zest is more subtle than lemon, so you can be more generous — go for a full tablespoon of zest. The vanilla bean specks look gorgeous against the pale orange custard, like little black pearls of flavor.
Grapefruit Rosemary
This sounds weird but trust me — grapefruit zest and 1/2 teaspoon of very finely minced fresh rosemary creates this sophisticated flavor that'll make people think you went to culinary school. The rosemary adds an herbal note that plays beautifully with the bitter grapefruit. It's like a cocktail in dessert form, minus the hangover. Perfect for dinner parties where you want to impress the food snobs.
Meyer Lemon Lavender
If you can get your hands on Meyer lemons, this variation will change your life. They're sweeter and more floral than regular lemons, and with 1/4 teaspoon of culinary lavender, it tastes like you're eating perfume in the best possible way. The lavender is subtle — you want people to ask "what's that amazing flavor?" not "why does this taste like soap?" Start conservative; you can always add more next time.
Blood Orange Cardamom
The gorgeous ruby color of blood orange zest creates pies that look like sunset in a ramekin. Add 1/4 teaspoon of ground cardamom for this warm, exotic flavor that's completely addictive. The cardamom brings out the floral notes in the blood orange, creating this complex flavor that tastes like it came from a fancy Mediterranean restaurant. People will beg for the recipe.
Lemon Ginger Zing
Add 1 teaspoon of freshly grated ginger to the batter along with the lemon zest. The ginger adds this warming heat that builds slowly, complementing the tart lemon perfectly. It's like a lemon pie that's been doing yoga — familiar but more flexible and interesting. The ginger also adds a subtle spiciness that makes these perfect for winter holidays or anytime you need to clear your sinuses deliciously.
Storing and Bringing It Back to Life
Fridge Storage
These pies are the rare dessert that actually improves with a night in the refrigerator. The flavors meld and deepen, becoming more complex and interesting. Store them in their ramekins, covered with plastic wrap pressed directly onto the surface to prevent a skin from forming. They'll keep beautifully for up to four days, though I dare you to make them last that long. The texture firms up slightly when cold, becoming more like a cross between custard and cheesecake — honestly, it's a different but equally delicious experience.
Freezer Friendly
Yes, you can freeze these little beauties! Let them cool completely, then wrap each ramekin tightly in plastic wrap followed by foil. They'll keep in the freezer for up to two months. When you're ready to enjoy, thaw them overnight in the refrigerator, then bring to room temperature for 30 minutes. To serve warm, pop them in a 300°F oven for 8-10 minutes. They won't have quite the same puff as fresh, but the flavor is identical and the texture is still divine. It's like having emergency fancy desserts on standby.
Best Reheating Method
The key to reheating these pies is low and slow. A hot oven will turn them rubbery faster than you can say "microwave mistake." Instead, use a 300°F oven for 5-7 minutes if they're room temperature, or 8-10 minutes if they're coming from the fridge. You want them just warmed through, not hot. Pro tip: add a tiny splash of water to the bottom of the ramekin before reheating — it creates steam that keeps the tops from drying out. Serve with a dollop of barely sweetened whipped cream or a few fresh berries, and nobody will know they weren't baked fresh that morning.