I still remember the day I almost threw my waffle maker out the window. There I stood, barefoot in my kitchen at 6:47 a.m., staring at a sad, floppy excuse for a low-carb waffle that tasted like cardboard had a baby with rubber. My keto journey was supposed to be delicious, not depressing. I'd tried every "miracle" recipe on Pinterest — cauliflower waffles (mushy disaster), protein powder waffles (chalky nightmare), even the famous two-ingredient cheese-and-egg version that tasted like I was licking a dairy farm. Just when I was ready to surrender to a lifetime of scrambled eggs, my competitive foodie friend Sarah texted me: "Bet you can't make a chaffle that doesn't suck." Challenge accepted, Sarah. Challenge accepted.
What happened next was three weeks of obsessive testing, 47 eggs sacrificed to the culinary gods, and a cheese budget that made my accountant cry. I became the Goldilocks of chaffles — too soft, too eggy, too crispy, too bland. But then, at 11:23 p.m. on a Tuesday night, magic happened. The smell hit me first: buttery, toasty, almost like fresh bread had decided to go on a hot date with grilled cheese. That first bite? Holy moly. Crispy edges that shattered like thin ice, revealing a tender, cheesy center with the perfect egg-to-cheese ratio. My roommate materialized from her bedroom like a zombie, following the aroma. We stood there in silence, devouring chaffle after chaffle straight from the waffle iron, burning our tongues because we couldn't wait. Sarah got a delivery at 1 a.m. that night — a photo of a plate of these beauties and a simple message: "Game over. I win."
Here's the thing about most keto chaffle recipes — they get the fundamentals completely backwards. They treat it like a sad diet food instead of celebrating what it actually is: a crispy, cheesy, ridiculously versatile canvas that happens to be low-carb. Most recipes use too much egg (hello, rubbery texture), not enough cheese (bland city), or skip the secret ingredients that make these taste like they came from a fancy brunch spot. They'll tell you to use just mozzarella and egg, which creates something that tastes like a failed omelet with identity issues. But when you understand the science — how the proteins bind, how the fats render, how that tiny bit of almond flour changes everything — you unlock chaffle perfection.
This isn't just another recipe; it's the result of obsessive testing, late-night failures, and one too many emergency cheese runs. I'm sharing every trick I discovered: the cream cheese hack that prevents dryness, the almond flour ratio that creates structure without carb load, the temperature sweet spot that guarantees golden perfection. By the time you finish reading this, you'll be able to make chaffles so good that your non-keto friends will beg for the recipe. Ready to become the chaffle legend of your friend group? Let me walk you through every single step — by the end, you'll wonder how you ever made it any other way.
What Makes This Version Stand Out
Taste Explosion: Unlike the eggy disappointments flooding the internet, these chaffles taste like someone crossed the best parts of a grilled cheese sandwich with the crispy edges of a perfect waffle. The combination of mozzarella for stretch, cream cheese for richness, and that whisper of garlic powder creates a flavor profile that makes you forget you're eating low-carb. I dare you to taste this and not go back for seconds — my record is seven in one sitting, and I'm not even sorry.
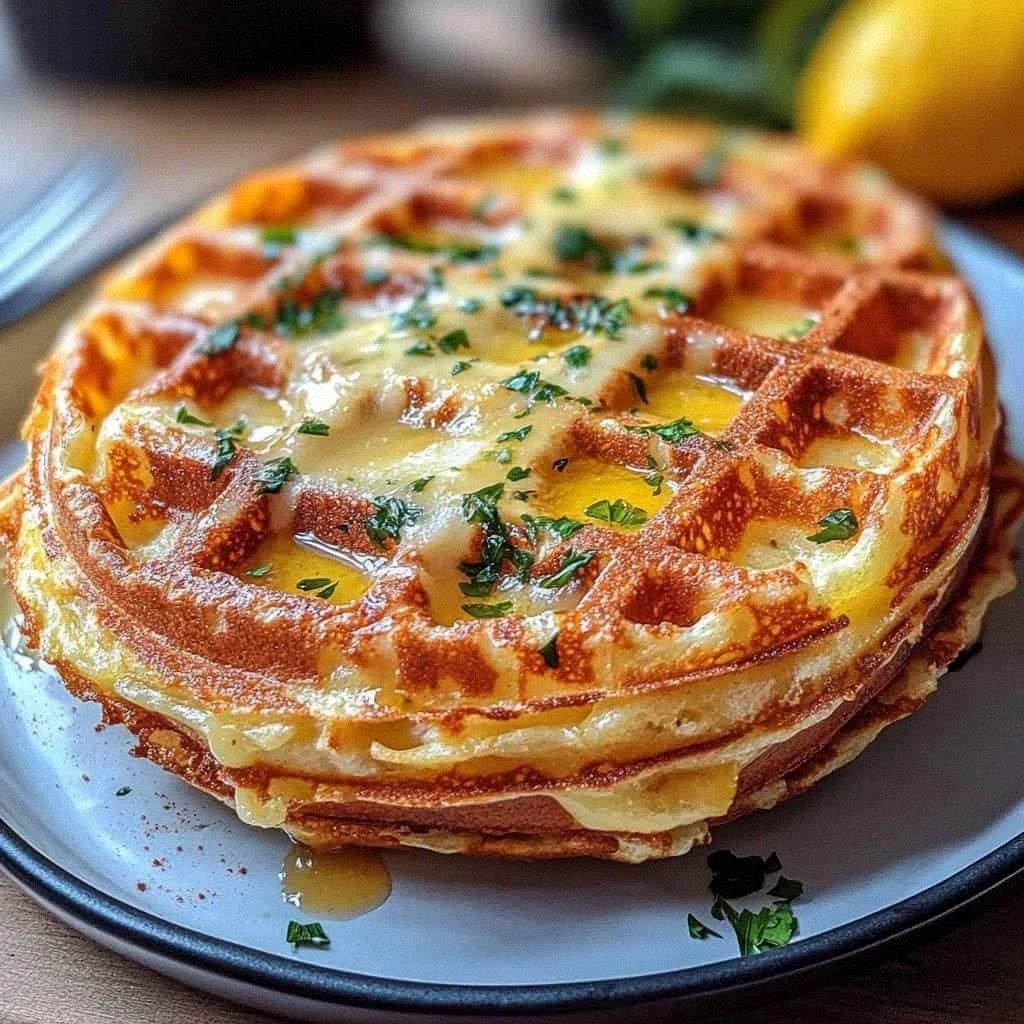
Texture Perfection: Most chaffles fail because they're either soggy messes or brittle disasters. This version achieves the impossible — crispy, golden-brown exterior with a tender, almost bread-like interior. The secret lies in the almond flour and baking powder combo, which creates tiny air pockets for lift while the cheese proteins form a crispy lattice. Picture yourself pulling this out of the oven, the whole kitchen smelling like a European bakery, hearing that satisfying crunch when you break one in half.
Stupidly Simple: While other recipes require whipping egg whites or complicated folding techniques, this one comes together in one bowl with a fork. Five minutes of prep, three minutes of cooking, infinite possibilities. If you've ever struggled with finicky keto breads that require seventeen specialty ingredients and a PhD in chemistry, you're not alone — and I've got the fix that'll make you feel like a kitchen wizard.
Endlessly Versatile: This base recipe transforms into everything from burger buns to dessert waffles with simple swaps. I've made breakfast sandwiches, mini pizzas, even chaffle croutons for Caesar salad. The neutral flavor profile means it plays well with both sweet and savory applications. Okay, ready for the game-changer? Keep reading.
Crowd-Pleasing Power: I'll be honest — I ate half the batch before anyone else got to try it. But when I finally shared, even my carb-loving nephew devoured three and asked for the recipe. These don't taste "diet" or "healthy" — they just taste ridiculously good. Bring these to brunch and watch keto and non-keto friends fight over the last one.
Make-Ahead Magic: Unlike regular waffles that turn into hockey pucks when reheated, these maintain their texture beautifully. Make a double batch on Sunday, freeze them with parchment between layers, and you've got instant breakfast all week. Thirty seconds in the toaster transforms them back to fresh-from-the-iron perfection. This next part? Pure magic.
Inside the Ingredient List
The Flavor Foundation
The eggs in this recipe aren't just binding agents — they're the structural backbone that transforms cheese into something magical. I use large eggs at room temperature because cold eggs shock the cheese and prevent proper incorporation. The yolks add richness and help create that gorgeous golden color, while the whites provide lift and structure. Don't even think about using egg substitutes here; real eggs create the protein network that gives these chaffles their bread-like texture. If you're tempted to use just egg whites to save calories, know that you'll end up with dry, brittle discs that taste like disappointment.
The Texture Crew
Mozzarella is the MVP here, but not all mozzarellas are created equal. Skip the fresh buffalo mozzarella swimming in water — it'll turn your chaffles into soup. You want the low-moisture, part-skim variety that comes in a block or already shredded. This melts smoothly without releasing excess water, creating those Instagram-worthy cheese pulls. The almond flour might seem optional, but trust me — it's the difference between chaffles that hold together like real bread and ones that crumble like a bad relationship. Just two tablespoons provide enough structure without making them taste like health food.
The Unexpected Star
Cream cheese is my secret weapon that most recipes completely miss. Just one tablespoon, softened to room temperature, creates moisture and richness that prevents the typical dry, eggy texture. It melts into tiny pockets of creamy goodness, ensuring every bite tastes indulgent. The baking powder might seem unnecessary since we're not making traditional waffles, but that half teaspoon creates just enough lift to prevent dense, hockey-puck results. And that optional garlic powder? It's like adding a bass line to your favorite song — you might not consciously notice it, but you'd miss it if it were gone.
The Final Flourish
Salt and pepper might seem basic, but they're crucial for making the cheese flavor pop. Without salt, your chaffles will taste flat and boring no matter how good your cheese is. I use kosher salt because the larger crystals distribute more evenly. The Everything bagel seasoning as an optional topping isn't just for Instagram — the combination of sesame, poppy, and onion creates a flavor explosion that makes these taste like your favorite bagel, minus the carb coma. A friend tried skipping this step once — let's just say it didn't end well for her brunch reputation.
Everything's prepped? Good. Let's get into the real action...
The Method — Step by Step
- Start by cracking your eggs into a medium bowl, but don't just dump them in — crack them on a flat surface to prevent shell fragments from contaminating your mixture. Let them sit for five minutes while you gather other ingredients; room-temperature eggs incorporate more smoothly and prevent the cheese from seizing. Whisk them vigorously with a fork for a full thirty seconds — you're not just mixing, you're incorporating air that will help create lift. The mixture should be pale yellow and slightly frothy on top, like liquid sunshine. This is the moment of truth where most people rush and end up with sad, dense chaffles.
- Now add your cream cheese, but here's the key — it needs to be softer than your heart after watching puppy videos. Microwave it for exactly eight seconds if it's cold from the fridge; any longer and it turns into hot lava. Drop it in small blobs rather than one big chunk, which helps it incorporate without leaving white streaks. Use your fork to smash it against the bowl's sides, creating a smooth mixture that looks like golden custard. If you see tiny white flecks, keep mixing — those will become dry pockets in your finished chaffles that taste like cream cheese bombs.
- Time for the cheese avalanche! Add your shredded mozzarella all at once, but don't stir yet. Let it sit for thirty seconds while you admire how the cheese creates little islands in your egg mixture. Now stir gently, using a folding motion rather than vigorous beating — you want to coat the cheese, not pulverize it. The mixture should look like cheesy scrambled eggs, with visible cheese shreds throughout. Don't worry if it seems like too much cheese; that's exactly what creates the structure we're after. And now the fun part.
- Sprinkle in your almond flour, baking powder, garlic powder, salt, and pepper, but treat them like precious spices rather than dumping them in a pile. Create a little well in the center and add each one separately, which prevents clumping that creates bitter pockets. Use your fork to whisk just until combined — overmixing develops the almond flour's natural oils and creates a greasy texture. The batter should be thick but pourable, like pancake batter that's been to the gym. If it's too thin, add another teaspoon of almond flour; too thick, a splash of water does the trick.
- Heat your waffle iron to medium-high, but don't trust the indicator light — let it heat for a full five minutes. A properly hot iron creates that initial sizzle that sets the exterior and prevents sticking. Brush it lightly with oil using a silicone brush, but don't drown it — excess oil creates greasy chaffles that never crisp. Close the lid for thirty seconds to let the oil heat, then open it quickly to prevent burning. That sizzle when it hits the pan? Absolute perfection.
- Pour exactly one-third cup of batter into the center of each waffle section — eyeballing it leads to overflow disasters that require archaeological digging to clean. Resist the urge to spread it around; the weight will naturally distribute it evenly. Close the lid gently rather than slamming it, which prevents batter from squishing out the sides. Don't peek for at least two minutes — lifting the lid too early tears the surface and ruins the crisp. The smell should hit you around minute two: buttery, toasty, with hints of garlic that make neighbors knock on your door.
- After three minutes, check for doneness by gently lifting the lid — the chaffles should release easily without tearing. If they stick, close it for another thirty seconds; they're not ready yet. Perfect chaffles are golden brown with darker edges that look almost caramelized. The cheese creates little lacy bits around the edges that crisp into frico-like deliciousness. Remove them with silicone-tipped tongs to a wire rack, not a plate — stacking creates steam that ruins the crunch. And now the hardest part: wait five minutes before eating. I know, I know, but trust me on this.
- While the first batch cooks, prep your toppings if you're using them. Everything bagel seasoning needs to go on immediately after cooking while the surface is still tacky. For shredded cheddar, sprinkle it on during the last thirty seconds of cooking so it melts but doesn't burn. Chives get sprinkled on right before serving so they stay bright green and fresh. Cooked bacon crumbles? Load them up — the salty, smoky crunch plays beautifully with the cheesy base. This next part? Pure magic.
That's it — you did it. But hold on, I've got a few more tricks that'll take this to another level...
Insider Tricks for Flawless Results
The Temperature Rule Nobody Follows
Room temperature isn't just a suggestion — it's the difference between chaffles that hold together and ones that crumble like a bad Tinder date. Take your eggs and cream cheese out thirty minutes before cooking, or use my cheat method: place eggs in warm (not hot) water for five minutes, and microwave cream cheese for exactly eight seconds. Cold ingredients shock the cheese proteins, causing them to seize up and create a grainy texture that no amount of cooking can fix. I've tested this with ingredients straight from the fridge versus room temp — the difference is like comparing a Ferrari to a horse-drawn carriage.
Why Your Nose Knows Best
Don't trust timers — trust your senses. When the chaffles are perfectly done, your kitchen will smell like the best grilled cheese sandwich you've ever had, with hints of garlic and toasted nuts from the almond flour. If you smell burning cheese, you've gone thirty seconds too long. If you don't smell anything after two minutes, your iron isn't hot enough. I trained my roommate to cook these by smell alone, and she now makes better chaffles than most food bloggers. Your nose knows when the Maillard reaction has created that perfect golden-brown color and nutty aroma.
The 5-Minute Rest That Changes Everything
I know you're going to want to dive in immediately — resist! Letting chaffles rest on a wire rack for five minutes allows the steam to redistribute, creating the perfect texture contrast between crispy exterior and tender interior. During this time, the cheese proteins set up and the almond flour fully hydrates, transforming your chaffle from good to legendary. If you cut into them too soon, you'll get a gummy center and soggy exterior that tastes like regret. Use this time to make coffee, set the table, or just admire your handiwork while drooling slightly.
The Double-Cheese Secret
For extra crispy edges that shatter like thin ice, add a teaspoon of shredded parmesan to the iron before the batter. It creates a cheesy crust that browns beautifully and adds incredible umami depth. The parmesan's lower moisture content means it crisps faster than mozzarella, creating a two-texture experience that's restaurant-quality. Don't use the powdered stuff from the green can — you want real shredded parm for maximum flavor impact. This trick turns good chaffles into conversation-stopping, Instagram-worthy masterpieces.
Storage Game-Changer
Most people store chaffles wrong and wonder why they turn into sad, soggy shadows of their former glory. Let them cool completely on a wire rack, then layer between parchment paper in an airtight container. They'll keep in the fridge for five days or freezer for three months. The parchment prevents them from sticking together and absorbs excess moisture that would ruin the texture. When reheating, use a toaster or air fryer — never the microwave unless you enjoy eating cheese-flavored sponges.
Creative Twists and Variations
This recipe is a playground. Here are some of my favorite ways to switch things up:
Everything Bagel Bliss
Replace the garlic powder with everything bagel seasoning, add two tablespoons of cream cheese to the batter, and top with smoked salmon and capers after cooking. These taste exactly like an everything bagel with lox, minus the carb coma. The seasoning distributes throughout instead of just on top, creating little flavor bombs in every bite. Perfect for brunch when you want to impress without the effort of actual bagels.
Jalapeño Popper Madness
Add one tablespoon of diced pickled jalapeños and two tablespoons of shredded sharp cheddar to the batter. The tangy heat from the peppers cuts through the richness of the cheese, while the cheddar adds depth that mozzarella alone can't achieve. Top with a dollop of sour cream and crumbled bacon for the full jalapeño popper experience. These disappear faster than free samples at Costco.
Pizza Party Chaffles
Stir in half a teaspoon of Italian seasoning and replace the garlic powder with pizza seasoning. After cooking, top with a spoonful of low-carb marinara and a sprinkle of mozzarella, then pop under the broiler for thirty seconds. These taste like the best parts of pizza without the carb crash. Kids love them, and they're perfect for after-school snacks that won't spoil dinner.
Cinnamon Roll Dreams
Omit the garlic powder and add half a teaspoon of cinnamon and one teaspoon of vanilla extract to the batter. The result tastes remarkably like cinnamon rolls, especially when topped with a cream cheese glaze made from softened cream cheese, a splash of heavy cream, and your favorite low-carb sweetener. The cheese creates a texture similar to the tender dough of real cinnamon rolls. Breakfast just got dangerous.
Herb Garden Fresh
Add one tablespoon each of chopped fresh chives, parsley, and dill to the batter. The fresh herbs brighten the whole dish and make it taste like spring regardless of the season. These are incredible as sandwich buns for chicken salad or as a base for smoked salmon appetizers. The herbs also make these photograph beautifully — your Instagram will thank you.
Buffalo Chicken Heaven
Add two tablespoons of shredded cooked chicken and one teaspoon of buffalo sauce to the batter. The chicken adds protein and texture, while the buffalo sauce creates a spicy kick that builds slowly. Top with blue cheese crumbles and celery leaves for the full buffalo wing experience. These are dangerously addictive and perfect for game day.
Storing and Bringing It Back to Life
Fridge Storage
Let chaffles cool completely on a wire rack for maximum air circulation — this prevents condensation that creates soggy spots. Once cool, layer them between squares of parchment paper in an airtight container. The parchment absorbs excess moisture and prevents them from sticking together like a cheesy Jenga tower. They'll keep for five days in the fridge, but honestly, mine never last more than two because they're perfect for quick meals. Store them plain without toppings — everything bagel seasoning gets weird in the fridge, and fresh herbs turn black and sad.
Freezer Friendly
Chaffles freeze beautifully, making them perfect for meal prep Sunday. Cool completely, then flash-freeze them flat on a baking sheet for thirty minutes before transferring to a freezer bag with parchment between layers. This prevents them from freezing into one solid block that requires a chisel to separate. They'll keep for three months in the freezer, though I recommend labeling the bag — frozen chaffles look suspiciously similar to frozen mystery items. To reheat, pop them straight from freezer to toaster and use the frozen waffle setting.
Best Reheating Method
The toaster is your best friend for resurrecting chaffles to their former glory. Use the medium setting and toast for one cycle, then check — they should be crispy on the outside and heated through. For a softer interior, wrap in foil and warm in a 350°F oven for five minutes. The air fryer works wonders too — three minutes at 350°F creates incredible crispiness. Add a tiny splash of water before reheating — it steams back to perfection. Never microwave unless you enjoy eating cheese-flavored rubber that tastes like disappointment and broken dreams.