I still remember the night I tried to make a “simple” dessert that turned into a kitchen catastrophe. I was staring at a bag of chocolate cookie crusts, six Snickers bars, and a half‑cup of peanut butter, convinced I could whip something sweet in fifteen minutes. The pantry looked like a candy store, but the moment I poured the melted chocolate into the crust, the kitchen filled with a cloud of burnt‑sugar perfume that made my eyes water. I was about to call it quits when my friend dared me to finish it and taste it before the clock hit midnight. That dare was the spark that turned a potential disaster into the most irresistible no‑bake Snickers treat I’ve ever made.
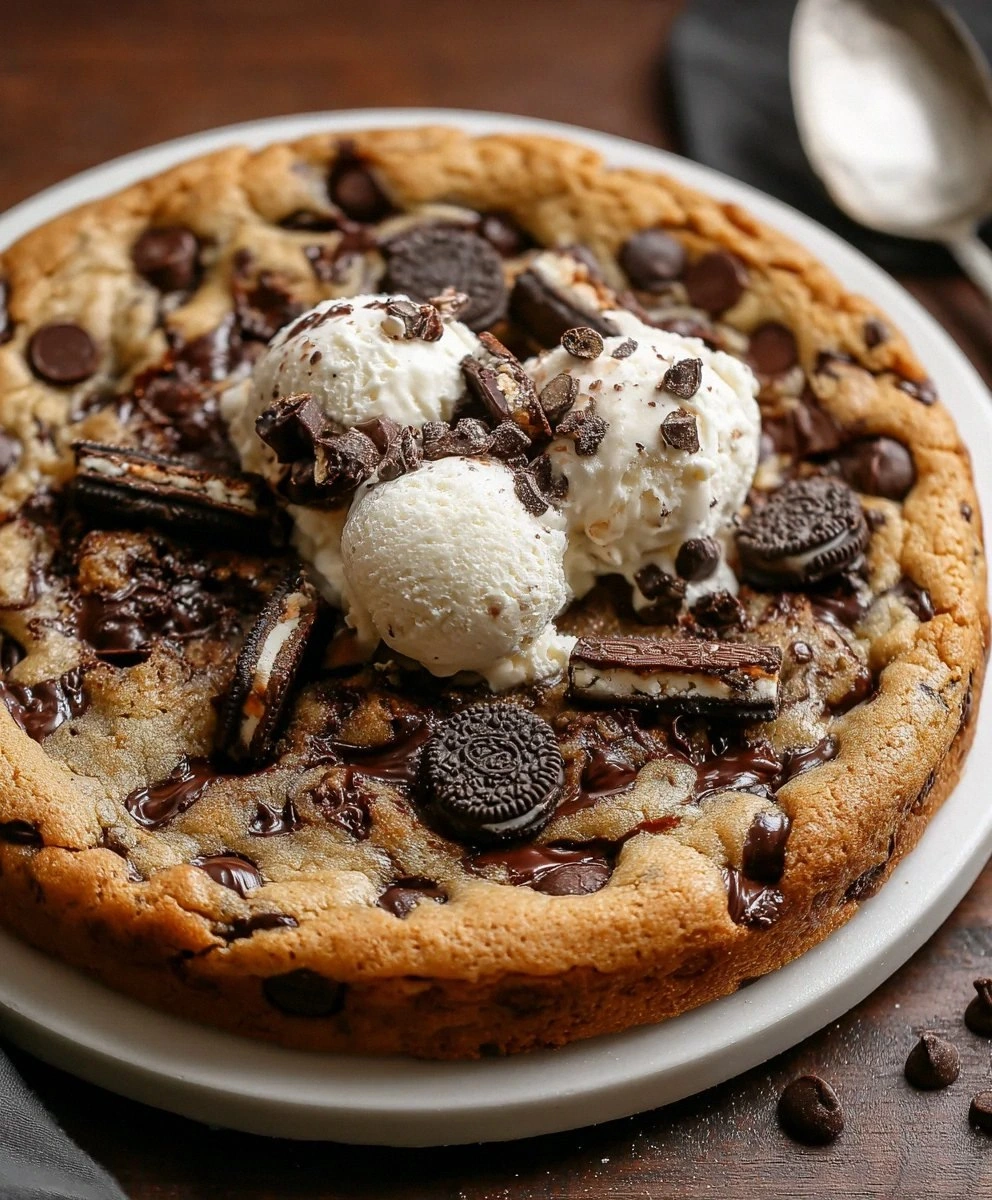
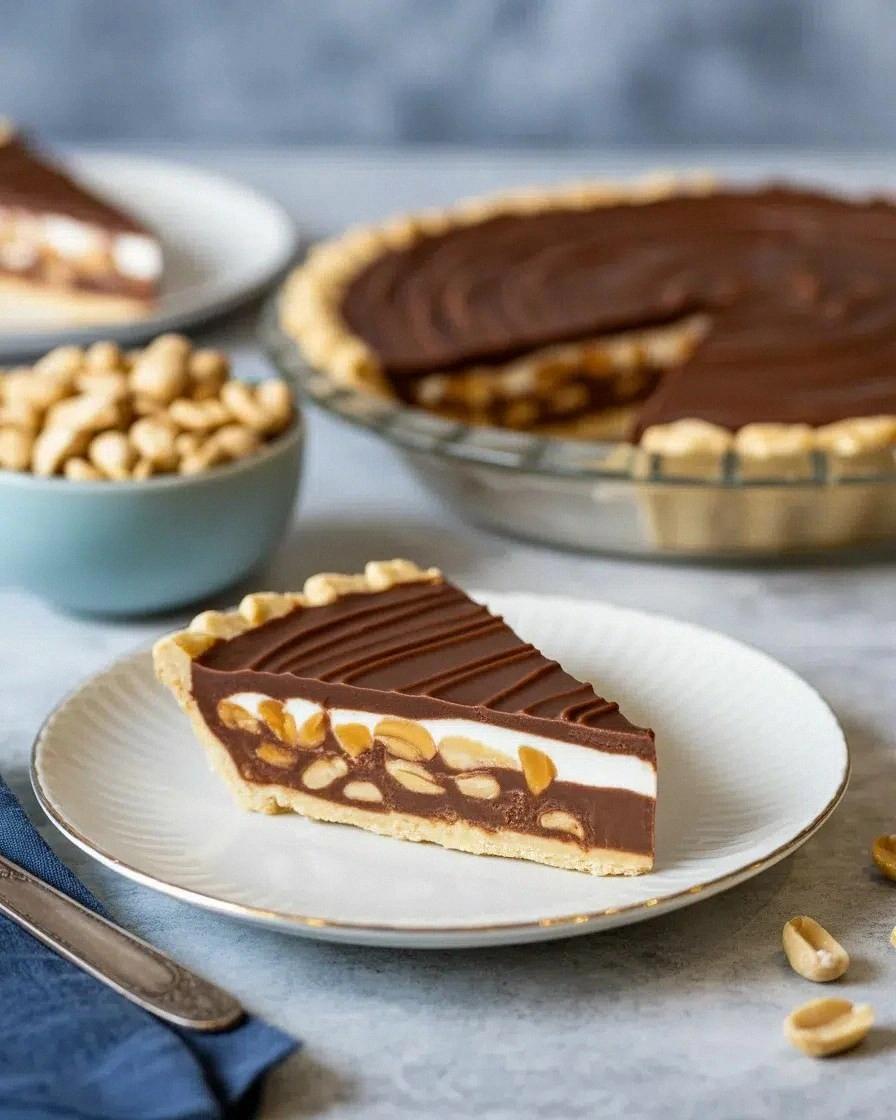
Picture the scene: a shiny chocolate crust, a mound of creamy peanut butter, and the unmistakable crunch of caramelized Snickers. The air is thick with the scent of toasted chocolate and nutty butter, the sound of a spoon slapping a mixing bowl, and the faint hum of the fridge door opening to keep everything chilled. The texture is a paradoxical blend—smooth, chewy, and crunchy—all in one bite. I could almost taste the caramel drizzle, the hot fudge swirls, and the sweet, salty crunch of the peanuts, each element dancing on the tongue. I didn’t just make a dessert; I engineered a flavor symphony that plays with contrast, texture, and pure indulgence.
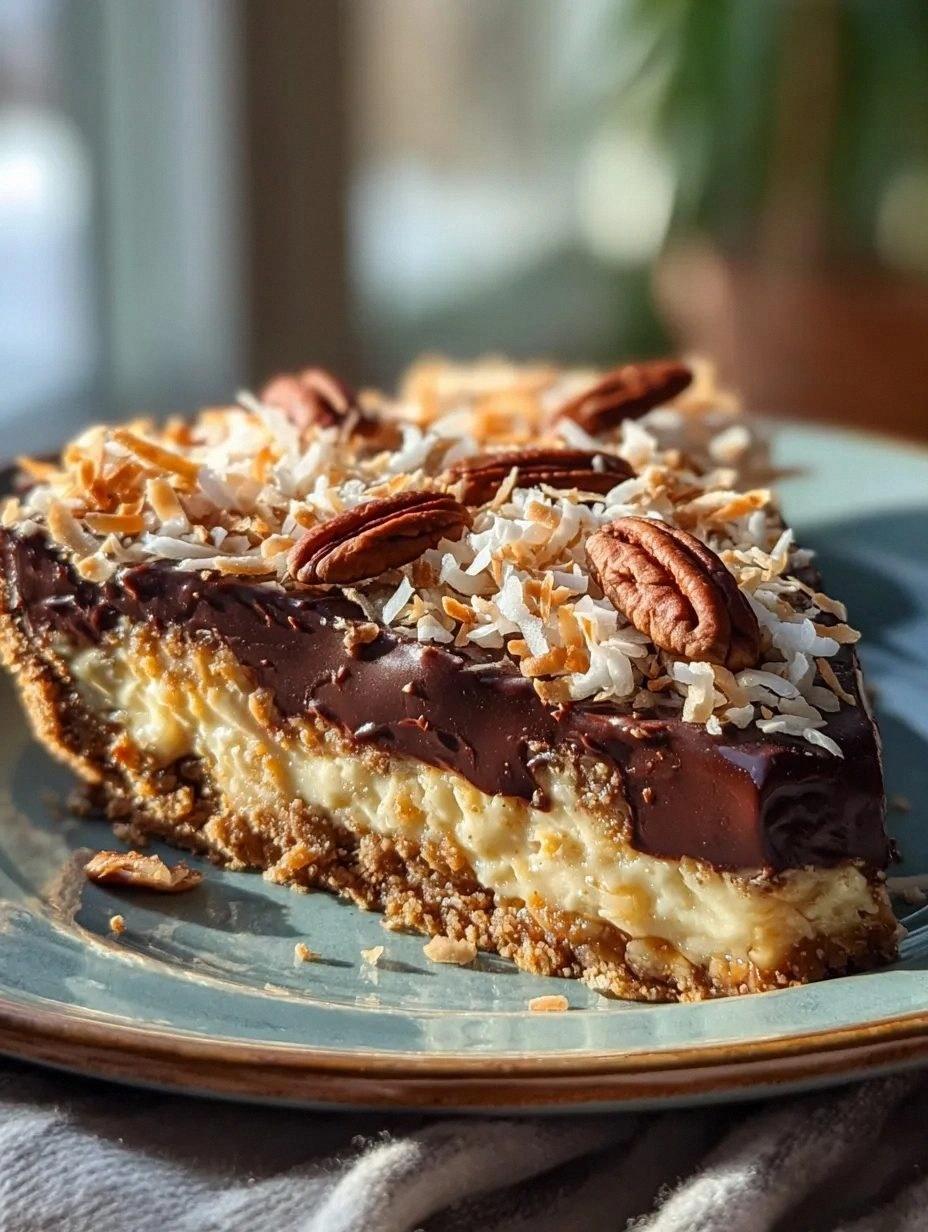
Why does this version stand out from every other Snickers‑inspired treat? First, it’s no‑bake, so you skip the oven and the risk of overcooking the chocolate. Second, the cream cheese base creates a silky, mousse‑like consistency that contrasts with the crunchy Snickers. Third, the caramel and hot fudge sauces are drizzled on top, giving a glossy finish that looks as good as it tastes. Fourth, the ready‑made crust cuts prep time to a minimum, yet it still offers a buttery, crumbly foundation that holds everything together. Finally, the recipe is scalable—whether you’re feeding a crowd or treating a single craving, the proportions stay perfect. If you’ve ever made a Snickers dessert that felt flat or over‑sweetened, you’re not alone, and this version is the fix you’ve been searching for.
There’s a twist you won’t expect: the use of whipped topping as a binding agent. Most people think cream cheese is enough to hold the mix together, but the airy whipped topping lightens the texture and gives the dessert a cloud‑like mouthfeel. It also keeps the mixture from becoming too dense, allowing the caramel and hot fudge to shine. I dare you to taste this and not go back for seconds—because once you bite, the combination of chocolate, peanut butter, and creamy mousse will have you craving more. Let me walk you through every single step—by the end, you’ll wonder how you ever made it any other way.
What Makes This Version Stand Out
- Texture: The creamy mousse base paired with crunchy Snickers bars creates a multi‑sensory experience that feels both luxurious and satisfying.
- Flavor Depth: Caramel and hot fudge sauces add layers of sweetness and richness, turning a simple dessert into a decadent indulgence.
- No‑Bake: Skip the oven entirely, saving time and preventing the dreaded burnt‑chocolate mishap that plagues many chocolate desserts.
- Ready‑Made Crust: A pre‑baked cookie crust provides a buttery foundation that is both convenient and flavorful, eliminating the need for a custom crust.
- Make‑Ahead Friendly: This dessert can be assembled a day in advance, making it a stress‑free option for parties or last‑minute gatherings.
- Balanced Sweetness: The combination of powdered sugar, peanut butter, and sauces is carefully calibrated to avoid overwhelming sweetness.
- Visual Appeal: The glossy caramel and hot fudge drizzle gives the dessert a professional, Instagram‑ready finish.
- Scalable: Whether you’re making 4 servings or 12, the proportions hold up, making it perfect for any occasion.
Alright, let’s break down exactly what goes into this masterpiece…
Inside the Ingredient List
The Flavor Base
The ready‑made chocolate cookie crust is the silent hero that holds everything together. It brings a buttery, slightly sweet crunch that contrasts beautifully with the smooth mousse. If you’re in a pinch, a store‑bought graham cracker crust can work, but the chocolate flavor is essential for authenticity. Skipping the crust would leave the dessert too soft, and the flavors would lose their structure.
The Texture Crew
Cream cheese and whipped topping are the dynamic duo that gives this dessert its signature texture. Cream cheese adds richness and a slight tang, while whipped topping introduces air and lightness. Together, they create a mousse‑like consistency that clings to the Snickers but remains pourable. If you prefer a denser dessert, reduce the whipped topping by a quarter; for a lighter version, increase it.
The Unexpected Star
Peanut butter isn’t just a flavoring; it’s a binder. Its natural oils keep the mixture cohesive, preventing it from crumbling when you slice. A good quality creamy peanut butter works best—avoid crunchy varieties that introduce unwanted texture. If you’re vegan or dairy‑free, a plant‑based cream cheese can be used, but the overall flavor profile will shift slightly.
The Final Flourish
Caramel sauce and hot fudge are the finishing touches that elevate this dessert from good to unforgettable. Drizzle them in a swirling pattern to create a glossy, decadent look. The caramel adds a buttery sweetness, while the hot fudge contributes a silky, chocolatey finish. If you’re short on time, a simple chocolate glaze can replace the hot fudge, but the contrast of flavors will be lost.
Everything’s prepped? Good. Let’s get into the real action…
The Method — Step by Step
- Place the ready‑made chocolate cookie crust in a 9‑inch springform pan and press it firmly into the bottom and up the sides. Make sure the crust is evenly distributed; a lumpy base will compromise the final texture. Let the crust sit while you prep the filling. This step is crucial because a solid foundation will hold the creamy mixture without sagging.
- In a large bowl, beat the softened cream cheese until it’s smooth and silky—no lumps allowed. Add the peanut butter and powdered sugar, continuing to beat until fully incorporated. The mixture should have a thick, pourable consistency. This is the moment of truth; if the mixture is too thick, add a splash of milk to loosen it slightly.
- Fold in the whipped topping gently with a spatula, being careful not to deflate the airy texture. The whipped topping will lighten the mousse, making it easier to spread over the crust. After mixing, taste the base and adjust sweetness if desired—add a pinch of salt or a splash more powdered sugar for balance.
- Chop the six Snickers bars into bite‑sized pieces. The size should be small enough to mingle with the mousse but large enough to maintain a crunchy texture. Sprinkle the chopped Snickers evenly over the bottom of the pan before pouring the mousse, so each bite gets a satisfying crunch.
- Pour the prepared mousse over the Snickers, spreading it evenly with a spatula. The mousse should cover all the bars, creating a uniform layer. Let the mixture sit for a minute; the mousse will begin to set slightly, making it easier to work with.
- Drizzle caramel sauce in a zig‑zag pattern across the top of the mousse. The caramel should be warm enough to flow but not so hot that it melts the chocolate. This glaze not only adds flavor but also gives the dessert a glossy, professional finish. The caramel’s buttery sweetness balances the rich chocolate.
- Add a final drizzle of hot fudge sauce, creating a swirling pattern that contrasts with the caramel. The hot fudge adds a silky chocolate layer that melts into the mousse, enhancing the overall richness. The combination of caramel and hot fudge creates a dynamic, multi‑layered flavor profile that keeps the taste buds engaged.
- Cover the pan with plastic wrap and refrigerate for at least 4 hours, preferably overnight. The cold temperature allows the mousse to set firmly, ensuring clean slices. During refrigeration, the flavors meld, creating a cohesive, mouth‑watering experience. The longer you chill, the more the textures will firm up.
- Before serving, run a knife around the edge of the pan to loosen the crust. Slice the dessert into 4 equal portions, letting the creamy mousse flow over the crust in each piece. The result is a decadent, multi‑layered bite that showcases every element.
That's it—you did it. But hold on, I've got a few more tricks that'll take this to another level…
Insider Tricks for Flawless Results
The Temperature Rule Nobody Follows
The key to a perfectly set mousse is keeping everything at the right temperature. If the cream cheese is too warm, the mixture will be runny and the dessert won’t hold its shape. Keep the cream cheese and whipped topping chilled until you’re ready to combine them. A quick check: the mixture should feel cool to the touch but not cold, ensuring it spreads easily over the crust without melting.
Why Your Nose Knows Best
Smell the caramel sauce before drizzling; it should have a rich, buttery aroma that’s not overly sweet. A caramel that smells like burnt sugar indicates it’s overcooked. The same goes for hot fudge—its scent should be deep chocolate with a hint of vanilla. Trust your nose; it’s a reliable indicator of flavor quality.
The 5‑Minute Rest That Changes Everything
After pouring the mousse, let it rest for five minutes before adding the sauces. This short pause allows the mixture to set slightly, preventing the sauces from sinking into the mousse and creating an uneven layer. It also gives the flavors a chance to meld, resulting in a more cohesive taste.
The Crunch Factor
If you want an extra crunch, sprinkle a handful of chopped peanuts or crushed graham crackers on top before the final sauce drizzle. The added texture will contrast with the creamy mousse and make each bite more exciting. Just be sure not to overload the dessert, or you’ll overpower the delicate balance of flavors.
The Sweetness Balancer
A friend once skipped the powdered sugar, thinking it would keep the dessert less sweet. The result was a bland, overly chocolatey treat that lacked depth. Always include the powdered sugar; it balances the peanut butter’s saltiness and the caramel’s richness.
The Quick Chill Trick
If you’re in a hurry, place the pan in the freezer for 30 minutes after adding the sauces. The quick freeze will set the mousse faster, but be careful not to over‑freeze or the dessert will become hard.
Creative Twists and Variations
This recipe is a playground. Here are some of my favorite ways to switch things up:
Almond Crunch Edition
Swap the peanut butter for almond butter and add chopped almonds to the mousse. The nutty flavor pairs beautifully with the chocolate base and adds a new crunch profile. This variation is perfect for those who love a more sophisticated nutty taste.
Dark Chocolate Delight
Use dark chocolate chips instead of Snickers bars for a more intense chocolate experience. Combine with a splash of espresso to deepen the flavor. This version is ideal for coffee lovers who enjoy a bittersweet bite.
Minty Fresh Twist
Add a teaspoon of peppermint extract to the mousse and drizzle a mint‑infused caramel on top. The cool mint cuts through the richness, creating a refreshing contrast. Great for summer gatherings or a holiday treat.
Spiced Caramel Surprise
Incorporate a pinch of cinnamon or cayenne pepper into the caramel sauce. The subtle heat adds depth to the sweetness, making each bite more complex. This variation works well for those who enjoy a little kick in their desserts.
Vegan Version
Replace cream cheese with a dairy‑free alternative and use plant‑based whipped topping. Opt for a vegan caramel sauce and chocolate fudge. The result is a creamy, indulgent dessert that’s entirely plant‑based.
Fruit‑Infused Finale
Add fresh berries or a drizzle of raspberry coulis to the top. The tartness balances the sweetness and introduces a fresh, juicy element. This version is especially refreshing during the warmer months.
Storing and Bringing It Back to Life
Fridge Storage
Store the dessert in an airtight container in the refrigerator for up to 5 days. Keep it wrapped tightly to prevent it from absorbing fridge odors. When you’re ready to serve, let it sit at room temperature for 10 minutes to soften slightly before slicing.
Freezer Friendly
Wrap the dessert tightly in plastic wrap and place it in a freezer bag. It can be frozen for up to 2 weeks. To thaw, let it sit in the refrigerator overnight. The texture remains intact, and the flavors stay vibrant.
Best Reheating Method
If you prefer a warm dessert, microwave the slices for 15‑20 seconds on a low setting. Alternatively, place the dessert on a baking sheet and warm it in a preheated oven at 300°F for 5 minutes. Add a tiny splash of water before reheating to create steam, which keeps the mousse moist and prevents it from drying out.