I was in the middle of a rainy Thursday night when my roommate dared me to bake something that would make even the most hardened cookie monster weep with joy. I stared at the pantry, the only thing that looked promising was a half‑finished bag of dark cocoa powder and a lonely jar of dried cranberries that had been hiding behind the flour for months. The kitchen was a symphony of clinks and the faint hum of the refrigerator, but the real soundtrack was the growl in my stomach that demanded something richer than a plain chocolate chip cookie. I thought, “What if I could marry the deep, almost bitter notes of dark chocolate with the tart pop of cranberries and the buttery crunch of walnuts?” That thought turned into a mission, and after a few missteps (including a burnt batch that tasted like charcoal), I finally cracked the code.
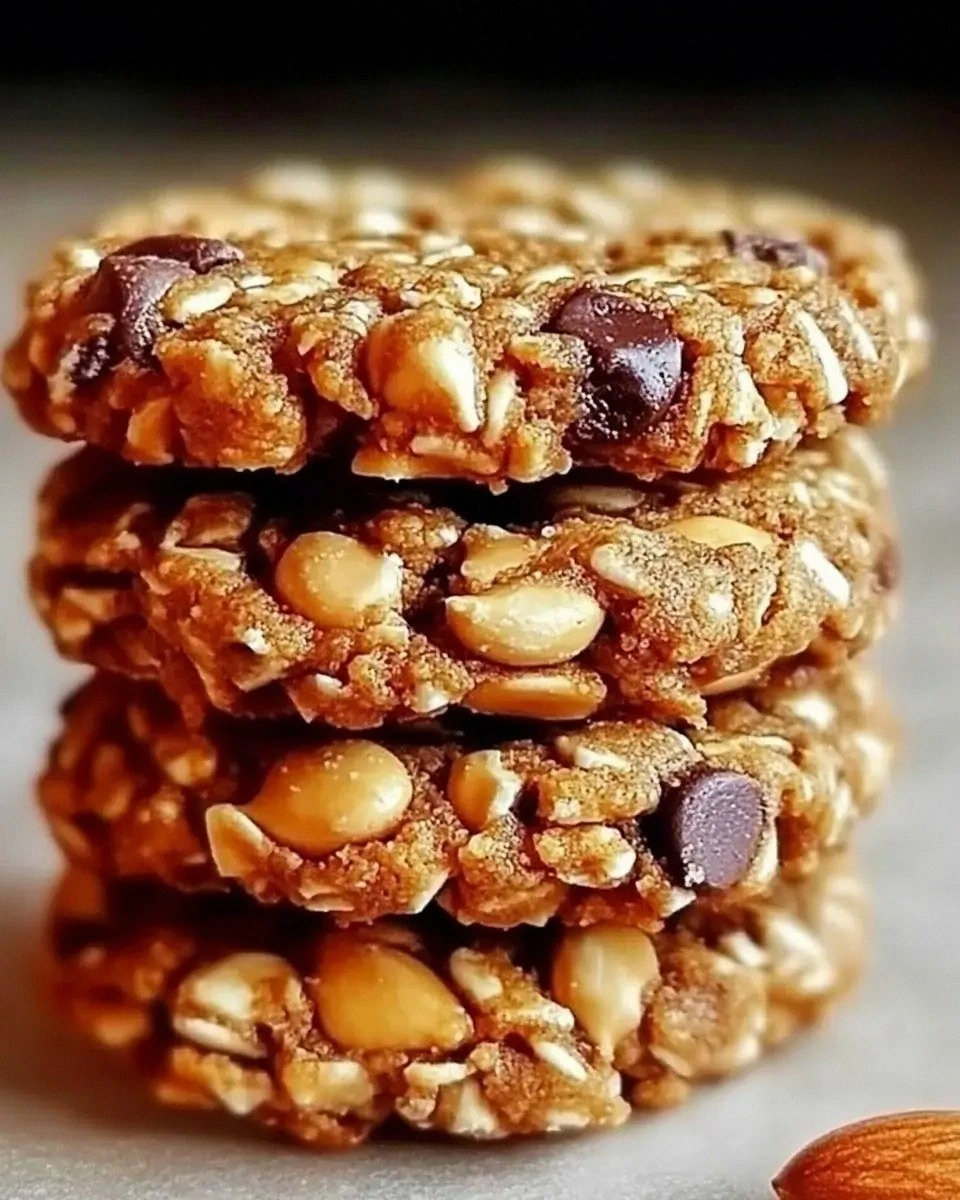
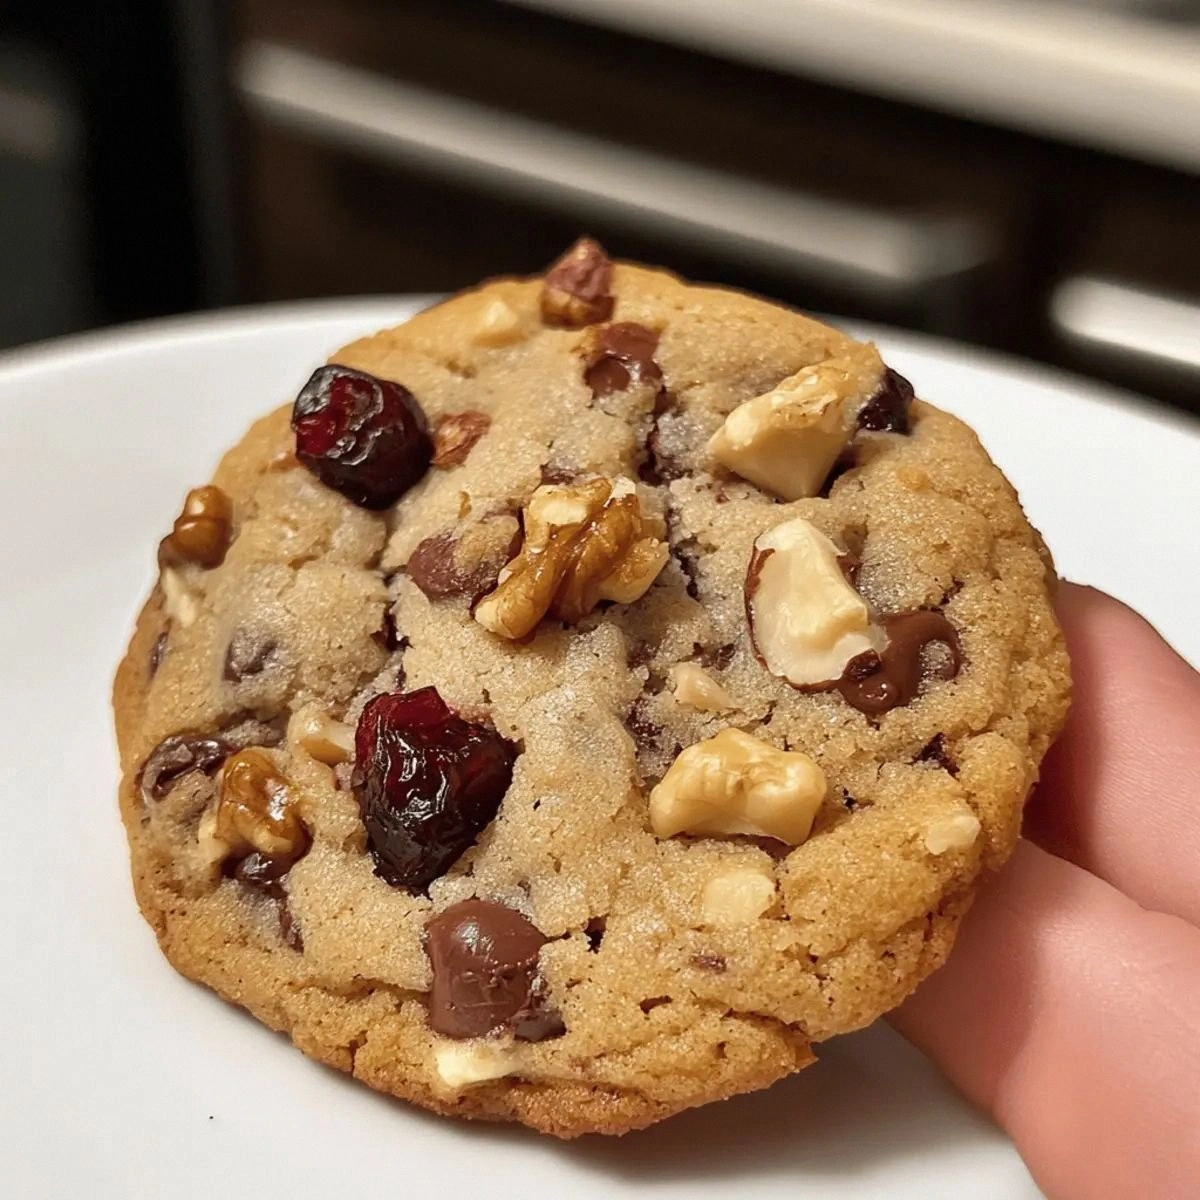
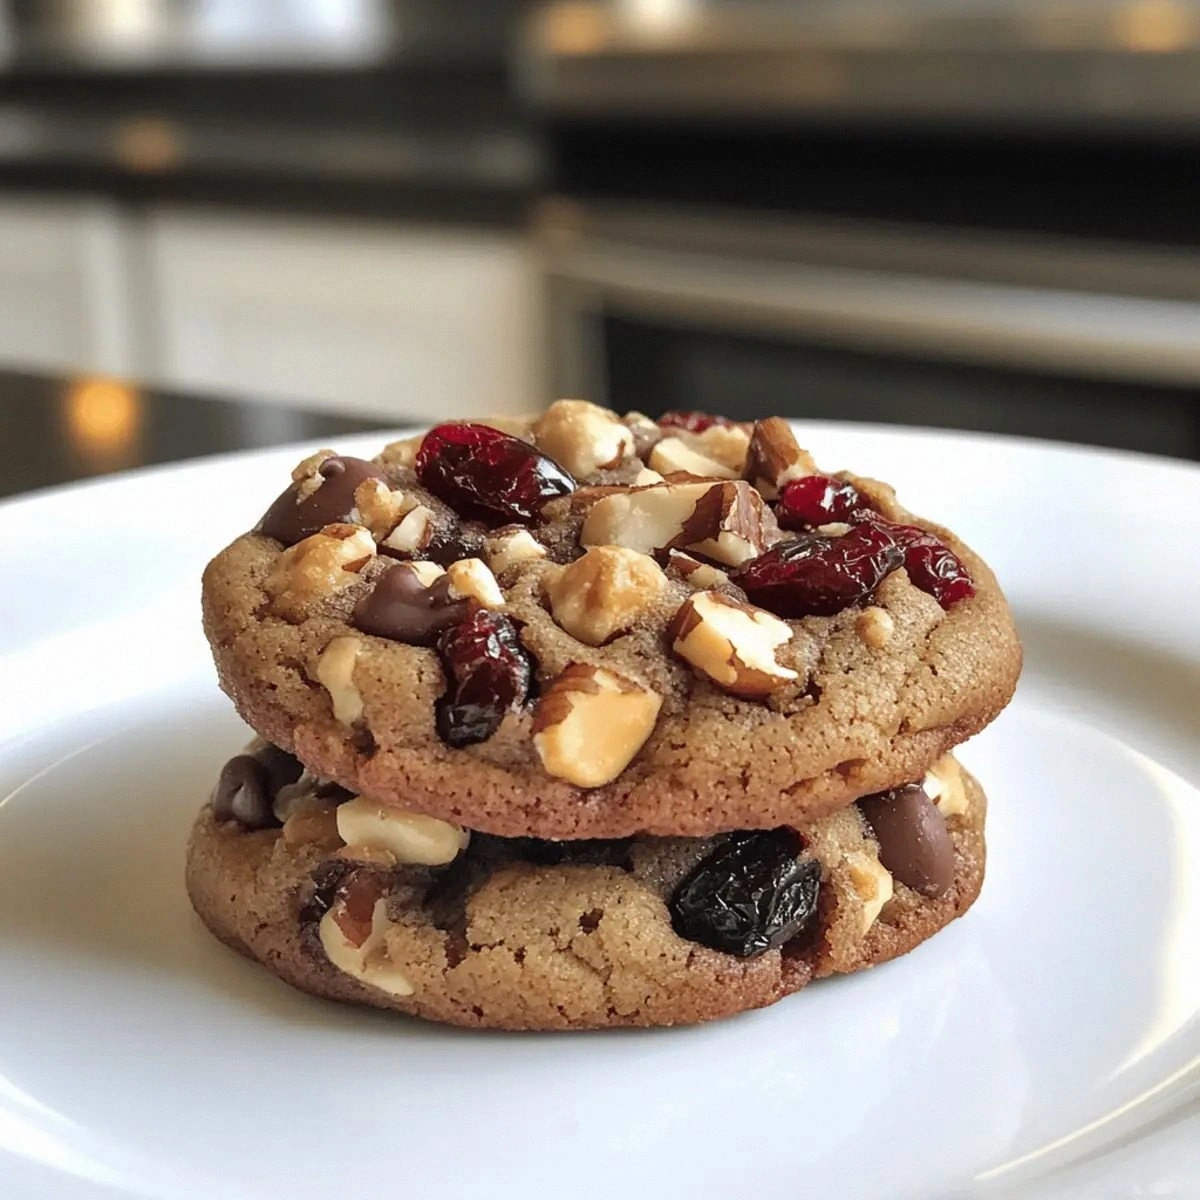
Picture this: the oven door swings open, a wave of fragrant steam rolls out, and the scent of melted chocolate, toasted walnuts, and a whisper of cranberry tang fills the air like a warm hug on a cold night. The cookies themselves are a study in contrast – the edges are crisp, snapping like thin ice under a foot, while the centers stay chewy, almost gooey, with pockets of melted chocolate that coat the palate like velvet. When you bite in, the first thing you notice is the deep cocoa flavor, followed by the bright, almost wine‑like bite of the cranberries, and finally the satisfying crunch of the walnuts that linger just long enough to keep you reaching for another. This is not just a cookie; it’s a full‑on sensory experience that makes you forget everything else happening in the world.
Most cookie recipes out there either drown you in sugar or forget the importance of texture. This version, however, walks the tightrope between sweet and tart, soft and crunchy, simple and sophisticated. I’m being bold when I say this is hands down the best version you’ll ever make at home – I’ve tried the classic chocolate chip, oatmeal raisin, and even double‑chocolate variations, and none of them hold a candle to this. The secret? A precise balance of unsweetened dark cocoa, a pinch of sea salt that amplifies every flavor, and the strategic addition of a tiny splash of espresso powder that makes the chocolate taste even deeper without turning the cookie bitter.
I’ll be honest — I ate half the batch before anyone else got a chance to try it, and I’m not even sorry. The dare was real, the challenge was real, and the reward? Pure, unadulterated cookie bliss. Let me walk you through every single step — by the end, you’ll wonder how you ever made it any other way.
What Makes This Version Stand Out
- Depth: The unsweetened dark cocoa powder gives a richness that ordinary chocolate chips can’t match, creating a flavor that feels almost luxurious.
- Contrast: Tart cranberries punctuate each bite, cutting through the sweetness and keeping the palate from getting bored.
- Texture: Toasted walnuts add a buttery crunch that contrasts beautifully with the soft, chewy interior.
- Simplicity: Despite the impressive flavor profile, the ingredient list is short and the technique is straightforward.
- Crowd‑pleaser: Even the pickiest eaters, from kids who love chocolate to adults who appreciate a hint of sophistication, rave about these cookies.
- Ingredient Quality: Using a high‑quality unsweetened dark cocoa and fresh, plump cranberries makes all the difference.
- Method: The “creaming” technique locks in air, giving you a light crumb without sacrificing chewiness.
- Make‑Ahead Potential: These cookies keep beautifully for up to a week, and they freeze like a dream.
Inside the Ingredient List
The Flavor Base
All‑Purpose Flour is the structural backbone of any cookie, providing the necessary gluten network that holds everything together. If you substitute with a low‑protein flour, the cookies will crumble like dry sand. I always recommend sifting the flour with the cocoa to avoid any lumps and to ensure an even distribution of the chocolatey goodness.
Unsweetened Dark Cocoa Powder is the hero of this recipe. Its deep, almost bitter notes create a sophisticated backdrop that makes the semi‑sweet chocolate chips shine rather than compete. If you’re using a cocoa that’s too sweet, the balance will tip, and you’ll lose that luxurious depth.
Baking Soda is the leavening agent that gives the cookies a subtle lift, ensuring they spread just enough without turning into flat discs. Too much, and you’ll get a metallic aftertaste; too little, and the cookies will be dense.
Salt isn’t just a flavor enhancer; it also strengthens the gluten network, giving the cookies a tighter crumb. A pinch of flaky sea salt on top before baking can add a delightful pop.
The Texture Crew
Unsalted Butter, when creamed with the sugars, creates tiny air pockets that result in a light, airy interior. Make sure the butter is softened but not melted – room temperature is perfect. If you melt it, you’ll lose that airy texture and end up with a denser cookie.
Granulated Sugar provides crisp edges and a slight caramelization, while Light Brown Sugar adds moisture and a subtle molasses flavor that deepens the overall taste. The combination of both sugars is what gives these cookies their signature chew.
Eggs act as binders, adding richness and helping the dough hold together. Using large eggs ensures enough liquid; if you’re on a diet, you can replace one egg with a tablespoon of unsweetened applesauce, but expect a slightly softer texture.
Vanilla Extract is the aromatic glue that ties the flavors together. A high‑quality pure vanilla will make a noticeable difference; avoid imitation extracts.
The Unexpected Star
Semi‑Sweet Chocolate Chips melt into pockets of molten chocolate that make each bite feel like a mini indulgence. If you prefer a more intense chocolate hit, swap half of the chips for dark chocolate chunks.
Diamond of California Chopped Walnuts bring a buttery crunch and a nutty aroma that complements the cocoa perfectly. Toast them lightly before folding them in to unlock their full flavor potential.
Dried Cranberries add a bright, tart contrast that cuts through the richness. If you’re not a fan of cranberries, you can substitute with dried cherries or chopped dried apricots for a similar effect.
The Final Flourish
When you combine all these components, you get a cookie that’s simultaneously complex and comforting. The secret to success is respecting each ingredient’s role and not rushing any step. If you skip the toasting of walnuts, you’ll miss that nutty depth; if you over‑mix the dough after adding the flour, you’ll develop too much gluten and end up with a tough cookie.
Everything's prepped? Good. Let's get into the real action…
The Method — Step by Step
Preheat your oven to 350°F (175°C) and line two baking sheets with parchment paper. While the oven warms up, take a moment to appreciate the aroma that will soon fill the kitchen – it’s like a promise of something extraordinary. I always set a timer for 5 minutes just to keep the rhythm; the seconds ticking down feel like a countdown to cookie heaven.
In a large mixing bowl, whisk together the flour, unsweetened dark cocoa powder, baking soda, and salt. This dry blend should be a uniform, deep brown with no streaks of white flour. Power transition: Okay, ready for the game‑changer? This is where the espresso powder (if you’re using it) joins the party, amplifying the cocoa without any coffee flavor.
Kitchen Hack: Sift the dry ingredients twice. The first sift removes lumps; the second aerates the mixture, giving you lighter cookies.In a separate bowl, cream together the softened unsalted butter, granulated sugar, and light brown sugar until the mixture is pale, fluffy, and smells like a bakery. This usually takes about 3–4 minutes with a handheld mixer on medium speed. The texture should be similar to a light mousse – that’s the air we’re trapping for the perfect crumb.
Add the eggs one at a time, beating well after each addition, then stir in the vanilla extract. The batter should become glossy and smooth, with the eggs fully incorporated. If you notice any streaks, keep mixing – the goal is a homogenous, slightly thick batter.
Gradually fold the dry ingredients into the wet mixture using a rubber spatula. Scrape the sides of the bowl to ensure everything is evenly combined. This next part? Pure magic. The dough will look thick, almost a little sticky, but that’s exactly how it should be. Over‑mixing here can develop gluten, making the cookies tough, so stop as soon as you no longer see flour streaks.
Watch Out: If the dough feels too dry, add a tablespoon of cold milk. Too much liquid will make the cookies spread excessively.Gently fold in the semi‑sweet chocolate chips, chopped walnuts, and dried cranberries. Distribute them evenly so every bite gets a balanced mix of all three. I like to sprinkle a few extra walnuts on top of each cookie for a decorative crunch.
Using a cookie scoop (about 2 tablespoons), drop rounded mounds onto the prepared baking sheets, spacing them about 2 inches apart. The dough will spread slightly, but not dramatically. Watch out: If the dough sticks to the scoop, dip it in a little flour between scoops. This ensures uniform size and shape.
Kitchen Hack: Chill the dough for 15 minutes before scooping. Cold dough spreads less, giving you thicker, chewier centers.Bake for 12‑14 minutes, or until the edges are set and just beginning to turn a golden brown while the centers still look slightly soft. The cookies will continue to firm up as they cool on the sheet – that’s the moment of truth. Resist the urge to over‑bake; you want that chewy middle.
Allow the cookies to cool on the baking sheet for 5 minutes before transferring them to a wire rack. This short rest lets the cookies set without becoming brittle. As they cool, the aroma will intensify, and you’ll hear the faint crack of the edges separating – a sound that says, “I’m ready to be devoured.”
That’s it — you did it. But hold on, I’ve got a few more tricks that'll take this to another level…
Insider Tricks for Flawless Results
The Temperature Rule Nobody Follows
Never bake cookies straight from a warm kitchen. Let the dough rest at room temperature for at least 30 minutes before baking. This allows the butter to firm up slightly, preventing excessive spreading and giving you a thicker, chewier cookie. I once tried skipping this step and ended up with flat, crispy discs that tasted like disappointment.
Why Your Nose Knows Best
When the cookies are about 10 minutes into baking, open the oven door just a crack and sniff. If you smell a deep, nutty aroma with a hint of toasted chocolate, you’re on the right track. If the scent is still raw or floury, give them another minute. Trusting your nose saves you from the dreaded over‑baked cookie.
The 5‑Minute Rest That Changes Everything
After removing the cookies from the oven, let them sit on the baking sheet for exactly five minutes. This brief pause lets the residual heat finish the cooking process and allows the sugars to crystallize just enough to create that perfect snap when you bite. A friend tried skipping this rest once — the cookies fell apart like soggy paper.
The Salt Sprinkle Secret
Just before the cookies go into the oven, lightly sprinkle flaky sea salt on top of each mound. The salt dissolves slightly during baking, creating tiny pockets of flavor that burst when you bite. This tiny step turns a good cookie into an unforgettable one.
The Double‑Fold Technique
When incorporating the chocolate chips, walnuts, and cranberries, fold them in twice: first, a gentle stir to distribute, then a second, more deliberate fold to ensure even pockets. This prevents clumps of one ingredient and guarantees each bite is balanced.
Creative Twists and Variations
This recipe is a playground. Here are some of my favorite ways to switch things up:
White Chocolate & Macadamia
Swap the semi‑sweet chocolate chips for white chocolate chunks and replace walnuts with toasted macadamia nuts. The buttery macadamia pairs beautifully with the sweet white chocolate, creating a tropical vibe.
Spicy Chili Chocolate
Add a pinch of cayenne pepper or a dash of chili powder to the dry mix. The heat amplifies the chocolate’s depth and adds an unexpected kick that will surprise even the most conservative cookie lovers.
Orange Zest Delight
Stir in one tablespoon of finely grated orange zest along with the cranberries. The citrus brightens the flavor profile, making the cookies feel lighter while still delivering that rich chocolate base.
Nut‑Free Version
Replace walnuts with toasted pumpkin seeds or sunflower seeds. The seeds give a comparable crunch without the nut allergens, and they bring a subtle earthiness that complements the chocolate.
Gluten‑Free Adaptation
Swap the all‑purpose flour for a 1:1 gluten‑free flour blend, and add a teaspoon of xanthan gum if your blend doesn’t already contain it. The texture remains tender, and you won’t miss the gluten at all.
Storing and Bringing It Back to Life
Fridge Storage
Place the cooled cookies in an airtight container and store them in the refrigerator for up to a week. The cooler environment keeps the chocolate from blooming and maintains the chewy interior. If you’re planning to serve them cold, a quick 10‑minute room‑temperature sit before serving restores their softness.
Freezer Friendly
These cookies freeze like a charm. Layer them between parchment sheets in a zip‑top bag, squeeze out excess air, and freeze for up to three months. When you’re ready to indulge, let them thaw at room temperature for 20 minutes, then give them a quick 5‑minute bake at 300°F to refresh the crust.
Best Reheating Method
If your cookies have hardened, place them on a microwave‑safe plate, sprinkle a tiny splash (about a teaspoon) of water around the edges, and microwave for 10‑15 seconds. The steam revives the interior, and the outer layer regains a slight crispness. This trick works wonders for cookies that have been sitting out for a day.