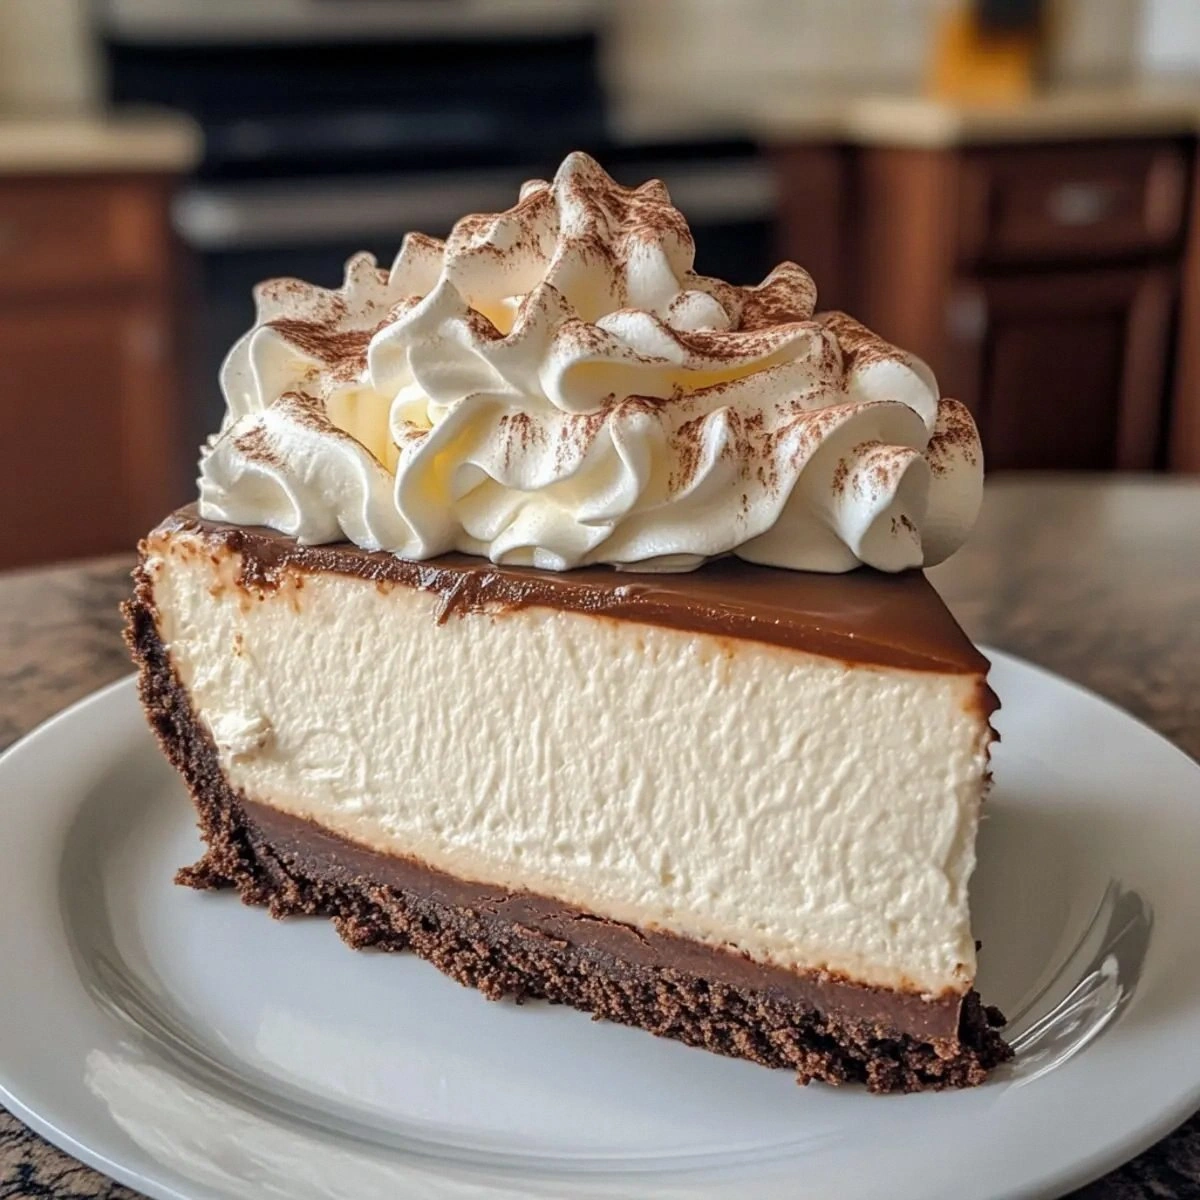
Picture this: it’s a cold, rain‑splattered Thursday night, and you’re hunched over the kitchen sink, trying to salvage a half‑melted chocolate bar that decided to stage a rebellion on the stovetop. I was there, mid‑meltdown, when a friend dared me to “make something that could hug you from the inside.” I laughed, grabbed the nearest stash of chocolate cookie crumbs, and whispered to myself, “Okay, ready for the game‑changer?” What emerged was a cheesecake that smells like a cozy cabin after a fresh snowfall, with a marshmallow‑whipped topping that’s as fluffy as a cloud‑kissed dream. This isn’t just a dessert; it’s a full‑blown sensory takeover that will make you question every other cheesecake you’ve ever tasted.
The moment the batter hits the oven, the kitchen fills with a warm, earthy aroma that’s part hot cocoa, part sweet nostalgia. Imagine the scent of a freshly brewed mug of hot chocolate mingling with the buttery crunch of a chocolate cookie crust, all while a whisper of vanilla dances in the background. You’ll hear the gentle sigh of the oven’s fan, feel the heat radiating from the metal pan, and see the top of the cheesecake rise just enough to create a golden‑kissed edge that shatters like thin ice when you cut into it. The texture? Silky, velvety, and just a touch dense enough to satisfy any sweet tooth without feeling heavy.
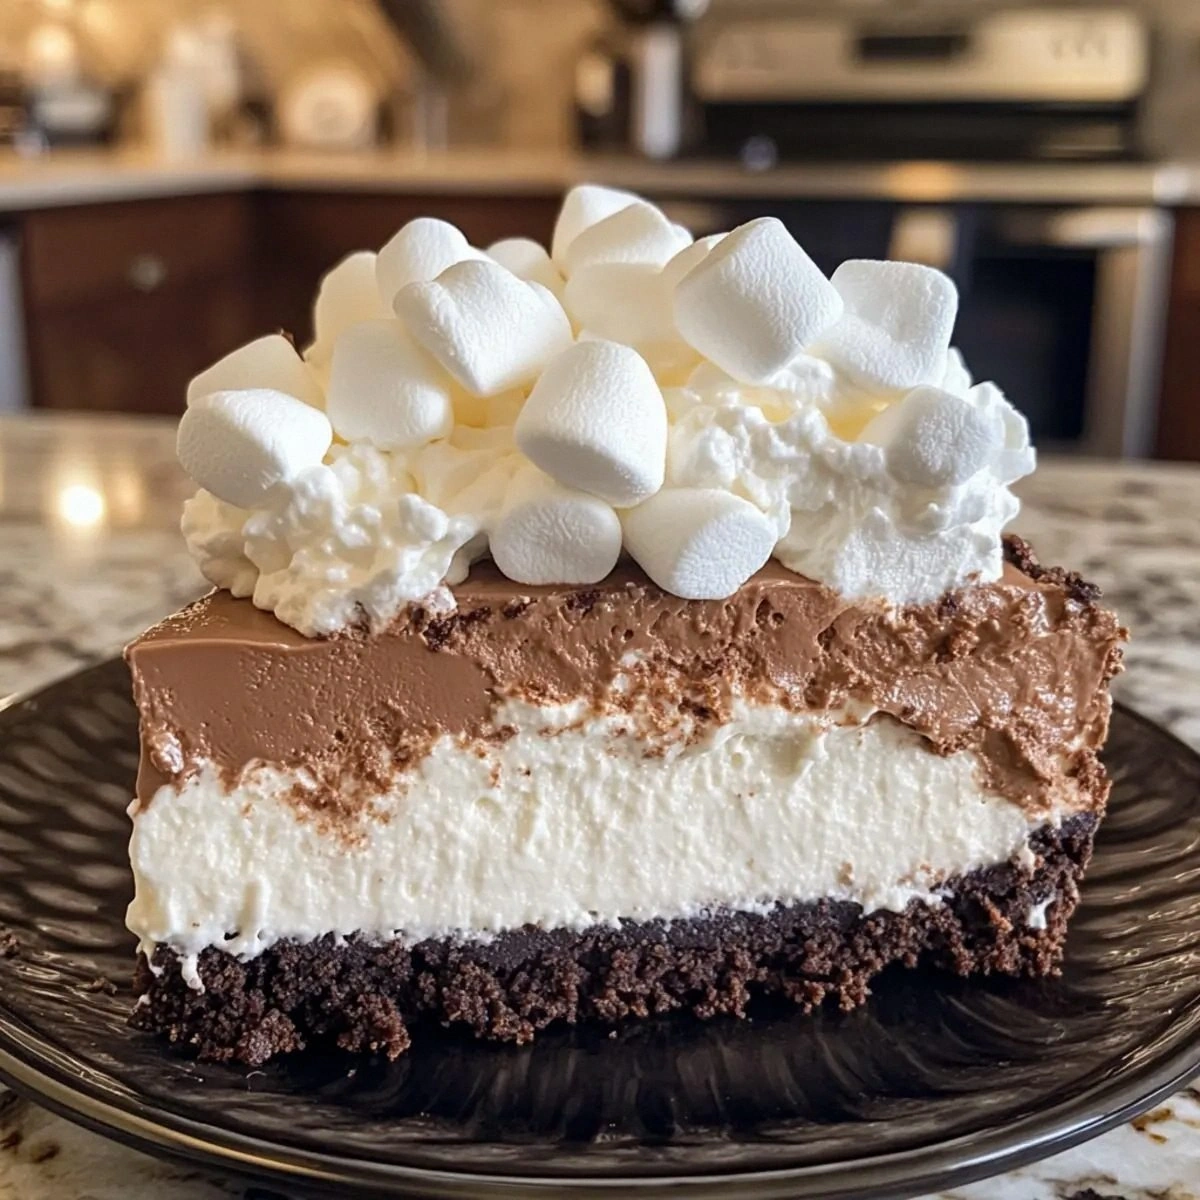
What truly sets this version apart is the marshmallow whipped cream—a light, airy crown that adds a playful bounce to each bite. Most cheesecake recipes stop at a plain sour‑cream swirl or a drizzle of chocolate; this one takes a bold detour into the realm of dessert decadence. I’m being honest— I ate half the batch before anyone else got a chance to try it, and I still have no regrets. If you’ve ever struggled with a cheesecake that’s either too dry or too soggy, you’re not alone, and I’ve got the fix that will make your kitchen the talk of the town.
But here’s the secret I’m about to spill: the hot cocoa mix isn’t just a flavor booster; it’s the binding agent that gives the filling a subtle, almost caramel‑like depth while keeping it perfectly set. This little twist is the reason why this cheesecake holds together like a dream and melts in your mouth like a warm hug. Let me walk you through every single step — by the end, you’ll wonder how you ever made it any other way.
What Makes This Version Stand Out
- Flavor Explosion: The combination of hot cocoa mix and chocolate cookie crumbs creates a chocolate intensity that’s balanced by the sweet, airy marshmallow topping. It’s like a chocolate truffle that decided to become a cheesecake.
- Texture Harmony: A buttery crust that’s crisp on the outside, a creamy, dense filling that’s still light enough to slice cleanly, and a fluffy marshmallow crown that melts on contact.
- Simplicity: Fewer than ten ingredients, all of which you probably already have in your pantry, yet the result feels like a five‑star dessert from a boutique patisserie.
- Unique Twist: Hot cocoa mix replaces traditional cocoa powder, delivering a richer, more aromatic flavor profile that you won’t find in standard cheesecake recipes.
- Crowd Reaction: I dare you to taste this and not go back for seconds. Even the most skeptical guests end up begging for the recipe.
- Ingredient Quality: Using real butter and high‑fat cream cheese ensures a luxurious mouthfeel; the marshmallow fluff adds an unexpected, cloud‑like lift.
- Cooking Method: The water‑bath technique guarantees even baking, preventing cracks and giving the cheesecake that coveted “no‑crack” finish.
- Make‑Ahead Potential: This cheesecake can be prepared a day ahead, allowing the flavors to meld and the texture to perfect itself before serving.
Inside the Ingredient List
The Flavor Base
1 cup Chocolate Cookie Crumbs: These crumbs provide the foundational chocolate crunch that mimics a chocolate cookie crust you’d find at a gourmet bakery. If you skip them, the cheesecake loses its signature snap and becomes just another plain cream cheese cake. You can swap with crushed chocolate graham crackers for a slightly sweeter edge, but the texture will be a tad softer.
1/2 cup Unsalted Butter: The butter binds the crumbs, creating a buttery, melt‑in‑your‑mouth crust. Using unsalted butter lets you control the salt level precisely; a pinch of sea salt on top can elevate the flavor dramatically. If you’re out of butter, coconut oil works in a pinch, though it adds a faint coconut note.
The Texture Crew
16 oz Cream Cheese: The star of any cheesecake, this high‑fat cheese delivers the silky, rich body that makes each bite melt on your tongue. Opt for full‑fat, room‑temperature cream cheese; low‑fat versions will turn the filling grainy and dry. If you can’t find cream cheese, a blend of mascarpone and ricotta (2:1) can mimic the texture, but the flavor will be milder.
1 cup Granulated Sugar: Sugar sweetens and helps stabilize the batter, ensuring a smooth, crack‑free surface. You could substitute with coconut sugar for a caramel undertone, but be aware it will darken the filling slightly.
3 Large Eggs: Eggs act as the structural backbone, setting the cheesecake as it bakes. Over‑beating can incorporate too much air, leading to cracks; gentle folding is the key. If you’re allergic, try using 3 tablespoons of aquafaba per egg, though the texture will be a bit lighter.
The Unexpected Star
1/2 cup Hot Cocoa Mix: This isn’t just cocoa powder; the mix includes sugar, milk solids, and a pinch of salt, giving the filling a deep, velvety chocolate flavor with a hint of caramel. Skipping it would make the cheesecake taste like plain cream cheese, missing the chocolatey heart that makes it unforgettable. For a darker, more intense flavor, use a premium Dutch‑process cocoa powder, but adjust sugar accordingly.
The Final Flourish
1 cup Heavy Cream: The cream lightens the batter, adding a luscious, airy quality that prevents the cheesecake from feeling too dense. Whipping it to soft peaks before folding ensures an even lighter texture. If you’re low on cream, substitute with half‑and‑half, but expect a slightly less silky finish.
1 cup Marshmallow Fluff: This is the crowning glory—whipped into a fluffy cloud that sits atop the cheesecake like a sweet snowcap. It adds a subtle vanilla‑marshmallow flavor that contrasts beautifully with the chocolate base. For a dairy‑free version, use a vegan marshmallow spread, though the texture may be a touch firmer.
Everything's prepped? Good. Let's get into the real action…
The Method — Step by Step
Preheat your oven to 325°F (163°C) and place a large roasting pan on the lower rack. Fill the pan with hot water to create a water bath; this gentle heat will keep the cheesecake from cracking. While the water heats, lightly grease a 9‑inch springform pan with butter, then line the bottom with parchment paper for easy removal.
In a medium saucepan, melt the unsalted butter over low heat. Add the chocolate cookie crumbs, stirring constantly for about 2 minutes until the mixture is fragrant and lightly toasted. Press this crumb‑butter blend firmly into the bottom of the springform pan, creating an even layer. Pro tip: Use the bottom of a measuring cup to smooth it out without leaving air pockets.
While the crust chills, beat the softened cream cheese in a large mixing bowl until smooth and free of lumps—about 2 minutes on medium speed. Gradually add the granulated sugar, continuing to beat until the mixture is light and fluffy, resembling a satin ribbon. This step is crucial because any sugar granules left un‑dissolved will create a gritty texture.
In a separate bowl, whisk together the hot cocoa mix, heavy cream, and marshmallow fluff until smooth. The mixture should look glossy and thick, not runny. Fold this cocoa‑cream blend into the cream cheese mixture, using a spatula to incorporate it gently. You’ll notice the batter turning a deep, luxurious brown—this is the moment of truth.
One at a time, add the eggs, beating just until each egg is incorporated before adding the next. Over‑mixing at this stage can introduce too much air, leading to cracks later. The batter should be silky and glossy, with a consistency that pours slowly off the spatula.
Pour the filling over the chilled crust, smoothing the top with an offset spatula. Tap the springform pan gently on the counter three times to release any trapped air bubbles. Then, place the pan inside the prepared water bath, ensuring the water reaches about halfway up the sides of the pan.
Bake for 45‑55 minutes, or until the edges are set and the center still has a slight jiggle when you gently shake the pan. The surface should have a faint golden hue, and you might see tiny cracks forming—don’t panic; this is normal for a water‑baked cheesecake.
Turn off the oven, crack the door open slightly, and let the cheesecake cool inside for 1 hour. This gradual cooling prevents sudden temperature changes that cause cracks. After the hour, remove the cheesecake from the water bath and let it cool completely on a wire rack.
Once cooled, cover the springform pan with plastic wrap and refrigerate for at least 6 hours, preferably overnight. While it chills, whip the remaining marshmallow fluff with a splash of heavy cream until stiff peaks form. Spread this fluffy cloud over the chilled cheesecake just before serving, and garnish with a dusting of cocoa powder or a few chocolate shavings for extra drama.
That's it — you did it. But hold on, I've got a few more tricks that'll take this to another level...
Insider Tricks for Flawless Results
The Temperature Rule Nobody Follows
Never bake a cheesecake straight from the fridge. Let the batter sit at room temperature for 15‑20 minutes before you pour it into the crust. This small step ensures the batter spreads evenly and reduces the chance of a cracked top. I once tried skipping this step, and the result was a cheesecake that looked like a cracked desert floor—definitely not the vibe we’re after.
Why Your Nose Knows Best
While the cheesecake bakes, trust your nose more than the clock. When you catch a faint, toasted chocolate scent, that’s the signal that the crust is perfectly caramelized. If you rely solely on the timer, you might end up with an over‑browned edge that overpowers the delicate marshmallow topping.
The 5‑Minute Rest That Changes Everything
After the cheesecake has cooled in the oven for an hour, let it sit uncovered on the counter for an extra five minutes. This brief exposure to ambient air helps any residual steam escape, preventing a soggy top. It’s a tiny pause that makes a massive difference in texture.
Whisking the Marshmallow Fluff
When whipping the marshmallow fluff, add a tablespoon of powdered sugar and a pinch of salt. The sugar stabilizes the peaks, while the salt cuts through the sweetness, giving the topping a more balanced flavor. I once omitted the salt and ended up with a topping that was too cloying—lesson learned.
Freezer‑Friendly Finish
If you need to make this ahead for a party, freeze the cheesecake un‑topped, then thaw in the fridge overnight before adding the marshmallow cloud. This method preserves the crumbly crust and prevents the whipped topping from becoming watery.
Creative Twists and Variations
This recipe is a playground. Here are some of my favorite ways to switch things up:
Spicy Chili Chocolate
Add a pinch of cayenne pepper and a dash of smoked paprika to the hot cocoa mix. The subtle heat will contrast the sweet marshmallow topping, creating a sophisticated flavor that’s perfect for adult palates.
Minty Fresh
Swap half of the hot cocoa mix for peppermint extract (about 1/2 tsp) and garnish with crushed peppermint candies. The cool mint will cut through the richness, making it an ideal holiday treat.
Nutty Crunch
Fold in 1/2 cup toasted chopped hazelnuts or pecans into the filling before baking. The nuts add a delightful crunch and a buttery depth that complements the chocolate beautifully.
White Chocolate Dream
Replace the hot cocoa mix with 1/2 cup white chocolate chips melted into the heavy cream. Top with toasted coconut flakes for a tropical twist that still feels indulgent.
Vegan Version
Use a plant‑based cream cheese alternative, coconut oil for the crust, and a vegan marshmallow spread. The texture will be slightly different, but the flavor profile remains deliciously chocolatey.
Berry Burst
Stir in 1/2 cup raspberry puree into the filling before baking, and garnish with fresh raspberries on top of the marshmallow cloud. The tart berries cut through the richness, offering a refreshing finish.
Storing and Bringing It Back to Life
Fridge Storage
Cover the cheesecake tightly with plastic wrap or store it in an airtight container. It will keep fresh for up to 5 days. For optimal texture, let it sit at room temperature for 10 minutes before serving to let the flavors open up.
Freezer Friendly
Wrap the entire springform pan in a double layer of foil, then place it in a freezer‑safe bag. The cheesecake freezes well for up to 2 months. When you’re ready to enjoy it, thaw overnight in the fridge, then add a fresh dollop of marshmallow whipped cream.
Best Reheating Method
To revive a refrigerated slice, place it on a microwave‑safe plate, add a tiny splash (about 1 tsp) of water, and microwave on low (30% power) for 20‑30 seconds. The steam will bring back that melt‑in‑your‑mouth softness without drying it out.