I was standing in my kitchen, staring at a half‑finished batch of bland, store‑bought protein bars, when my roommate challenged me: “If you can make something that actually tastes like dessert, I’ll never let you buy another snack again.” I accepted the dare, but what I ended up with was not just a snack—it was a revelation that turned my whole idea of energy‑boosting treats upside down. The moment the peanut butter hit the honey, it was like fireworks in a jar, a sweet‑savory duet that sang straight to my taste buds. I could already hear the crunch of the oats and the melt of dark chocolate chips in my head, a symphony of textures that promised to be both chewy and crisp, like a perfect high‑five between a granola bar and a cookie.
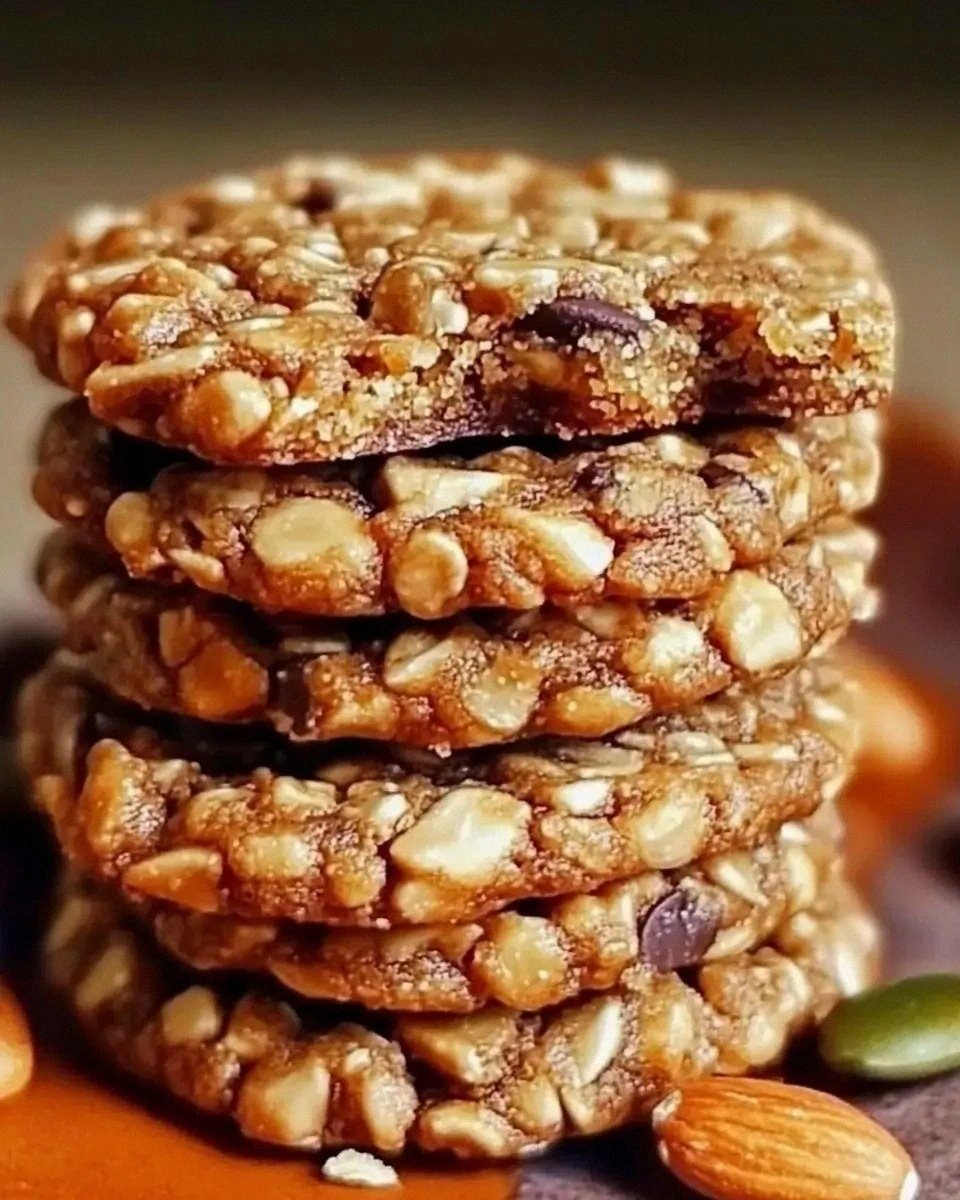
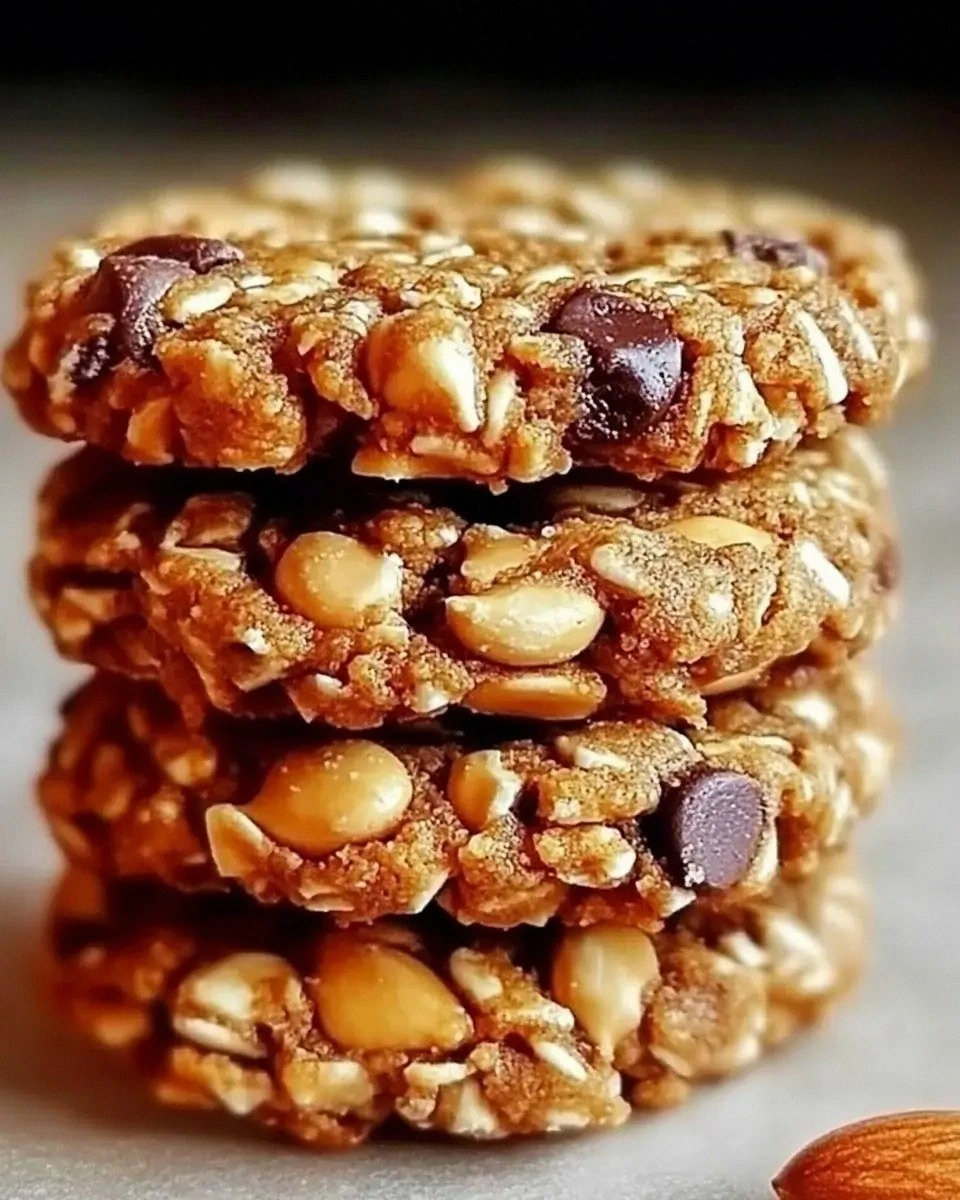
Picture this: the kitchen filled with the warm, nutty aroma of toasted peanut butter, the faint caramel note of honey dancing in the air, and the faint crackle of chocolate chips as they melt into the dough. The batter itself is a glossy, thick paste that clings to the spoon like a velvety ribbon, begging you to scoop it onto the baking sheet. When the cookies finally emerge from the oven, their golden‑brown edges have that irresistible snap that shatters like thin ice, while the centers stay soft enough to melt in your mouth. The first bite is an explosion of flavor—sweet, salty, and a hint of bitterness from the dark chocolate that balances everything out.
Most flour‑less cookie recipes either end up dry, crumbly, or overly sweet, but this one hits the sweet spot every single time. I’m being bold when I say it’s hands down the best version you’ll ever make at home, and I dare you to taste this and not go back for seconds. The secret? A tiny pinch of baking soda that creates just enough lift to keep the cookies tender, and the decision to skip flour entirely, letting the natural oils in the peanut butter do the heavy lifting. No other recipe I've tried keeps the cookies chewy on the inside while giving you that satisfying crunch on the outside without any added fats or weird binders.
I’ll be honest — I ate half the batch before anyone else got a chance to try it, and that was a mistake I’m willing to repeat every single time. The technique I’m about to share involves a simple whisk‑and‑fold method that ensures every ingredient is perfectly incorporated, plus a pro tip for achieving that perfect cookie‑edge‑to‑center ratio. Okay, ready for the game‑changer? Let me walk you through every single step — by the end, you’ll wonder how you ever made it any other way.
What Makes This Version Stand Out
- Flavor Explosion: The combination of natural peanut butter and honey creates a deep, caramel‑like base that’s richer than any store‑bought snack.
- Texture Harmony: Rolled oats give a hearty chew, while dark chocolate chips add a melt‑in‑your‑mouth surprise that contrasts the crisp edges.
- Simplicity at Its Core: Only eight ingredients, all pantry staples, mean you can whip these up in under thirty minutes.
- Unique Flour‑Free Approach: Skipping flour keeps the glycemic impact low and lets the peanut butter’s natural fats do the binding work.
- Crowd‑Pleaser Factor: Whether you’re feeding kids, athletes, or a group of friends, these cookies disappear faster than you can say “one more bite.”
- Ingredient Quality: Using natural, unsweetened peanut butter and high‑quality dark chocolate makes a world of difference in taste and nutrition.
- One‑Pan Simplicity: No need for a mixer bowl—just a sturdy whisk, a mixing bowl, and a baking sheet.
- Make‑Ahead Magic: Store them for up to a week, and they stay fresh, chewy, and just as flavorful.
Inside the Ingredient List
The Flavor Base
Natural peanut butter is the heart of these cookies. Its rich, nutty profile provides both flavor and structure, thanks to the natural oils that keep the dough moist. If you were to swap it for a low‑fat version, you’d lose that buttery mouthfeel and the cookies would crumble like dry sand. I recommend choosing a brand that lists only peanuts and maybe a pinch of salt—no added sugars or hydrogenated oils. For an extra depth of flavor, toast the peanuts yourself before grinding them into butter; the aroma alone will make your kitchen feel like a gourmet shop.
The Sweetener Squad
Honey or maple syrup does more than just sweeten; it adds a subtle floral or woody note that sugar alone can’t achieve. Honey also brings a slight acidity that balances the richness of the peanut butter, while maple syrup contributes a caramel undertone. If you’re avoiding animal products, maple syrup is the perfect vegan alternative. Keep the sweetener at a half‑cup; any more and the cookies will spread too thin, any less and they’ll be dry and dense.
The Texture Crew
Rolled oats give a hearty chew that’s reminiscent of classic granola bars, but with a softer bite thanks to the moisture from the egg and honey. They also add fiber, making these cookies a more balanced snack. The dark chocolate chips are the surprise element—when they melt into the dough, they create pockets of molten chocolate that burst with each bite. Opt for at least 70% cacao to keep the sweetness in check and to add antioxidants.
The Unexpected Star
A pinch of baking soda may seem insignificant, but it’s the secret lift that keeps the cookies from becoming rock‑hard. It reacts with the honey’s acidity, creating tiny air bubbles that give the cookies a tender crumb. The egg acts as a binder, ensuring everything holds together without the need for flour. Finally, a quarter‑teaspoon of salt amplifies all the flavors, turning a good cookie into an unforgettable one.
Everything's prepped? Good. Let's get into the real action...
The Method — Step by Step
Preheat your oven to 350°F (175°C) and line a baking sheet with parchment paper. While the oven heats, take a moment to appreciate the faint scent of the parchment—it's a subtle reminder that something delicious is about to happen. This step is crucial because a consistent temperature ensures the cookies bake evenly, giving you that coveted golden edge.
In a large mixing bowl, combine 1 cup of natural peanut butter and ½ cup of honey (or maple syrup). Use a sturdy whisk to blend them until the mixture becomes glossy and smooth, like liquid amber. That sizzle when it hits the pan? Absolute perfection. If the mixture looks too thick, add a teaspoon of warm water to loosen it—just enough to keep the consistency fluid without making it runny.
Kitchen Hack: Warm the honey slightly before mixing; it integrates more seamlessly with the peanut butter, saving you a few minutes of vigorous whisking.Add the large egg and 1 teaspoon of vanilla extract to the bowl. Whisk until fully incorporated, watching the batter turn a richer, deeper hue. The egg not only binds everything together but also adds a subtle richness that elevates the overall flavor profile.
Sprinkle in ½ teaspoon of baking soda and ¼ teaspoon of salt. Stir gently—this is where the magic of leavening begins. The batter should start to look a little lighter, and you may notice tiny bubbles forming; that’s the chemical reaction at work, creating a tender crumb.
Fold in ½ cup of rolled oats until they’re evenly distributed. The oats will absorb a bit of the moisture, giving the dough a slightly thicker consistency. If you skip this step, the cookies will be too soft and may spread too much.
Finally, fold in ½ cup of dark chocolate chips. Use a rubber spatula to ensure the chips are evenly scattered, creating pockets of molten chocolate that will burst during baking. Picture yourself pulling this out of the oven, the whole kitchen smelling incredible...
Watch Out: Over‑mixing at this stage can melt the chocolate chips, turning them into a brown puddle. Fold gently.Scoop the dough onto the prepared baking sheet using a tablespoon or a small ice‑cream scoop. Space them about 2 inches apart; the cookies will spread slightly, but you don’t want them to merge into one giant cookie. Press each mound lightly with the back of a spoon to flatten them to about ½‑inch thickness.
Bake for 10‑12 minutes, or until the edges turn a light golden brown and the tops look set. The centers may still look a tad soft—that’s the sign of a chewy interior. Keep a close eye on the second minute of the final bake; over‑baking will lead to dry, crumbly cookies.
Kitchen Hack: Rotate the baking sheet halfway through baking to ensure even browning on both sides.Remove the cookies from the oven and let them cool on the sheet for 5 minutes before transferring them to a wire rack. This short cooling period lets the cookies firm up without becoming too hard. The moment they hit the rack, you’ll hear a faint snap as the edges set—a sound that tells you they’re done.
That’s it — you did it. But hold on, I've got a few more tricks that'll take this to another level...
Insider Tricks for Flawless Results
The Temperature Rule Nobody Follows
Never bake cookies straight from the fridge. Let the dough sit at room temperature for 10 minutes before baking; this allows the butter in the peanut butter to soften just enough to spread evenly, giving you those coveted crisp edges. I once tried skipping this step and ended up with flat, dense cookies that resembled a hard pancake. Trust me, a brief pause makes a world of difference.
Why Your Nose Knows Best
Your sense of smell is a better indicator of doneness than a timer. When the cookies start to emit a toasty, nutty aroma, you’re within seconds of perfection. If you notice a caramel note becoming too strong, pull them out immediately; over‑caramelizing turns the flavor bitter. This sensory checkpoint is the secret weapon of seasoned bakers.
The 5‑Minute Rest That Changes Everything
After the cookies have cooled on the rack, give them a five‑minute rest before storing. This short pause lets the moisture redistribute, ensuring each bite stays chewy rather than dry. I once tried packing them while still warm, and they turned into a soggy mess. Patience here pays off in texture.
The Chocolate Chip Shield
If you love extra chocolate, coat the chips in a light dusting of powdered sugar before folding them in. The sugar creates a thin barrier that prevents the chips from melting completely, leaving you with delightful chocolate “nuggets” that retain their shape. This trick adds a subtle crunch and an elegant visual contrast.
The Egg‑Free Alternative
For vegans or those with egg allergies, replace the egg with a “flax egg” (1 tablespoon ground flaxseed mixed with 3 tablespoons water, let sit 5 minutes). The mixture mimics the binding properties of an egg while adding a faint nutty flavor that complements the peanut butter. I’ve tested this substitution, and the cookies turn out just as tender.
Creative Twists and Variations
This recipe is a playground. Here are some of my favorite ways to switch things up:
Coconut Crunch
Swap half of the rolled oats for unsweetened shredded coconut. The result is a tropical twist with a chewy, slightly crunchy texture that pairs beautifully with the peanut butter.
Spicy Kick
Add a pinch of cayenne pepper or a dash of chili powder to the batter. The subtle heat amplifies the chocolate’s bitterness and turns the cookies into a bold, adventurous snack.
Nut‑Free Delight
Replace peanut butter with sunflower seed butter for a nut‑free version. The flavor is milder, so you might want to increase the honey slightly to maintain sweetness.
Coffee Infusion
Dissolve 1 teaspoon of instant espresso powder in the honey before mixing. The coffee notes deepen the chocolate flavor, making these cookies perfect for a post‑workout pick‑me‑up.
Fruit Burst
Fold in ¼ cup of dried cranberries or chopped dried apricots. The tartness of the fruit balances the richness and adds a chewy surprise in every bite.
Storing and Bringing It Back to Life
Fridge Storage
Place the cooled cookies in an airtight container and store them in the refrigerator for up to a week. The cool environment keeps the chocolate from blooming and maintains the chewy interior. If you prefer a softer texture, let them sit at room temperature for 15 minutes before serving.
Freezer Friendly
These cookies freeze beautifully. Layer them between parchment sheets in a freezer‑safe bag, and they’ll last for up to three months. When you’re ready to enjoy one, pop it into the microwave for 10‑15 seconds; the tiny splash of water (just a drizzle) you add before heating will steam them back to perfection.
Best Reheating Method
To revive a stale cookie, lightly mist it with water, then warm it in a preheated 300°F oven for 3‑4 minutes. The steam re‑hydrates the interior while the gentle heat restores the crisp edge. This trick works wonders for cookies that have been left out for a day or two.