It all started on a rain‑slick Saturday afternoon when I was rummaging through the back of my fridge, hunting for something that would satisfy the sudden, almost primal craving for Mexican comfort food. I found a handful of dried chilies, a couple of onions, and a half‑pound chunk of chuck that had been sitting there longer than my patience. The kitchen smelled like a storm brewing, and the thought of turning that humble stash into something that would make my taste buds sing felt like a dare from a long‑lost friend. I dared myself to turn a slow‑cooked, melt‑in‑your‑mouth beef into tacos that would leave a lingering, smoky trail on the palate.
Picture this: the first bite of a warm tortilla, the beef already shredded like a cloud of flavor, the sauce thick enough to coat your tongue like velvet, and a hint of vinegar that cuts through the richness, leaving a clean finish. The aroma that rises from the pot is a symphony of roasted chilies, garlic, and cumin, while the sizzling sound when you lift the ladle is a promise of something extraordinary. I swear the kitchen was so fragrant that even the cat stopped meowing and stared, eyes wide, as if it understood the culinary revolution about to unfold. And that’s just the beginning.
Why does this version stand out from the endless stream of “birria” recipes that flood the internet? The secret lies in the balance of heat, acidity, and the slow‑cook technique that turns tough cuts of beef into tender, fall‑apart meat. I’ve refined this recipe through countless trials—once I accidentally dropped the chilies into the pot too early, and the sauce turned out as bitter as a bad joke. That experience taught me the importance of timing and the art of building flavor layer by layer. I’m not here to give you a generic guide; I’m here to give you a recipe that feels like a culinary confession, a story you can tell your friends with a wink.
And there’s a twist you won’t see in most birria recipes: a splash of vinegar that brightens the sauce and a touch of oregano that adds a green, herbal lift. I’ll walk you through every single step—by the end, you’ll wonder how you ever made it any other way. Let’s dive into the heart of this dish and discover why it’s the best version of birria tacos you’ll ever make at home.
What Makes This Version Stand Out
- Flavor Depth: The combination of dried chilies, cumin, and oregano creates a complex, smoky profile that lingers on the tongue. Each bite is a revelation, revealing new layers of heat and sweetness.
- Texture Perfection: Slow‑cooking the beef until it shreds effortlessly ensures a melt‑in‑your‑mouth experience. The sauce’s silky consistency coats the meat like a velvet blanket.
- Time Efficiency: While the beef cooks for hours, the prep is minimal—just a few minutes of chopping and seasoning. You’ll have a full‑meal ready in under a day.
- Make‑ahead Friendly: The dish tastes even better the next day, making it ideal for meal prep or entertaining. Store the sauce and meat separately and reheat gently.
- Authenticity: Using dried chilies and vinegar gives it a true Mexican touch that most copycat recipes miss. The flavor is genuine, not watered down.
- Crowd‑Pleaser: Friends who have tried this version rave about the depth of flavor. Even skeptics of spicy foods admit it’s a game‑changer.
- Ingredient Quality: Selecting fresh, high‑quality chilies and beef makes a noticeable difference in the final taste.
- Versatility: The base can be tweaked with different proteins or spices without losing its core identity.
Alright, let’s break down exactly what goes into this masterpiece…
Inside the Ingredient List
The Flavor Base
At the heart of this birria lies a symphony of aromatics that set the stage for everything that follows. The onions and garlic sauté in a splash of oil until they’re caramelized and fragrant, forming a sweet, savory foundation. The tomatoes add a subtle acidity that balances the richness of the beef. If you skip any of these, you’re missing the core flavor that makes the sauce sing. For a subtle twist, try using fire‑roasted tomatoes—they add a smoky undertone that complements the chilies.
The Texture Crew
The beef, whether chuck or brisket, is the star that carries the sauce’s boldness. It’s cut into large chunks so it can absorb the spices and broth during the slow cook. The broth acts as the liquid medium that pulls all the flavors together. If you use a low‑sodium broth, you’ll have more control over the saltiness of the finished dish. A good rule of thumb: choose a broth that has a clean, beefy profile—avoid those with added vegetables or spices that could clash.
The Unexpected Star
The dried chilies are the unsung hero that gives this birria its signature heat and depth. They’re not just hot; they bring a smoky, earthy undertone that can’t be replicated with fresh chilies. Soak them in hot water for 10 minutes to soften before grinding or chopping. If you can’t find the exact chilies, a mix of guajillo and ancho works well. This substitution still delivers that classic Mexican flavor profile.
The Final Flourish
Finish the sauce with a splash of vinegar to cut through the richness and brighten the overall taste. The oregano and cumin add herbal, earthy notes that anchor the dish. Bay leaves bring a subtle floral aroma that elevates the broth’s complexity. The cilantro and diced onions are added at the end to keep their bright freshness intact. If you’re watching your sodium, you can reduce the amount of broth and increase the vinegar slightly, balancing the flavors without compromising the integrity of the dish.
Everything’s prepped? Good. Let’s get into the real action…
The Method — Step by Step
- Step 1: Prep the Chilies – Start by removing stems and seeds from the dried chilies. Soak them in hot water for 10 minutes to soften. Once softened, grind them into a coarse paste using a mortar and pestle or a spice grinder. The goal is to release the oils without turning it into a fine powder. I dare you to taste this and not go back for seconds; the aroma alone will have you hooked.
- Step 2: Sauté Aromatics – In a large skillet, heat a tablespoon of oil over medium heat. Add the diced onion and minced garlic; sauté until the onions are translucent and the garlic is fragrant, about 3–4 minutes. The sizzling sound when they hit the pan? Absolute perfection. This step builds the flavor base that the rest of the dish will lean on.
-
Step 3: Brown the Beef – Season the beef chunks generously with salt, pepper, cumin, and oregano. Add them to the skillet in batches, searing each side until a brown crust forms. This caramelization locks in juices and adds a savory depth. Watch the edges pull away; that’s when the Maillard reaction kicks in. Kitchen Hack: Use a cast‑iron skillet for an even sear; it retains heat better and gives a more uniform crust.
- Step 4: Assemble in Crock Pot – Transfer the browned beef to the crock pot. Add the sautéed onion and garlic, the ground chilies, diced tomatoes, and bay leaves. Pour in the broth and vinegar. Stir everything together so the meat is fully coated. The slow cooker will work its magic, turning the beef into tender, flavorful shreds over the next hours.
- Step 5: Cook Low and Slow – Cover and cook on low for 8 hours or until the beef is fork‑tender and falling apart. The long, low heat allows the spices to meld and the broth to reduce into a thick, glossy sauce. This is the moment of truth; you’ll smell the sauce turning into a fragrant, smoky elixir.
- Step 6: Shred the Beef – Once cooked, remove the beef from the pot and shred it with two forks. Return the shredded meat to the pot, mixing it back into the sauce. The meat should be moist and infused with every nuance of flavor. If the sauce looks too thin, let it simmer uncovered for a few minutes to thicken.
- Step 7: Warm the Tortillas – While the meat rests, warm the tortillas on a skillet or in a damp paper towel. They should be pliable and slightly charred on the edges, giving that crisp texture that contrasts with the silky meat.
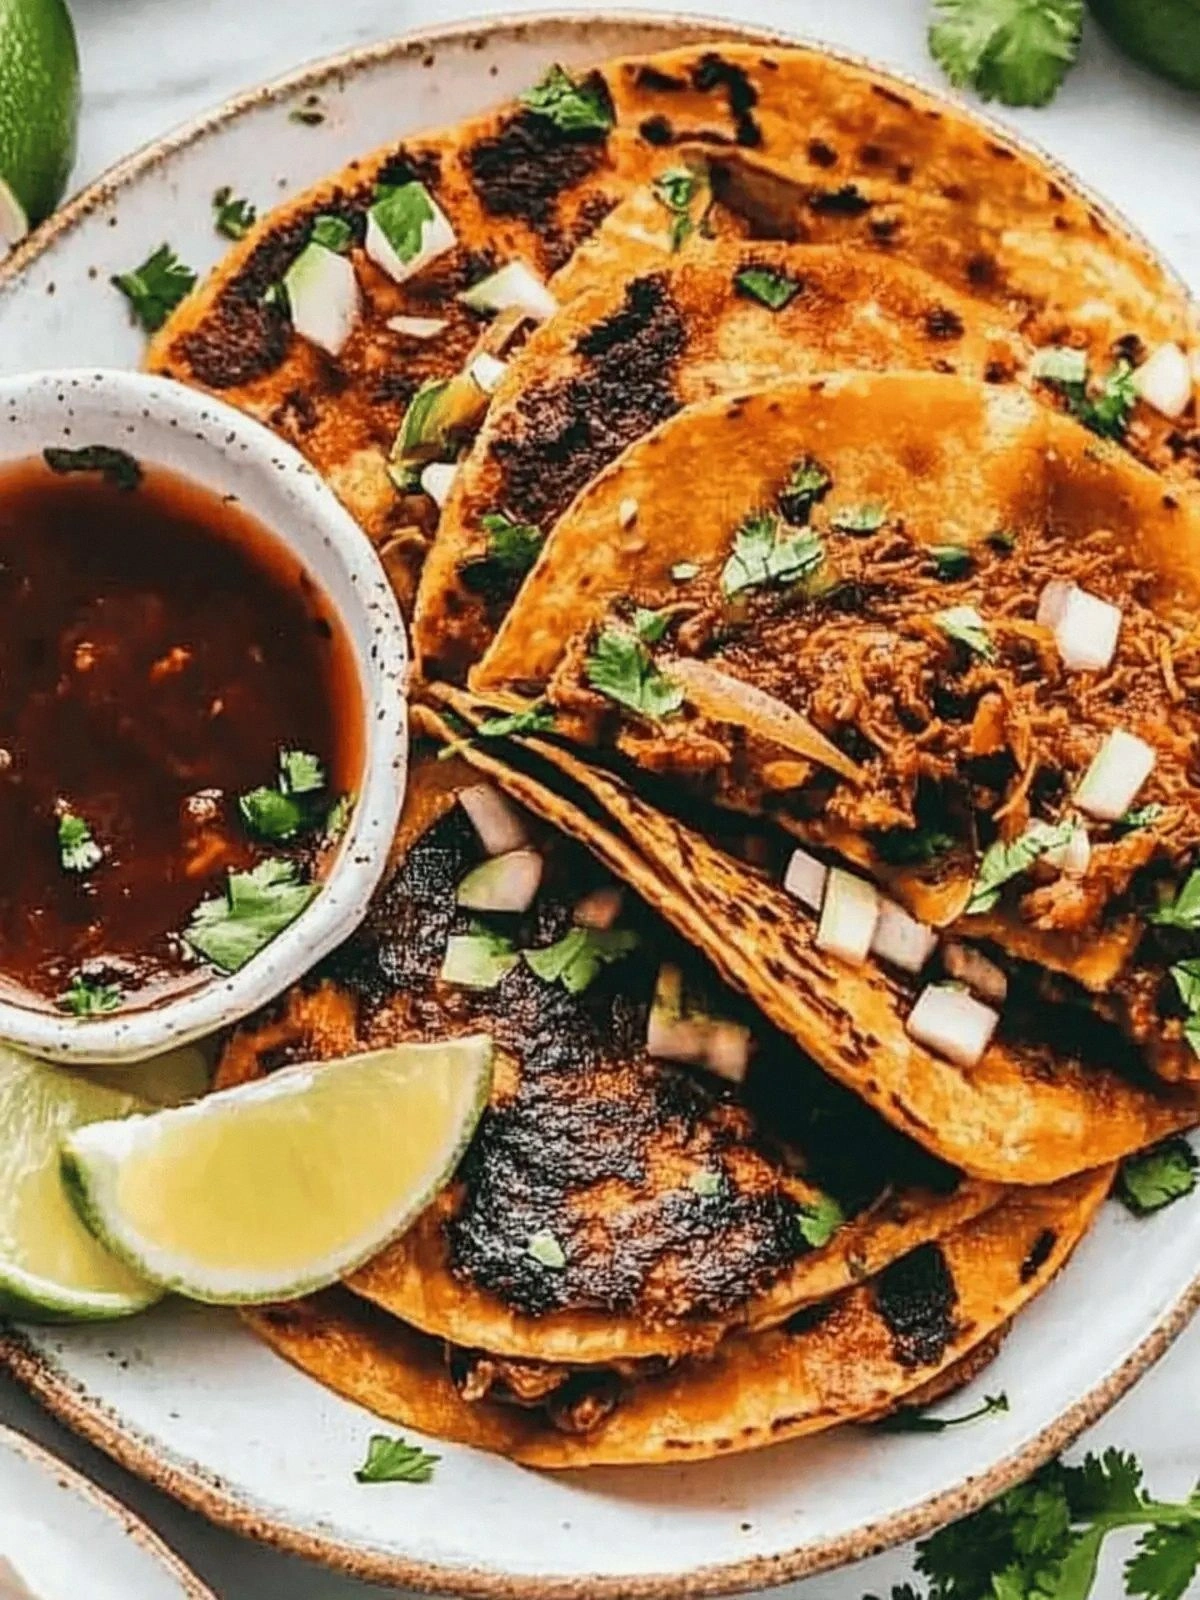
- Step 8: Assemble the Tacos – Spoon a generous amount of shredded beef onto each tortilla. Top with diced onions, fresh cilantro, and a squeeze of lime if desired. The sauce should coat the meat like velvet, and the fresh herbs will cut through the richness.
- Step 9: Serve Immediately – Plate the tacos with a side of lime wedges and a sprinkle of extra cilantro. The aroma will fill your kitchen, and the first bite will transport you to a bustling Mexican street market. This is pure magic.
- Step 10: Enjoy and Share – Take a moment to savor the first bite, then watch as friends and family reach for seconds. I’ll be honest — I ate half the batch before anyone else got to try it. The reaction? A chorus of “I can’t believe it’s homemade!”
That’s it — you did it. But hold on, I've got a few more tricks that'll take this to another level…
Insider Tricks for Flawless Results
The Temperature Rule Nobody Follows
Many people cook birria on high heat, which can make the meat tough. Cooking on low allows collagen to break down slowly, resulting in melt‑in‑your‑mouth texture. Keep the crock pot at its lowest setting and let it do its thing. I’ve seen even tough cuts turn into silky tender shreds with this approach.
Why Your Nose Knows Best
When the sauce starts to bubble, trust your nose. A deep, earthy aroma signals that the chilies are fully integrated. If you notice a sharp, vinegary smell, it means the vinegar is dominating; reduce it slightly.
The 5‑Minute Rest That Changes Everything
After cooking, let the pot sit covered for 5 minutes before shredding. This rest period allows the juices to redistribute, making the meat even more moist. Skipping this step often results in a dry, uneven texture.
Use Freshly Ground Chili Powder for Extra Depth
Instead of pre‑ground chili powder, grind your own from dried chilies. Freshly ground spice releases more essential oils, intensifying the flavor profile. It’s a small extra effort that pays off big time.
Keep the Sauce Thick with a Slurry
If your sauce is too thin after shredding, whisk a tablespoon of flour with a splash of water to create a slurry. Stir it into the pot and let it simmer until thickened. This keeps the sauce from separating when you plate the tacos.
Serve with a Tangy Lime Slaw
Whip up a quick slaw with shredded cabbage, lime juice, a touch of honey, and a pinch of salt. The acidity will cut through the richness, giving a bright counterpoint to the beef.
Creative Twists and Variations
This recipe is a playground. Here are some of my favorite ways to switch things up:
Chicken Birria
Swap the beef for shredded rotisserie chicken. The cooking time drops to 4 hours, but the flavor profile stays intact. This version is lighter and works great for a quick weeknight dinner.
Vegan Birria Tacos
Use jackfruit or seitan instead of beef. Simmer in the same sauce for 2 hours until the plant‑based protein absorbs the chilies. Serve with vegan cheese for a fully plant‑based feast.
Spicy Chipotle Twist
Add a chipotle pepper in adobo to the sauce for an extra kick. The smoky heat pairs beautifully with the sweet chilies, giving the dish a layered complexity.
Sweet Potato Tacos
Roast diced sweet potatoes until caramelized and toss them into the sauce at the end. The natural sweetness balances the heat and adds a comforting texture.
Cheese‑Loaded Tacos
Top each taco with crumbled queso fresco or a sprinkle of melted cheddar right before serving. The cheese adds a creamy contrast to the smoky sauce.
Storing and Bringing It Back to Life
Fridge Storage
Store the shredded beef and sauce separately in airtight containers for up to 4 days in the refrigerator. Keep the tortillas in a sealed bag to maintain freshness. When ready to serve, reheat the sauce gently on the stove and warm the tortillas in a skillet.
Freezer Friendly
Freeze the beef and sauce in freezer‑safe containers for up to 3 months. Thaw overnight in the fridge, then reheat on the stove. The flavor remains robust after freezing.
Best Reheating Method
To revive the sauce, add a splash of water or broth and simmer on low until it reaches the desired consistency. For the tortillas, wrap them in foil and warm in a 350°F oven for 5 minutes.