I was standing in my kitchen, staring down a pan of sizzling oil that had just decided to turn into a mini volcano. The smoke alarm was about to join the chorus, and my roommate was shouting, “What on earth are you doing?” In that chaotic moment, I realized I had been trying to make a simple scallop dish for weeks and kept ending up with soggy, rubber‑like results that made me question my very existence as a home cook. That disaster sparked a dare from my best friend: “If you can get those scallops crispy without turning them into charcoal, I’ll treat you to a whole bottle of the good stuff.” I accepted, and after a few frantic experiments, I finally nailed the perfect balance of crunch, buttery flavor, and that unmistakable sea‑kiss that only fresh scallops can deliver.
Picture this: a pan hot enough to make the oil ripple like a miniature lake at sunrise, the first scallop hitting the surface and releasing a sizzle that sounds like applause. The aroma of toasted panko mingles with a whisper of garlic and paprika, instantly making your kitchen feel like a high‑end seafood bistro. You can see the golden crust forming, each piece looking like a tiny, edible treasure chest. When you finally bite in, the crunch shatters like thin ice, revealing a sweet, tender interior that practically melts on your tongue. The whole experience is a full‑on sensory overload—in a good way.
What makes this version a game‑changer? Most recipes either drown the scallops in batter or forget the crucial step of patting them dry, resulting in a soggy mess. I’ve taken the time to perfect a three‑step coating system that locks in moisture while delivering a crunch that could rival the best tempura. The secret? A light dusting of flour, a quick dip in beaten egg, and a generous coating of panko seasoned with just the right amount of spice. The oil temperature is dialed in to a precise 350°F (175°C), ensuring the crust forms instantly without overcooking the delicate meat inside.
Okay, ready for the game‑changer? I’m about to walk you through every single step — by the end, you’ll wonder how you ever made it any other way. I dare you to taste this and not go back for seconds. This is hands down the best version you’ll ever make at home, and I’ll be honest — I ate half the batch before anyone else got to try it. So grab your apron, fire up that stove, and let’s dive into the crunchy, buttery goodness together.
What Makes This Version Stand Out
- Texture: The triple‑layer coating creates a crust that’s airy yet sturdy, shattering like glass but never turning bitter.
- Flavor: Garlic powder and paprika add a subtle depth that elevates the natural sweetness of the scallops without overwhelming them.
- Simplicity: Only nine ingredients, all pantry‑friendly, and you don’t need any fancy equipment—just a good skillet.
- Uniqueness: Using panko instead of regular breadcrumbs gives that feather‑light crunch you usually only find in Japanese tempura.
- Crowd Reaction: Guests often declare these the “best thing they’ve ever tasted at a party,” and they’ll be back for more.
- Ingredient Quality: Fresh sea scallops provide a sweet, briny core that pairs perfectly with the crisp coating.
- Cooking Method: Precise oil temperature ensures the crust forms fast, sealing in juices for a buttery interior.
- Make‑Ahead Potential: You can prep the coating stations ahead of time, making the actual frying a breeze even for a crowd.
Inside the Ingredient List
The Flavor Base
Garlic powder and paprika are the unsung heroes of this dish. The garlic powder adds a warm, aromatic backbone that complements the sweet sea flavor, while paprika contributes a subtle smoky note and a gorgeous golden hue. If you skip these, you’ll end up with a bland crust that feels more like a bland breadcrumb blanket than a flavor‑packed coating. Want a little heat? Swap half the paprika for smoked chipotle powder, and you’ll get a gentle kick that still respects the scallop’s delicate nature.
The Texture Crew
Panko breadcrumbs are the star of the texture crew. Unlike regular breadcrumbs, panko is larger and airier, which means it creates a light, crunchy shell that stays crisp even after a brief rest. The all‑purpose flour is the adhesive that helps the egg cling to the scallops, forming a bridge for the panko to lock onto. If you’re gluten‑free, try a rice flour blend; it works just as well, though you’ll notice a slightly different mouthfeel.
The Unexpected Star
The oil you choose can make or break the final product. A neutral oil with a high smoke point—like vegetable or sunflower—lets you fry at 350°F without the oil turning bitter. Olive oil might seem luxurious, but its lower smoke point can cause the panko to brown too quickly, leaving the interior undercooked. If you’re feeling adventurous, a blend of half clarified butter and half neutral oil gives a buttery flavor while still maintaining the right temperature.
The Final Flourish
Fresh sea scallops are the real MVP. Look for scallops that are dry, firm, and have a slightly sweet scent. Avoid any that appear mushy or have a fishy odor—those are signs of age or poor handling. If you’re buying frozen, make sure they’re flash‑frozen and never previously thawed. Thaw them in the refrigerator overnight, then pat them dry thoroughly; moisture is the enemy of crispness.
Everything's prepped? Good. Let’s get into the real action…
The Method — Step by Step
-
First, gather three shallow dishes: one with 1/2 cup of all‑purpose flour seasoned with a pinch of salt and pepper, the second with 2 large eggs lightly beaten, and the third with 1 cup of panko mixed with 1 teaspoon garlic powder, 1 teaspoon paprika, and a dash more salt. This three‑station setup is the foundation of that perfect triple‑layer coat. Pro tip: Keep the dishes close together so you don’t have to chase the scallops around the kitchen.
-
Pat the 12 large sea scallops dry with paper towels. This step is crucial—any lingering moisture will steam the coating instead of frying it, leading to that dreaded soggy texture. I dare you to taste this and not go back for seconds; the dryness is what makes the crust cling like a second skin.
Kitchen Hack: Use a clean kitchen towel instead of paper towels for a gentler pat‑down; the towel can be washed and reused, reducing waste. -
Dredge each scallop in the flour, shaking off any excess. The flour creates a dry surface that helps the egg adhere. You’ll notice a faint “powdery” scent—this is the first whisper of crispness to come.
-
Dip the floured scallops into the beaten egg, ensuring each side is fully coated. The egg acts as the glue that binds the panko to the scallop. If the egg is too runny, add a splash of water to thin it just enough for a smooth coating.
Watch Out: Do not let the scallops sit in the egg for more than 30 seconds; they’ll start to absorb the liquid and become soggy, ruining the crisp finish. -
Press the egg‑coated scallops into the seasoned panko, turning them gently to achieve an even, thick crust. The panko should cling like a second skin—if it falls off, give it a quick pat with your fingers to press it in.
-
Heat a large skillet over medium‑high heat and add enough oil to come up about 1/4 inch (roughly 2‑3 tablespoons). Use a thermometer to bring the oil to 350°F (175°C). The moment the oil shimmers and you see tiny ripples, you know it’s ready. That sizzle when it hits the pan? Absolute perfection.
Kitchen Hack: If you don’t have a thermometer, drop a single breadcrumb into the oil; if it bubbles and turns golden in 15‑20 seconds, the oil is hot enough. -
Carefully lay the coated scallops in the hot oil, leaving space between each piece. Overcrowding drops the oil temperature and leads to soggy crusts. Fry for 2‑3 minutes on the first side, watching the edges turn a deep amber and start to pull away from the pan.
-
Flip the scallops gently with tongs and fry another 2‑3 minutes until the second side is equally golden and the interior is just opaque. The total cooking time should be about 5‑6 minutes; any longer and you risk a rubbery interior. Once done, transfer the scallops to a paper‑towel‑lined plate to drain excess oil.
-
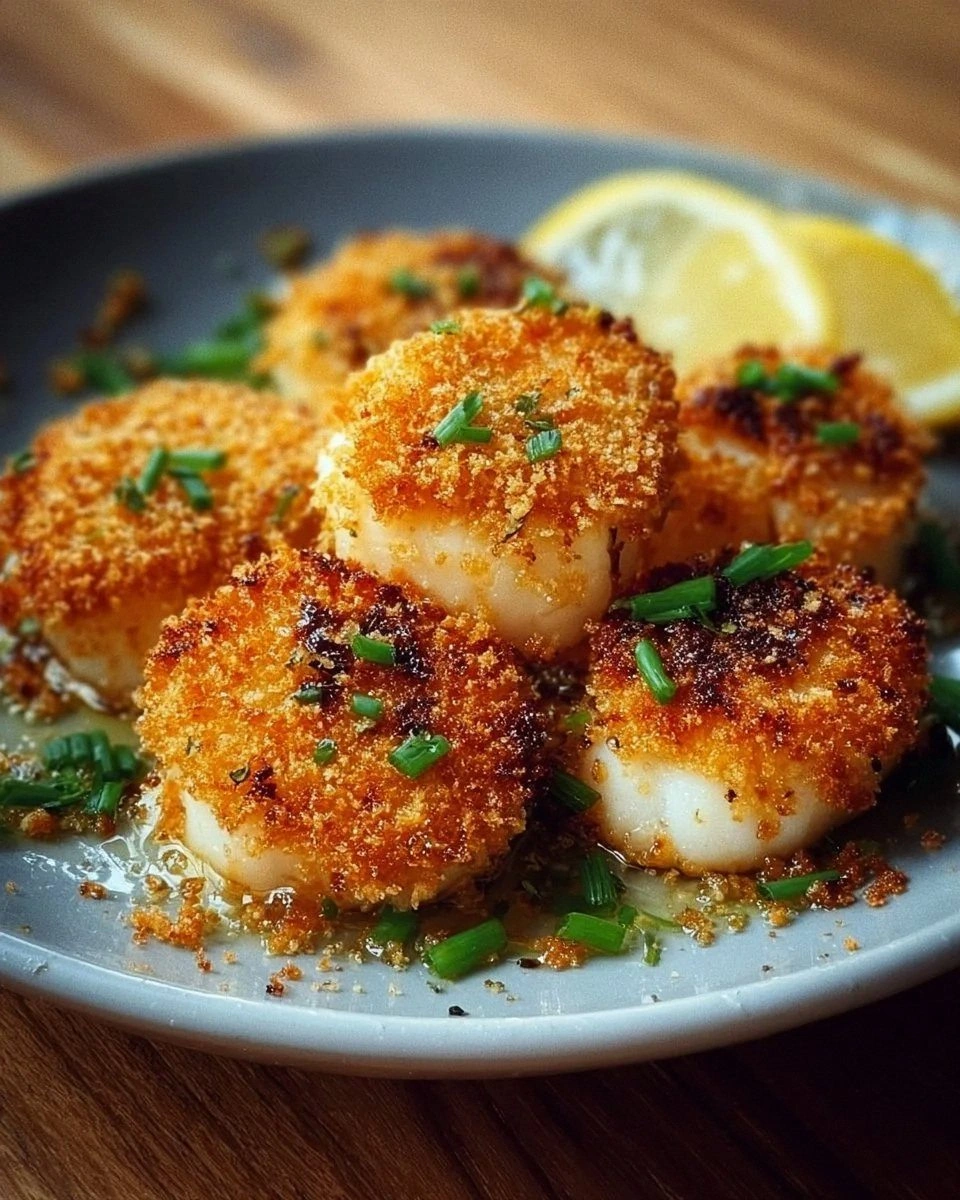
Finish with a sprinkle of fresh parsley and a wedge of lemon on the side. The bright citrus cuts through the richness, while the parsley adds a pop of color that makes the dish look restaurant‑worthy. Serve immediately while the crust is still cracking under your fork.
That's it — you did it. But hold on, I've got a few more tricks that'll take this to another level. The next sections will show you how to fine‑tune every element so that each bite is a flawless symphony of flavor and texture.
Insider Tricks for Flawless Results
The Temperature Rule Nobody Follows
Maintaining a steady 350°F (175°C) is the secret sauce behind that perfect crunch. If the oil is too cool, the panko will absorb oil and become soggy; too hot, and the crust will burn before the scallop cooks through. Use a deep‑fat thermometer and adjust the burner in small increments. A friend once cranked the heat up to “high” thinking faster meant better—let’s just say the scallops turned into charcoal and the kitchen smelled like a burnt toast factory for hours.
Why Your Nose Knows Best
Your sense of smell is an underrated cooking tool. When the oil reaches the right temperature, you’ll catch a faint nutty aroma from the panko before the first sizzle. If you notice a sharp, acrid smell, the oil is overheating. Trust that nose cue and lower the heat a notch. This instinctive approach saves you from a batch of bitter crusts and keeps the scallops buttery.
The 5‑Minute Rest That Changes Everything
After frying, let the scallops rest for exactly five minutes on a wire rack, not a plate. This short rest allows the steam to escape, keeping the crust crisp. If you leave them on a plate, the residual heat will trap steam and soften the panko—ruining the crunch you worked so hard to achieve. I’ve seen many a home chef miss this step and wonder why the “perfect” crust fell flat.
Seasoning the Oil
Add a pinch of smoked paprika or a tiny sprig of rosemary to the oil while it heats. This infuses a subtle background flavor that seeps into the crust without overpowering the scallops. It’s a tiny tweak that makes the dish feel layered and sophisticated. Just remember to remove the herb before adding the scallops, or you’ll end up with a bitter bite.
The Final Squeeze
A quick squeeze of lemon right before serving brightens the entire plate. The acidity cuts through the richness and awakens the natural brininess of the sea scallop. For an extra touch, zest a little lemon over the top for a fragrant finish that looks as good as it tastes.
Creative Twists and Variations
This recipe is a playground. Here are some of my favorite ways to switch things up:
Spicy Sriracha Crunch
Add 1 tablespoon of Sriracha to the beaten eggs and sprinkle a pinch of cayenne into the panko mix. The result is a fiery crust that still respects the scallop’s sweetness. Perfect for those who love a little heat without overwhelming the palate.
Herb‑Infused Panko
Mix finely chopped fresh thyme, rosemary, and a bit of lemon zest into the panko. This herbaceous twist gives a Mediterranean vibe, making the dish pair beautifully with a side of grilled asparagus or a light couscous salad.
Coconut‑Panko Fusion
Replace half of the panko with unsweetened shredded coconut. The coconut adds a subtle sweetness and a tropical crunch that pairs wonderfully with a mango salsa drizzle.
Sesame‑Sesame
Toast a tablespoon of sesame seeds and toss them into the panko mixture. The nutty aroma and extra crunch elevate the dish to an Asian‑inspired masterpiece, especially when served with a soy‑ginger dipping sauce.
Parmesan‑Pepper Explosion
Stir in ¼ cup of grated Parmesan and a grind of fresh black pepper into the panko. This creates a cheesy, peppery crust that’s irresistibly savory and pairs well with a simple arugula salad.
Storing and Bringing It Back to Life
Fridge Storage
Place cooled scallops in an airtight container lined with a paper towel to absorb excess oil. They’ll stay crisp for up to 2 days, though the texture is best enjoyed fresh. Reheat gently in a 350°F oven for 5‑7 minutes to revive the crunch.
Freezer Friendly
Lay the fried scallops on a parchment‑lined tray and freeze them uncovered for 1 hour, then transfer to a zip‑top bag. This flash‑freeze method prevents the crust from sticking together. They’ll keep for up to 3 months. When ready, bake from frozen at 375°F for 10‑12 minutes, adding a splash of water to the pan to steam the interior back to buttery perfection.
Best Reheating Method
For the ultimate reheated crunch, preheat a skillet over medium heat, add a thin layer of oil, and warm the scallops for 2 minutes per side. Add a tiny splash of water (about a teaspoon) and cover for 30 seconds; the steam revives the interior while the oil restores the crust.