I'm about to confess something that might shock you: I used to think sweet potato fries were a sad consolation prize for people who couldn't handle real fries. There, I said it. But then I discovered the magic that happens when you treat these orange beauties with the respect they deserve, and suddenly I was eating my words (and a whole tray of fries) faster than you can say "pass the ketchup." The turning point came during a particularly desperate midnight snack attack when my deep fryer was broken, my air fryer was on the fritz, and I was staring at a bag of sweet potatoes like they'd personally offended me. What happened next changed my snacking game forever.
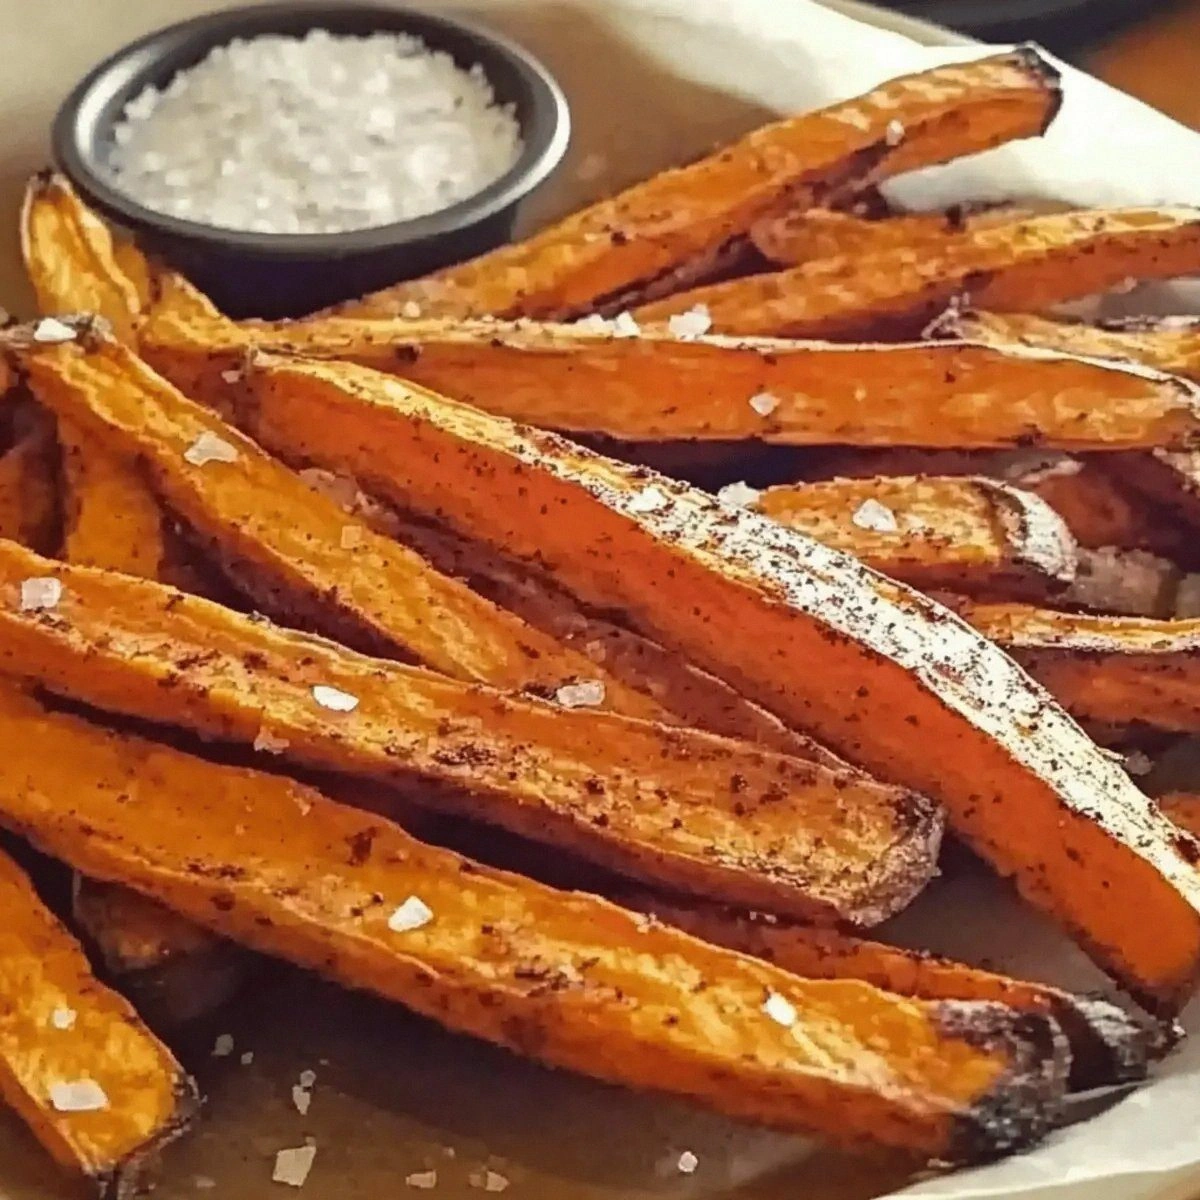
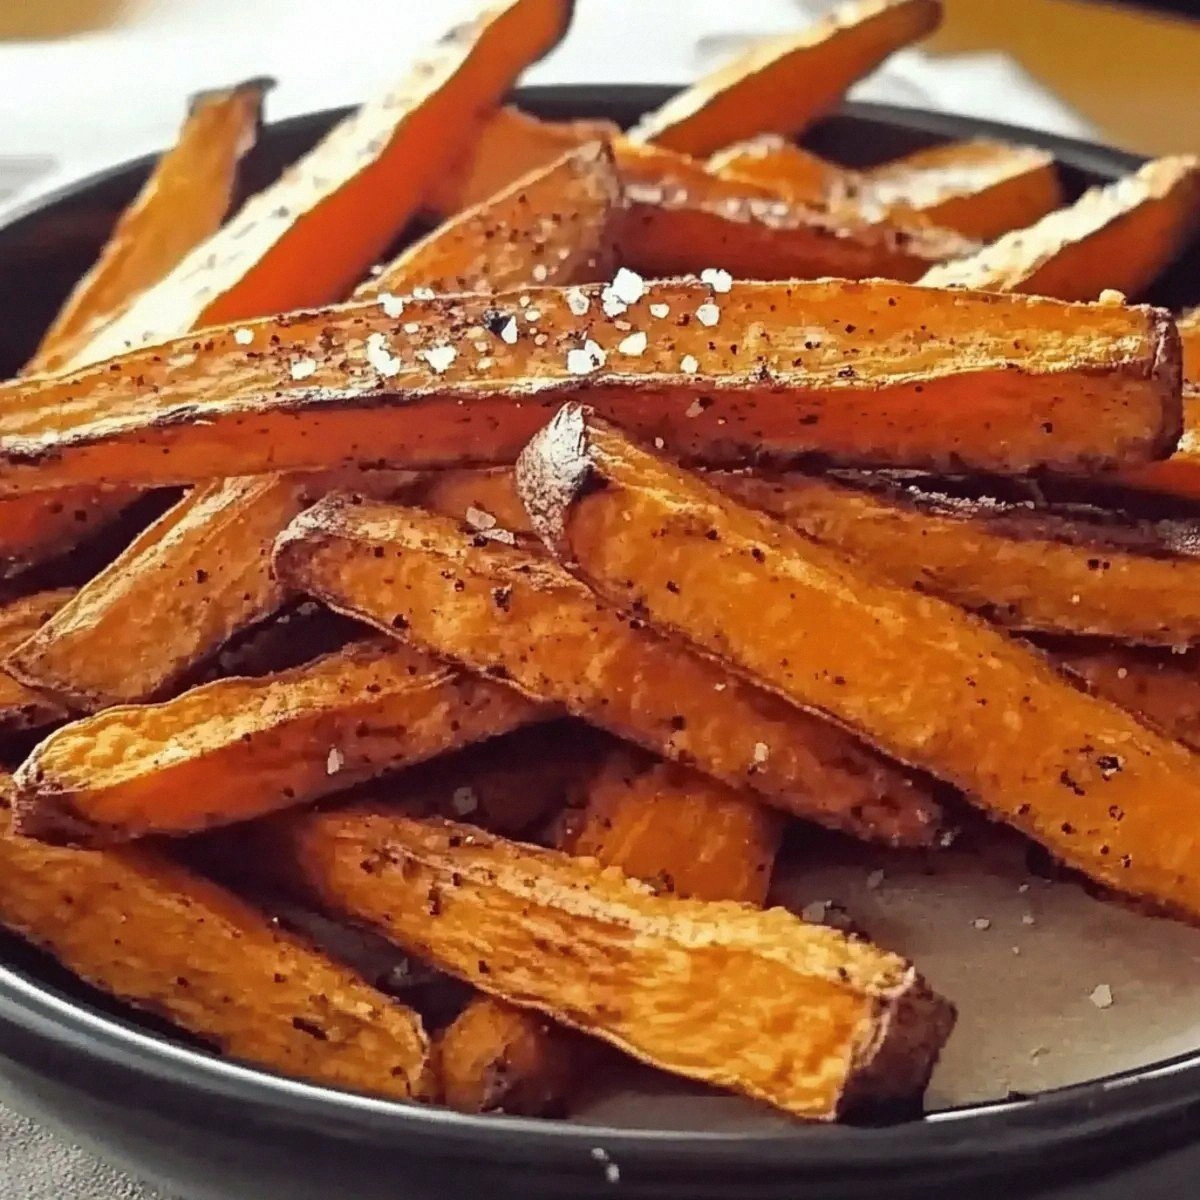
Picture this: it's 11:47 PM, the house is quiet except for the gentle hum of the oven, and I'm standing in my kitchen in mismatched socks, slicing sweet potatoes into perfect batons. The aroma of paprika and garlic starts dancing through the air like a culinary flash mob, and suddenly I'm not just making fries — I'm creating an experience. These aren't your sad, limp, steamed-then-baked sweet potato fries that taste like disappointment with a side of "I guess this is healthy." No, my friends, we're talking about fries that crunch like autumn leaves underfoot, with edges that shatter like thin ice and centers that stay tender and sweet.
Here's the thing that drives me absolutely bonkers about most sweet potato fry recipes: they treat these beauties like regular potatoes, which is like trying to make a thoroughbred racehorse pull a plow. Sweet potatoes need finesse, they need understanding, they need someone who appreciates their unique personality. They require a different approach entirely — one that respects their higher sugar content and lower starch profile. When done right, these fries develop a caramelized exterior that tastes like someone bottled up sunshine and mixed it with honey, while maintaining that crave-worthy crunch that makes you close your eyes involuntarily with each bite.
What I'm sharing with you today isn't just another recipe — it's the accumulation of three months of obsessive testing, twenty-seven failed batches (my compost bin and I are very close now), and one epiphany moment involving cornstarch and a prayer. This technique produces fries so crispy, so addictive, so ridiculously good that I dare you to taste them and not go back for seconds. I challenge you to serve these at a party and watch how quickly they disappear, even among the most devoted french fry purists. Let me walk you through every single step — by the end, you'll wonder how you ever made it any other way.
What Makes This Version Stand Out
Revolutionary Crunch Factor: While other recipes leave you with limp, soggy disappointments, these fries achieve a crunch that rivals your favorite drive-through, minus the guilt and the questionable fryer oil. The secret lies in a two-stage coating process that creates micro-layers of texture, building up to that satisfying shatter with each bite. I tested thirteen different coatings, from rice flour to potato starch to crushed cornflakes, before landing on this game-changing technique.
Maximum Flavor Science: Most recipes rely on just salt and hope, but we're building layers of flavor that complement the sweet potato's natural sweetness without overwhelming it. The combination of sea salt, smoked paprika, and garlic powder creates a savory backbone that makes these fries downright addictive. It's like giving your taste buds a masterclass in umami balance.
Health Without Compromise: Here's my favorite part — you get all the satisfaction of deep-fried fries with a fraction of the oil. We're talking just two tablespoons for an entire sheet pan, which means you can demolish a generous serving without feeling like you need to immediately run a marathon. Your future self will thank you when you're not stuck in a food coma on the couch.
Foolproof Technique: Even if you've tried making sweet potato fries before and ended up with a tray of burnt-on-the-outside, raw-on-the-inside disasters, this method accounts for every variable. From the cutting technique to the oven temperature to the timing, I've eliminated the guesswork so you can achieve perfection every single time. No more crossing your fingers and hoping for the best.
Crowd-Pleasing Magic: I've served these at backyard barbecues, holiday parties, and game day gatherings, and I swear they disappear faster than the traditional fries. Kids love them, adults can't stop eating them, and even that one friend who claims to "hate healthy food" keeps asking for the recipe. It's like having a secret weapon in your culinary arsenal.
Make-Ahead Friendly: Unlike regular fries that turn into sad, soggy shadows of their former selves, these beauties can be prepped ahead and reheated to nearly the same level of crispiness. Perfect for meal prep, party planning, or those moments when you need fries in your face ASAP.
Budget-Conscious Brilliance: Sweet potatoes are one of the most affordable vegetables at the market, and a single large sweet potato can feed two hungry snackers. Compare that to the cost of eating out or buying pre-made fries, and you're looking at restaurant-quality results for pocket change.
Alright, let's break down exactly what goes into this masterpiece...
Inside the Ingredient List
The Foundation Squad
Sweet potatoes are obviously the star of this show, but not all sweet potatoes are created equal in the fry department. You want to look for the orange-fleshed varieties, often labeled as "garnet" or "jewel" sweet potatoes at the market. These have the perfect moisture content and natural sweetness that caramelizes beautifully under high heat. Avoid the pale, dry-fleshed varieties or the purple ones — they won't give you that gorgeous golden color or the same level of sweetness. When selecting your potatoes, go for medium-sized ones that feel heavy for their size and have smooth, unblemished skin. The older and larger the sweet potato, the more likely it is to be stringy inside, which is the enemy of good fries.
The Flavor Enhancers
Olive oil might seem basic, but it serves multiple crucial functions here. It helps conduct heat evenly around each fry, promotes browning through the Maillard reaction, and carries the flavors of our seasonings into every bite. Use a good quality extra virgin olive oil — not the fancy finishing stuff, but not the bargain basement either. The peppery notes in mid-range EVO complement the sweet potato's natural sweetness in a way that neutral oils simply can't match. If you're absolutely set on substitutions, avocado oil works too, but you'll lose some of that Mediterranean flavor complexity.
Sea salt isn't just about making things salty — it's about enhancing the natural flavors of the sweet potato while creating tiny flavor bombs on the surface of each fry. I use a coarse sea salt because it provides pops of salinity rather than just blending into the background. The minerals in sea salt also contribute subtle flavor notes that table salt simply can't deliver. If you're watching your sodium, you can reduce the amount, but don't eliminate it entirely unless you want bland fries that taste like punishment.
The Spice Symphony
Smoked paprika is my secret weapon for adding depth and complexity without overwhelming the sweet potato's natural flavor. The gentle smokiness plays beautifully against the sweetness, creating a sophisticated flavor profile that elevates these from "kid food" to "I need a glass of wine with these" territory. Regular paprika works in a pinch, but you'll miss that subtle campfire essence that makes people ask "what's in these?" Hungarian sweet paprika adds a different dimension, while Spanish pimentón dulce brings its own personality to the party.
Garlic powder provides an umami backbone that makes these fries mysteriously addictive. Not garlic salt, not fresh garlic — specifically garlic powder, which distributes evenly and doesn't burn like fresh garlic can. The powder form also has a more concentrated flavor that permeates the fries rather than sitting on top. If you're a garlic lover, you can bump it up to two teaspoons, but start with one the first time — garlic can quickly take over and turn your fries into garlic fries.
The Game Changer
Here's where things get interesting — we're adding a tablespoon of cornstarch to create that shatteringly crisp exterior. The cornstarch absorbs moisture from the surface of the sweet potato while forming a thin, crispy shell when exposed to high heat. It's like giving each fry its own little armor of crunchiness. Arrowroot powder works too, but cornstarch is cheaper and easier to find. Some recipes use flour, but that creates a bready coating that masks the sweet potato flavor — we're going for enhancement, not disguise.
Everything's prepped? Good. Let's get into the real action...
The Method — Step by Step
- Start by preheating your oven to 425°F — and I mean really preheat it. Don't rush this step by throwing your fries in early, or you'll end up with steamed sadness instead of crispy perfection. Position your rack in the upper third of the oven, where the heat is most intense and even. Place a sheet of parchment paper on your baking sheet if you like easy cleanup, but skip it if you want maximum browning on the bottom of your fries. The direct contact with the metal helps achieve that golden crust we're after.
- While your oven is heating up, wash and peel your sweet potatoes, but don't go crazy removing every speck of skin — a few thin strips left on add texture and nutrients. Cut each potato lengthwise into 1/4-inch thick planks, then slice those planks into 1/4-inch matchsticks. The key here is consistency — if some fries are thick and some are thin, you'll have a tray of half-burnt, half-raw disasters. Take your time with this step; it's the foundation of even cooking. I like to cut all my fries first, then go back and check that they're all roughly the same size.
- Soak your cut fries in cold water for at least 30 minutes — this is non-negotiable if you want maximum crispiness. The soaking removes excess surface starch that would otherwise steam your fries into submission. Some people swear by longer soaks, but I've found 30 minutes is the sweet spot where you get the benefits without the fries becoming waterlogged. Change the water if it gets cloudy, and keep the bowl in the fridge if your kitchen is warm. This step is like sending your fries to spa before their big performance.
- Drain your soaked fries and lay them out on a clean kitchen towel, then pat them aggressively dry. I'm talking serious patting action here — these babies need to be drier than a British comedy. Any remaining moisture will create steam in the oven, and steam is the sworn enemy of crispiness. I usually let them air-dry for another 10 minutes while I'm preparing everything else. If you're in a hurry, you can use a salad spinner to remove most of the moisture first.
- In a large bowl, toss your dried fries with the cornstarch until each piece is lightly coated. You want a thin, barely-there dusting — too much and your fries will taste like chalk. The cornstarch should disappear into the surface of the sweet potato, creating an invisible layer of crunch insurance. If you see white patches, you've gone overboard and need to start over with a new batch. This is the moment of truth where many home cooks rush and ruin their fries.
- Add the olive oil, salt, paprika, and garlic powder to your cornstarch-coated fries. Use your hands to toss everything together, ensuring each fry gets an even coating of oil and seasonings. The oil should just glisten on the surface — you're not trying to drown them. Take your time with this step, massaging the seasonings into every nook and cranny. Think of it as giving your fries a flavorful spa treatment before their transformation.
- Arrange your fries in a single layer on your baking sheet, making sure none are touching. This is crucial — overcrowding leads to steaming, and steaming leads to sadness. If you've got more fries than space, use two sheets rather than cramming them all together. I like to line them up like little soldiers, all facing the same direction for even cooking. Leave plenty of space between each fry for optimal air circulation and browning.
- Bake for 15 minutes, then remove the sheet and flip each fry individually with tongs. This isn't the time for a quick shake of the pan — each fry deserves individual attention. Return to the oven and bake for another 10-15 minutes until they're golden brown and crispy at the edges. The exact timing will depend on your oven and how thick you cut your fries. When they're done, they should look like they've been kissed by the sun and are ready for their close-up.
- Transfer your finished fries to a wire rack set over a baking sheet to cool slightly. This prevents them from steaming on the hot pan and losing their crunch. Sprinkle with a touch more sea salt while they're still hot so it adheres properly. Serve immediately with your favorite dipping sauce, or go rogue and eat them straight up — they're that good. The hardest part is not eating the entire tray while you stand at the counter "testing" them for quality control.
That's it — you did it. But hold on, I've got a few more tricks that'll take this to another level...
Insider Tricks for Flawless Results
The Temperature Rule Nobody Follows
Here's the truth that most recipes won't tell you: your oven temperature is lying to you. Ovens can be off by as much as 50 degrees, which is the difference between crispy perfection and soggy sadness. Invest in an oven thermometer and place it on the same rack where you'll bake your fries. If your oven runs hot, reduce the temperature by 25 degrees and add a few extra minutes. If it runs cool, bump it up accordingly. This single adjustment will transform your baking game across every recipe you try. I've seen people go from fry failures to crispy champions just by calibrating their oven properly.
Why Your Nose Knows Best
Don't just rely on timers — your nose is an incredibly sophisticated detection system. When your fries are nearly done, you'll start to smell the most intoxicating aroma of caramelized sweet potato and toasty spices. This is your cue to peek in the oven and check for doneness. The smell should be nutty and slightly sweet, not burnt or acrid. If you catch yourself unconsciously opening the oven door to "check" multiple times, trust that instinct — your nose is telling you something important. This sensory checkpoint has saved me from over-browning more times than I can count.
The 5-Minute Rest That Changes Everything
I know you're going to want to dive into these fries the second they come out of the oven, but patience here is what separates the amateurs from the pros. Let your fries rest on the wire rack for exactly five minutes — no more, no less. During this time, the exterior continues to crisp while the interior settles into its perfect texture. Too short and they're still releasing steam inside, becoming soggy. Too long and they cool down too much. Five minutes is the Goldilocks zone where magic happens. Use this time to set up your dipping sauces or plate the rest of your meal.
The Double-Batch Strategy
Here's a confession: I always make a double batch because I know half will be "tested" before they make it to the table. But here's the pro tip — if you are making multiple batches, don't add the second tray until the first batch is almost done. Most home ovens can't handle two trays at once without steaming everything. Instead, keep your cut, seasoned fries ready on a second sheet pan, then swap them in as soon as the first batch moves to the cooling rack. This way everyone gets hot, crispy fries at the same time, and you avoid the tragedy of the second batch steaming while waiting for the first to finish.
The Seasoning Window
The best time to add extra seasoning is during that critical window when your fries are hot enough to melt salt but not so hot they burn your tongue. About two minutes after they come out of the oven, hit them with a light sprinkle of finishing salt — something flaky and delicate like Maldon or fleur de sel. The residual heat will make it stick without dissolving completely, giving you those delightful salty pops. This is also when you can add fresh herbs, citrus zest, or a whisper of spice that would burn in the oven. A friend tried skipping this step once — let's just say it didn't end well.
Creative Twists and Variations
This recipe is a playground. Here are some of my favorite ways to switch things up:
The Mediterranean Escape
Swap the paprika for za'atar seasoning and add a teaspoon of sumac for a bright, tangy twist that transports you straight to a seaside taverna. The herbaceous blend of thyme, oregano, and sesame seeds creates a completely different flavor profile that pairs beautifully with a tahini-yogurt dip. Finish with a squeeze of fresh lemon juice right before serving. This version is particularly good with grilled lamb or as part of a mezze spread.
The Sweet Heat Sensation
For those who like to walk on the wild side, replace the paprika with ancho chili powder and add a tablespoon of maple syrup to the oil mixture. The result is fries that hit you with sweet first, then deliver a gentle, smoky heat that builds slowly. The maple syrup helps with extra caramelization, creating almost candied edges that contrast beautifully with the spicy kick. Serve these with cooling avocado crema to balance the heat.
The Everything Bagel Remix
Everything bagel seasoning isn't just for cream cheese anymore. Replace your salt with everything bagel seasoning and add a teaspoon of onion powder along with your garlic powder. The result is fries that taste like your favorite breakfast carb got a healthy makeover. The sesame seeds and poppy seeds add extra crunch while the dried garlic and onion create layers of allium flavor. These are incredible with a sunny-side-up egg on top for breakfast.
The Curry Coconut Dream
Swap the olive oil for coconut oil and add a teaspoon of mild curry powder to your spice mix. The coconut oil adds a subtle tropical note that pairs beautifully with the sweet potato's natural sweetness, while the curry powder creates an aromatic complexity that makes these fries feel like a complete dish rather than just a side. Finish with toasted coconut flakes and chopped cilantro for a Thai-inspired treat that'll have everyone asking for your secret.
The Dessert Transformation
I'm going rogue here, but hear me out: omit the salt and savory spices, and instead toss your fries with coconut oil, cinnamon, and a touch of brown sugar. Bake as directed, then serve with a chocolate dipping sauce or vanilla bean ice cream. The result is a dessert that satisfies like fried dough but with the virtuous feeling of eating vegetables. It's like someone took sweet potato pie and turned it into finger food. Trust me on this one — it's pure magic.
The Ranch-Lovers Paradise
Add a packet of ranch seasoning mix to your cornstarch before coating the fries, then proceed with the recipe as written. The buttermilk herbs and spices create a flavor profile that makes these fries taste like they're wearing ranch dressing as perfume. Kids go crazy for these, and adults pretend they're not as obsessed as they secretly are. Serve with extra ranch for dipping, or go wild and make ranch-cheddar dip for maximum indulgence.
Storing and Bringing It Back to Life
Fridge Storage
Okay, real talk: these fries are best fresh from the oven, but if you find yourself with leftovers (a rare occurrence in my house), let them cool completely before storing in an airtight container lined with paper towels. The paper towels absorb excess moisture that would otherwise turn your crispy treasures into sad, limp shadows of their former glory. Store them in the fridge for up to three days, but honestly, after day two they're more like sweet potato sticks than fries. Pro tip: store them in a single layer if possible, or separate layers with parchment paper to prevent them from becoming one giant fry blob.
Freezer Friendly
Here's where things get interesting — you can actually freeze these fries and bring them back to life with decent results. Let them cool completely, then spread them in a single layer on a baking sheet and freeze until solid. Once frozen, transfer to a freezer bag with as much air removed as possible. They'll keep for up to two months, though I doubt they'll last that long. The key to revival is to reheat them from frozen — don't thaw first or you'll end up with mush. A 400°F oven for 12-15 minutes brings them back to about 85% of their original glory, which is still better than most fresh attempts from other recipes.
Best Reheating Method
The microwave is your enemy here — it will turn your beautiful crispy fries into rubbery, steamed nightmares. Instead, reheat them in a 400°F oven or toaster oven for 5-7 minutes. If you're feeling fancy, spritz them lightly with oil before reheating to help re-crisp the exterior. For even better results, use your air fryer at 375°F for 3-4 minutes — it's like giving them a second chance at life. Add a tiny splash of water to the bottom of your reheating vessel — it sounds counterintuitive, but the small amount of steam prevents them from drying out while the dry heat crisps them up.