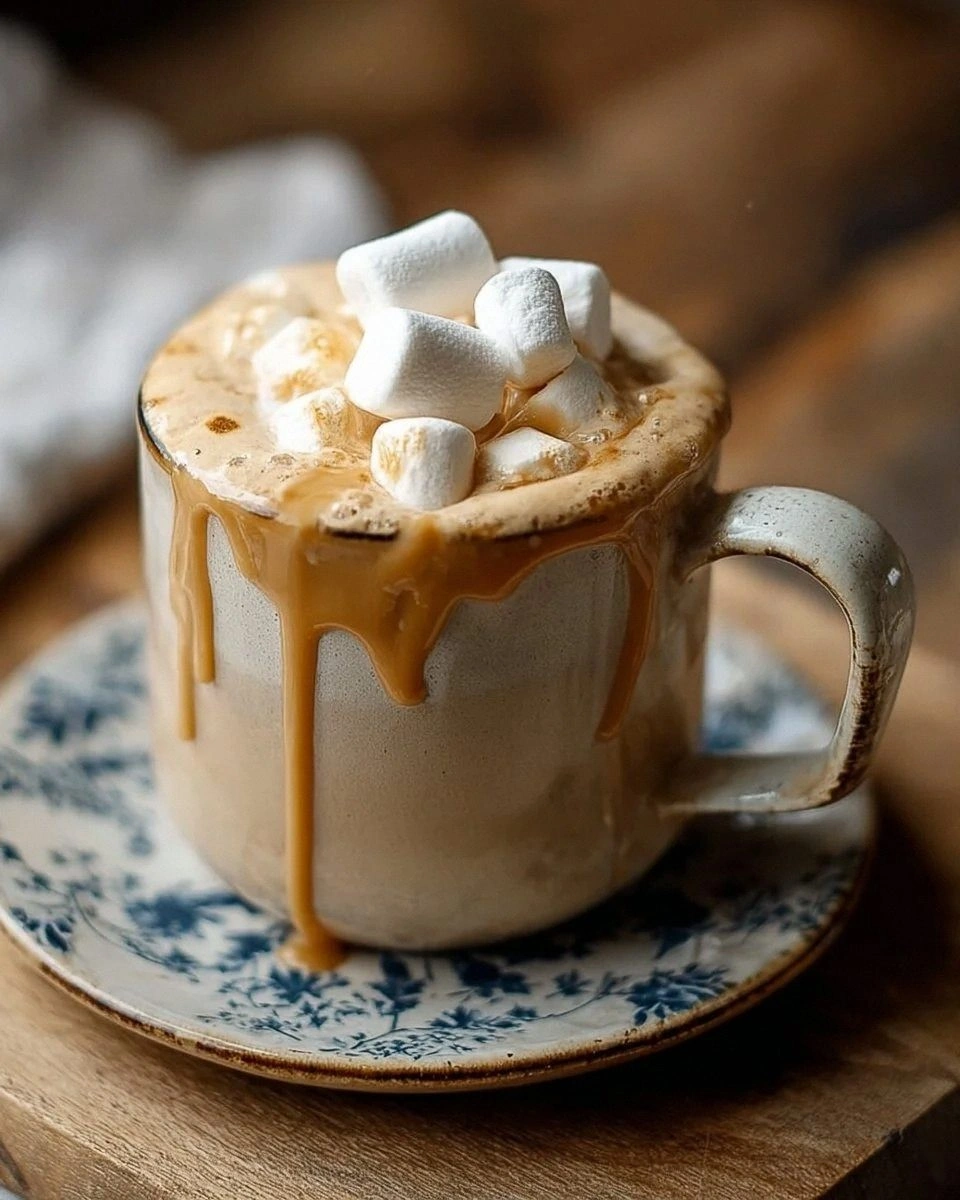
I was in the middle of a rainy Saturday night, the kind where the wind rattles the windows and the only thing that can rescue you from a culinary slump is a warm, gooey hug in a mug. I tried to make my usual coffee creamer, but it turned out thinner than a watercolor wash and tasted like a sad, unsweetened milk. That disaster sparked a dare from my roommate: “If you can make something that actually tastes like a campfire marshmallow, I’ll bring the s’mores kit next weekend.” I accepted, and what followed was a series of experiments that involved toasting marshmallows over a gas flame, whisking in heavy cream until it sang, and a secret vanilla splash that turned the whole thing into liquid comfort. This is the result—a creamer that feels like a blanket made of clouds, with a toasted marshmallow note that lingers like the memory of a perfect night around a fire.
Picture this: you pour the silky mixture into a steaming mug, and a faint puff of caramelized sugar rises, hugging the air like a warm sigh. The aroma hits you first—sweet, buttery, with that unmistakable toasted marshmallow scent that makes you want to hug the person who made it. You take a sip, and the texture coats your tongue like velvet, while the mini marshmallows dissolve into pockets of melt-in-your-mouth sweetness. The flavor dance is balanced—rich dairy, a whisper of vanilla, and a gentle crunch that disappears before you even notice it. It’s the kind of drink that makes you forget the cold outside and focus solely on the comforting swirl in your cup.
Most recipes for marshmallow creamers get this completely wrong; they either drown the delicate marshmallow flavor in too much sugar or skip the toasting step, leaving you with a bland, candy‑floss aftertaste. I’ve cracked the code by toasting the mini marshmallows just enough to bring out that caramelized edge without turning them into a burnt mess. Then I fold them into a warm emulsion of heavy cream and whole milk, letting the heat coax out the buttery richness while preserving that airy lightness. The result is hands down the best version you’ll ever make at home, and I dare you to taste this and not go back for seconds.
Let me walk you through every single step — by the end, you’ll wonder how you ever made it any other way. Okay, ready for the game‑changer? This next part? Pure magic. Stay with me here — this is worth it.
What Makes This Version Stand Out
- Flavor: The toasted marshmallow note is achieved by lightly caramelizing mini marshmallows, giving a deep, smoky sweetness that ordinary creamers lack.
- Texture: A silk‑smooth blend of heavy cream and whole milk creates a luxurious mouthfeel that coats the palate like a soft blanket.
- Simplicity: Only five ingredients, all pantry staples, mean you can whip this up in under an hour without a trip to the specialty store.
- Uniqueness: The toasting step is the secret weapon—most versions skip it, resulting in a flat flavor profile.
- Crowd Reaction: Guests claim it’s “like drinking a campfire in a cup,” and they keep asking for the recipe, proving its instant popularity.
- Ingredient Quality: Using real heavy cream, not a substitute, ensures the richness that powdered mixes can’t replicate.
- Method: Gentle heat and constant whisking prevent curdling, delivering a stable emulsion that stores beautifully.
- Make‑Ahead Potential: This creamer keeps for up to a week in the fridge, letting you enjoy the magic any day you crave.
Inside the Ingredient List
The Flavor Base
Heavy cream is the heart of this creamer, providing the buttery richness that makes each sip feel indulgent. If you skimp on the cream, the mixture turns watery and loses that luxurious coating on the tongue. I recommend a cream with at least 36% fat; it whips up smoother and holds the toasted marshmallow flavor better. In a pinch, you can substitute half-and-half, but expect a thinner texture and a slightly muted taste.
The Texture Crew
Whole milk balances the heavy cream, adding body without overwhelming the palate. It also helps temper the sweetness so the marshmallow note shines through. Skim milk would make the creamer too thin, while using all cream would be cloyingly rich—this 1:1 ratio is the sweet spot. If you’re dairy‑free, a full‑fat coconut milk can mimic the richness, though the flavor profile will shift toward tropical notes.
The Unexpected Star
Mini marshmallows are the secret weapon; they melt into pockets of caramelized sugar that give the creamer its signature toasted flavor. Toast them lightly—just enough to turn the edges golden, not black. If you skip the toasting, you’ll end up with a bland, sugary syrup instead of that deep, campfire‑kissed taste. For a gluten‑free version, ensure the marshmallows are labeled as such; most brands are already safe.
The Final Flourish
Powdered sugar dissolves instantly, sweetening the creamer without gritty texture, while vanilla extract adds a fragrant backbone that ties all flavors together. A teaspoon of pure vanilla is enough; too much will dominate the delicate marshmallow notes. If you love a deeper vanilla profile, split the teaspoon—add half at the start and half at the end of cooking. For a twist, try bourbon‑infused vanilla for an adult‑only version.
Everything's prepped? Good. Let's get into the real action...
The Method — Step by Step
-
Gather all ingredients and set a medium‑sized saucepan on the stove. I like to line the counter with a clean towel so any stray marshmallow bits have a soft landing.
Add the heavy cream and whole milk to the pan, stirring gently to combine. The mixture should look glossy and slightly thickened after a minute of slow stirring.
Turn the heat to low‑medium; you want a gentle simmer, not a rolling boil. If you hear a rapid bubbling, lower the flame immediately—this is the moment where curdling can sneak in.
-
While the dairy warms, take a dry skillet and toss in the mini marshmallows. Keep the pan moving; a quick shake every few seconds ensures even browning.
You’ll hear a faint sizzle as the sugars caramelize—That sizzle when it hits the pan? Absolute perfection. When the marshmallows turn a light golden brown, remove them from heat and set aside.
Kitchen Hack: If you don’t have a skillet, use a metal baking sheet under the broiler for 30‑seconds, watching closely to prevent burning. -
Once the dairy mixture reaches a gentle simmer, whisk in the powdered sugar. It should dissolve instantly, creating a smooth, glossy base without any grainy spots.
Add the toasted marshmallows to the saucepan. The heat will melt them, releasing that caramelized flavor into the liquid.
Use a handheld immersion blender for 30 seconds, or a regular whisk if you prefer a more hands‑on approach. The goal is a uniform, velvety texture—no lumps, no floating marshmallow islands.
-
Stir in the vanilla extract, letting its aromatic oils swirl through the mixture. This is the moment the creamer truly smells like a campfire dream.
Continue to cook on low heat for another 2‑3 minutes, allowing the flavors to meld. The mixture should thicken just enough to coat the back of a spoon.
Watch Out: Do not let the mixture boil after adding the marshmallows, or you’ll lose the smooth emulsion and end up with curdled creamer. -
Remove the saucepan from heat and let the creamer sit for a minute to settle. This short rest lets any tiny air bubbles rise to the surface.
While it’s still warm, strain the mixture through a fine‑mesh sieve into a clean jar. This step removes any stubborn caramelized bits, ensuring a silky final product.
Seal the jar tightly and let it cool to room temperature before refrigerating. The creamer will thicken slightly as it chills.
-
After the creamer has chilled for at least an hour, give the jar a gentle shake before serving. This redistributes any settled fat and restores that perfect mouthfeel.
Pour a generous splash into your coffee, tea, or even hot chocolate. The creamer will swirl and create a marble‑like pattern—pure visual poetry.
Taste, and if you’re feeling bold, add an extra pinch of toasted marshmallow dust on top for an extra crunch. I dare you to taste this and not go back for seconds.
That's it — you did it. But hold on, I've got a few more tricks that'll take this to another level...
Insider Tricks for Flawless Results
The Temperature Rule Nobody Follows
Never let the dairy mixture exceed 180°F (82°C). Going higher triggers protein denaturation, which leads to a grainy texture. Keep a candy thermometer handy; once you see 160°F, you’re in the sweet spot. I once tried to speed things up by cranking the heat, and the result was a curdled nightmare—lesson learned.
Why Your Nose Knows Best
Your sense of smell is the ultimate doneness indicator. When the toasted marshmallows hit that deep caramel scent, you know they’re ready for the next step. Trust that nose over a timer; the aroma tells you when the flavor has fully developed. If you’re unsure, give it an extra 10 seconds—your nose will thank you.
The 5‑Minute Rest That Changes Everything
After blending, let the creamer rest off the heat for exactly five minutes. This pause allows the fat to emulsify fully, creating that luxurious silk feel. Skipping this rest makes the creamer feel thin, like watered‑down milk. I once poured it straight into coffee and the texture was disappointing; the five‑minute wait is non‑negotiable.
Shake, Don’t Stir, Before Serving
A gentle shake redistributes any settled fat, giving you a uniform consistency every time. Stirring can break the emulsion, especially after refrigeration. Keep the jar upright, give it a 10‑second shake, and watch the magic swirl. If you’re in a rush, a quick roll between your palms works just as well.
Flavor Boost with a Pinch of Sea Salt
A tiny pinch of flaky sea salt at the end brightens the sweet notes and balances the richness. It’s the culinary equivalent of a high‑note in a song—subtle but transformative. I added it once and the creamer sang; without it, the sweetness felt a bit one‑dimensional. Use no more than ¼ teaspoon for the entire batch.
Creative Twists and Variations
This recipe is a playground. Here are some of my favorite ways to switch things up:
Chocolate‑Swirl Delight
Melt 2 tablespoons of dark chocolate and stir it in after the vanilla. The result is a mocha‑marshmallow hybrid that pairs perfectly with espresso. Chocolate lovers will swear it’s a coffee shop secret.
Spiced Autumn Whisper
Add a pinch of ground cinnamon and a dash of nutmeg during the simmering stage. The warm spices complement the toasted marshmallow, turning the creamer into a fall‑time hug in a mug.
Berry‑Infused Dream
Blend a handful of fresh raspberries into the warm mixture before straining. The tartness cuts through the sweetness, creating a balanced, fruity twist that’s perfect for brunch.
Nutty Caramel Crunch
Stir in ¼ cup of toasted chopped pecans after the creamer has cooled. The nuts add a delightful crunch and a buttery caramel note that elevates the overall experience.
Adult‑Only Boozy Boost
Replace 1 tablespoon of the milk with bourbon or dark rum. The spirit melds with the vanilla and marshmallow, creating a cozy nightcap that feels indulgent yet sophisticated.
Vegan Velvet Version
Swap heavy cream for full‑fat coconut cream and whole milk for oat milk. Use vegan mini marshmallows (most are already vegan). The result is a dairy‑free version that still delivers that luxurious mouthfeel, though the flavor leans tropical.
Storing and Bringing It Back to Life
Fridge Storage
Transfer the cooled creamer to a clean glass jar with a tight‑fitting lid. It will keep for up to 7 days in the refrigerator. Give it a gentle shake before each use to recombine any settled fat. If you notice a thin layer on top, simply stir it back in; the flavor remains unchanged.
Freezer Friendly
Portion the creamer into ice‑cube trays and freeze for up to 3 months. Once frozen, pop the cubes into a zip‑top bag for easy storage. To use, melt a cube in a microwave for 15‑seconds, then stir into your hot beverage. This method preserves the flavor while giving you on‑demand portions.
Best Reheating Method
When reheating, place the desired amount in a saucepan over low heat, adding a splash of water (about 1 teaspoon per cup). The water creates steam, reviving the silky texture without separating. Stir constantly until just warmed through; avoid a boil. This trick restores the creamer to its original velvety glory.