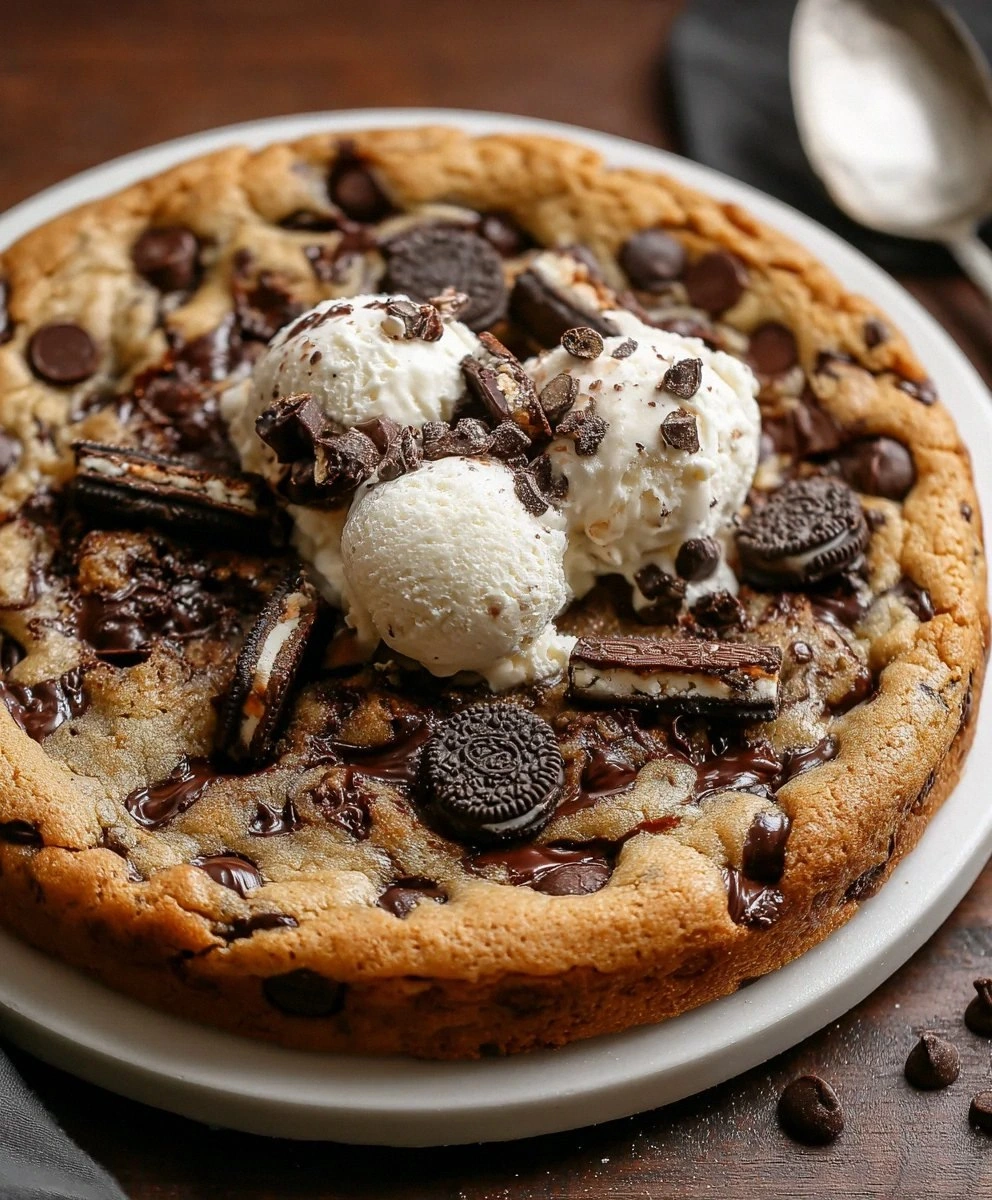
Last Tuesday at 11:47 p.m. I was standing in my kitchen wearing mismatched socks and a hoodie covered in flour, clutching a half-eaten package of Oreos like it was the last lifeboat on the Titanic. I’d promised myself I wouldn’t bake until the weekend, but the craving hit like a freight train—warm, gooey, cookies-and-cream everything, and I wanted it in a single, shareable, slightly dramatic format. Twenty minutes later the first skillet cookie emerged, hissing and crackling like it had secrets to tell, and by 12:03 a.m. I’d burned my tongue twice, demolished the outer rim, and declared—mouth still full—“This is hands down the best version you’ll ever make at home.” If you’ve ever stood in the glow of an open fridge, hunting for something that doesn’t exist yet, you know exactly why this recipe had to be born.
Picture this: the smell of browned butter swirling with vanilla, the low rumble of a cast-iron pan heating up, the soft crackle as chocolate meets cookie dough and starts to melt in real time. You hear the faint crunch of Oreo crumbs under your spoon as you scoop a corner that’s still molten, the white chocolate stripes marbling like edible marble. That first bite is a temperature roller coaster—crisp sugar shell, silky chocolate, cool flecks of cream—followed by the inevitable sugar rush that makes you dance barefoot on tile floors. I’m not saying this skillet cookie will solve existential dread, but I am saying it buys you at least forty-five minutes of unfiltered joy, and that’s a currency I’ll trade in any day.
Most internet recipes play it safe: regular melted butter, basic chocolate chips, polite little pucks that politely stay in their lane. This version laughs in the face of polite. We’re browning butter until it smells like toasted hazelnuts and looks like liquid amber, then folding in not one but three chocolate formats plus a blizzard of crushed sandwich cookies that bleed their cream filling into every crevice. The result is a cookie with crispy edges that shatter like thin ice, a center that stays fudgy even when cooled, and pockets of molten Lindt Cookies & Cream that stretch like cheese pulls in a pizza commercial. I dare you to taste this and not go back for seconds—actually, I double-dog dare you, because I’m still recovering from the night I ate half the batch before anyone else got to try it.
Stay with me here—this is worth it. By the time you slide the skillet from oven to table, the top will be a constellation of melted chocolate and cookie freckles, the kind of dessert that makes grown adults speak only in vowels. We’re going deep on technique, timing, and a few sneaky moves that separate the good skillet cookies from the legendary ones. Let me walk you through every single step—by the end, you’ll wonder how you ever made it any other way.
What Makes This Version Stand Out
Flavor Depth: Browning the butter unlocks nutty, toffee-like notes that mingle with the cocoa in the Oreos, creating a base so complex you’ll swear there’s secret espresso in there. The Maillard reaction works its midnight magic, and suddenly humble butter tastes like it graduated from pastry school with honors. Triple Chocolate Threat: Semisweet chips for classic comfort, bittersweet discs for sophisticated depth, and Lindt Cookies & Cream bars for silky sweetness—each plays a different octave in the chocolate chord, guaranteeing every bite hits a new note instead of monotone sugar. Texture Spectrum: Crispy caramelized rim, soft-baked middle, and molten puddles that flow like lava cake—achieved by under-baking slightly and letting residual heat do the final set. Most recipes get this completely wrong by over-baking; we pull it when the center still jiggles like a cheesecake. One-Pan Wonder: No chilling, no portioning, no stacking trays. You mix, pile, bake, and serve from the same cast-iron vessel, which stays hot at the table and keeps the cookie in a perpetual state of gooey splendor while everyone dives in with spoons. Crowd Reaction Guarantee: I’ve served this to toddlers, teenagers, and tough-cookie grandmas—they all drop their forks mid-sentence and make that involuntary “mmm” noise. Future pacing: picture yourself pulling this out of the oven, the whole kitchen smelling like Willy Wonka’s lab, and every roommate or kid drifting in like cartoon characters following a pie on a windowsill. Make-Ahead Flexibility: Mix the dough, press it into the skillet, cover tightly, and refrigerate up to 24 hours. When the craving strikes, you’re fifteen minutes away from hot cookie bliss, which is faster than delivery and infinitely more impressive.Inside the Ingredient List
The Flavor Base
Unsalted butter is the canvas, but browned butter is the masterpiece. When the milk solids toast, they release compounds that read as caramel and hazelnut on the palate, giving this cookie an adult edge no single extract can fake. Skip the browning and you still get a tasty treat; keep it and you’ll understand why French pastry chefs treat butter like liquid gold. Make sure you use unsalted so you control the seasoning—different brands vary wildly in salt content, and you want precision here. If you’re short on time, you can use regular melted butter, but do try the browned version for an enhanced taste that haunts your dreams in the best way.
Brown sugar isn’t just sweet; it’s a moisture magnet thanks to its molasses coat, which keeps the cookie chewy long after it cools. The subtle bitterness of molasses also balances the white chocolate’s sweetness, preventing sugar shock. Dark brown sugar amps that flavor even further, but light brown is the sweet spot for everyday pantries. If needed, you can substitute with coconut sugar for a healthier twist that brings butterscotch undertones and a lower glycemic spike.
Granulated sugar provides the structural crunch. It melts at a higher temperature than brown, creating those delicate, glassy edges that snap under your spoon. Without it, you’d have a floppy oatmeal-cookie situation, and nobody wants that drama. Feel free to swap it with cane sugar; the texture will remain lovely, and you’ll gain a whisper of toasty depth.
The Texture Crew
Large eggs bind everything while adding steam for lift. Room-temperature eggs disperse more evenly, so you aren’t chasing streaks of white through your dough like some kind of dessert dalmatian. Beat them just enough to incorporate; over-whipping introduces air that will dome the center and make you think you baked a cookie volcano. If you forgot to pull them ahead, submerge cold eggs in warm tap water for five minutes and you’re back in business.
All-purpose flour forms the cookie’s skeleton. Too much and you’re chewing on a hockey puck, too little and you’re scooping chocolate soup. I fluff, spoon, and level rather than dunking the cup like a shovel; that extra thirty seconds prevents density disasters. For a gluten-free version, use a 1:1 gluten-free flour blend with xanthan gum already blended in—nobody will know the difference unless you tell them, and even then they’ll shrug and keep eating.
Baking soda raises the dough just enough to keep things tender without cakiness. It also helps with browning, giving you that Instagram-worthy bronze lid. If you don’t have baking soda, baking powder can do the job, but adjust the amount accordingly—use triple the volume and expect a slightly cake-like crumb.
The Unexpected Star
Crushed Oreo biscuits are more than mix-ins; they’re little bursts of nostalgia that melt into zebra stripes throughout the dough. I crush them by hand so some pieces stay chunky for crunch while others dissolve into cream-flecked sand. Twist the cookies apart and scrape the filling if you want a less sweet cookie, or leave the sandwiches intact for maximum cookies-and-cream power. The secret ingredient brings in that iconic flavor without any artificial flavorings—just honest cookie chaos.
The Final Flourish
Semisweet chocolate chips are your reliable best friends—predictable, sweet, crowd-pleasing. Bittersweet discs, on the other hand, are the mysterious exchange student who teaches you new swear words in French; they add complexity and keep the sweetness from becoming one-note. Lindt Cookies & Cream chocolate bars melt into silky ribbons that taste like melted ice cream, giving you the “wow, how did they do that” moment. Chop them roughly so you get pools and shards rather than uniform squares—visual drama equals flavor drama. Additional semisweet chocolate chips and chocolate discs on top create those glossy eyes that lure everyone to the table like dessert paparazzi.
Everything’s prepped? Good. Let’s get into the real action...
The Method — Step by Step
- Start by placing your cast-iron skillet in the oven and preheating to 350°F (175°C). Heating the pan simultaneously ensures the dough begins to set on the bottom the instant it hits the metal, creating that coveted crisp layer. While the oven works, melt and brown the butter in a light-colored saucepan over medium heat, swirling every thirty seconds. The butter will foam, then quiet down as water evaporates; keep going until the milk solids turn chestnut brown and the aroma drifts between nutty and caramel corn. Pour it immediately into a heat-proof bowl to stop the cooking—those solids go from perfect to bitter in the blink of an eye.
- Whisk both sugars into the hot butter until the mixture looks like glossy caramel sauce. The residual heat dissolves granules so you don’t bite into sugar gravel later. Let it sit for five minutes; you want it warm, not screaming hot, when eggs enter the scene or you’ll scramble them into sad breakfast curds. Stir in vanilla extract—now is the moment of truth where your kitchen starts to smell like a professional bakery. Take a deep inhale and accept that you’re probably going to lick the spatula later.
- Beat in the eggs one at a time, mixing just until the shine comes back. Over-mixing here introduces air that will puff and then collapse, leaving a sunken crater big enough to swim in chocolate. The batter should ribbon off the whisk and slowly absorb back into itself—think thick brownie batter, not pancake soup. If you see streaks of egg white, keep whisking; if the batter splits and looks greasy, place the bowl over a warm towel for thirty seconds and stir until it reunites like happy campers.
- In a separate bowl, whisk flour, baking soda, and salt. Aerating the dry team prevents pockets of bitter baking soda that taste like metal. I add the salt now rather than creaming with butter because it disperses evenly without encouraging gluten toughness. Use a fork or whisk, not a sifter—sifting is for angel-food cakes, not skillet cookies with rugged charm.
- Fold the dry ingredients into the wet with a silicone spatula, stopping when only a few dusty streaks remain. Over-mixing develops gluten and gives you a cookie that could double as a doorstop. The dough should feel like play-doh that’s been left on a hot dashboard—soft, pliable, slightly greasy but not dripping. If you live somewhere humid and the dough feels loose, sprinkle in an extra tablespoon of flour; desert dwellers may need to drizzle a teaspoon of milk to loosen.
- Fold in the chocolates and crushed Oreos with two or three gentle strokes. You want ribbons of white and dark, not a homogenous gray blob. Some Oreo pieces will break down further—embrace the chaos. The dough should look like a Jackson Pollock painting, splattered with contrast and promise. Resist snacking on raw dough; I know it’s delicious, but you’ll want every ounce in the pan for maximum height.
- Carefully remove the hot skillet from the oven (ovens gloves, please—nobody needs a wrist branded like a cattle ranch). Plop the dough in the center and use an offset spatula or the back of a large spoon to spread it edge to edge. The heat will start to melt the bottom immediately, creating a caramelized skin. If the dough resists, dip the spatula in water; it glides like an Olympic skater and prevents tearing.
- Bake for 18–22 minutes, rotating at the halfway mark for even browning. The edges should pull away slightly and turn golden, while the center still looks underdone—like brownies you’d pull at the moist crumble stage. If the top browns too fast, tent loosely with foil for the final five minutes. Your nose knows best: when you smell toasted sugar and the faintest whiff of vanilla bean, start testing. A toothpick inserted two inches from the edge should come out with a few moist crumbs, not wet batter.
- Cool on a wire rack for exactly five minutes. This sets the structure so you don’t get molten chocolate lava everywhere, but keeps the interior in a spoonable state. Top with extra chips and chocolate discs—they’ll melt from residual heat and create glossy puddles that photograph like a magazine. Serve warm with a generous scoop of cookies and cream ice cream; the cold-hot contrast is the stuff of childhood dreams. Store any leftovers (ha!) covered at room temp up to two days, though realistically it won’t last the night.
That’s it—you did it. But hold on, I’ve got a few more tricks that’ll take this to another level...
Insider Tricks for Flawless Results
The Temperature Rule Nobody Follows
If you’ve ever struggled with greasy edges and a raw center, nine times out of ten the butter was too hot when sugar hit it. Butter above 140°F melts sugar into syrup that separates and pools, creating an oily slick that never reabsorbs. Wait until the browned butter cools to the point where you can comfortably stick your finger in for three seconds—think warm bath, not hot tub. This single pause gives you emulsification so smooth it could star in a hair-commercial slow-mo.
Why Your Nose Knows Best
Professional bakers rely on scent more than timers. When the aroma shifts from raw dough to toasted marshmallow and you can smell chocolate in the next room, the cookie is ninety seconds from perfect. A friend tried skipping this step once—let’s just say it didn’t end well, and her smoke alarm now doubles as a dinner bell. Trust the fragrance; evolution programmed us to detect caramelization for a reason.
The 5-Minute Rest That Changes Everything
Cutting into a skillet cookie straight from the oven is like slicing into a water balloon—everything gushes out and you’re left with sad puddles. Five minutes allows starches to retrograde just enough to hold the molten center while keeping it spoon-soft. Set a timer, pour the drinks, pick the movie; by the time you’re back, the dessert is at peak sexy gooeyness and nobody burns their tongue.
Cast-Iron Seasoning Bonus
Every time you bake a cookie in cast iron, you’re essentially seasoning the pan with sugar and butter, building a patina so slick that future fried eggs will skate across like Michelle Kwan. Wipe the skillet with a thin film of oil while it’s still warm, let it cool inside the oven, and store uncovered. Future you will send present you a thank-you card, possibly written in pancake syrup.
The Freezer Shortcut
Double the dough, press half into a parchment-lined eight-inch cake pan, and freeze solid. Once rock hard, pop out the puck, wrap tightly, and stash for emergencies. When unexpected guests arrive, drop the frozen disc into your preheated skillet, add three extra minutes to the bake, and bask in the applause. You’ll look like a dessert wizard who conjures miracles on demand.
Creative Twists and Variations
This recipe is a playground. Here are some of my favorite ways to switch things up:
Mint Chocolate Avalanche
Swap the Lindt bars for chopped mint cookies-and-cream bars, add a teaspoon of peppermint extract, and replace half the Oreos with crushed mint fudge cookies. The result tastes like Girl Scout Thin Mints took a sauna inside a chocolate volcano. Serve with mint chip ice cream and watch guests’ eyes glaze over like they’ve been hypnotized by an alpine glacier.
Peanut Butter Swirl Edition
Dollop ⅓ cup creamy peanut butter over the dough in the skillet, then drag a knife through to create peanut butter rivers. Use peanut butter-filled Oreos for extra nutty nuggets. The salt in the PB amplifies the chocolate, making the whole thing taste like a Snickers bar went to finishing school.
Salted Caramel Riptide
Replace granulated sugar with homemade caramel that you cook to deep amber, then cool slightly before mixing. Drizzle extra caramel on top right after baking and finish with a shower of flaky salt. The bitter edge of almost-burnt sugar plays off the sweet white chocolate like a jazz duet—complex, unexpected, and impossible not to tap your foot to.
Double Dark & Smoky
Use 70% dark chocolate for chips and discs, add a teaspoon of espresso powder, and fold in crushed chocolate-filled wafers instead of Oreos. A pinch of smoked salt on top gives a campfire vibe that makes adults feel like they’re eating dessert in a whiskey bar. Pair with coffee ice cream for a mocha experience that punches through the stratosphere.
Confetti Birthday Bash
Replace bittersweet discs with white chocolate, fold in rainbow sprinkles plus crushed birthday-cake Oreos, and top with mini marshmallows for the final two minutes of baking under the broiler. The marshmallows toast like campfire clouds, and the sprinkles bleed into technicolor freckles that make every slice look like a party. Kids will lose their minds; adults will suddenly remember they’re kids too.
Tahini Halva Halo
Swap out one tablespoon of butter for tahini, use halva-filled chocolate bars, and add toasted sesame seeds to the dough. The sesame notes give an earthy backbone that reins in the sweetness and adds intrigue. Serve with cardamom ice cream for a Middle-Eastern twist that feels both exotic and nostalgic, like a sesame street fair in your mouth.
Storing and Bringing It Back to Life
Fridge Storage
Cover the cooled skillet tightly with foil or transfer wedges to an airtight container. Refrigerated, the cookie keeps up to four days, though the chocolate will firm and the edges will lose their snap. To revive, microwave a wedge on 50% power for 20 seconds, then blast heat for 5 seconds to re-melt chips without turning the whole thing rubbery. Add a tiny splash of water before reheating—it steams back to perfection and prevents the dreaded day-old cardboard texture.
Freezer Friendly
Cut the fully cooled cookie into wedges, wrap each in plastic and then foil, and freeze up to two months. Thaw overnight in the fridge, then warm as above. For emergency single-serve cravings, freeze individual balls of raw dough on a sheet pan, then store frozen dough nuggets in a bag; bake from frozen at 325°F for 12 minutes and you’ve got a personal skillet cookie without sharing obligations.
Best Reheating Method
Oven wins every time: place wedges on a sheet lined with parchment, tent loosely with foil, and warm at 300°F for 8–10 minutes. The foil traps steam so the center softens while edges regain crunch. Skip the toaster oven unless you enjoy chocolate drips turning into charcoal on the heating elements—trust me, I’ve set off enough alarms to know.