I was standing in a kitchen that smelled of burnt garlic and regret, watching a pot of plain, uninspired beef stew bubble away. My friend had dared me to turn that mess into something that could make a crowd line up at the door. I pulled out a handful of spices, a can of tomatoes, and a secret ingredient that would change everything. That moment, the sizzle on the pan, the way the aroma curled around the room—it was the spark that ignited this recipe.
Picture yourself in a dimly lit kitchen, the stovetop glowing like a sunrise, the air thick with the promise of comfort food. The beef sears with a satisfying crackle, releasing a savory perfume that makes your mouth water before you even taste it. The tomatoes break open, their juices mingling with the smoky haze of chili powder, turning the broth into a velvet coat that clings to every morsel. You can hear the gentle hiss of simmering, feel the heat rise from the pot, and see the colors deepen from bright red to a rich, amber hue.
Why does this version stand out? Because it balances heat and depth without overwhelming the palate. It uses a blend of beans that add body without heaviness. It incorporates a splash of Worcestershire sauce for umami that elevates the entire dish. It finishes with a hint of brown sugar that tames the acidity and creates a subtle sweetness that lingers on the tongue. And most importantly, it’s simple enough to whip up on a weekday yet impressive enough to wow at a weekend gathering.
And here’s the kicker: I’ll reveal a technique that most chili recipes skip—a quick caramelization step that adds a layer of flavor you won’t believe you missed. I dare you to taste this and not go back for seconds. Let me walk you through every single step—by the end, you’ll wonder how you ever made it any other way.
What Makes This Version Stand Out
- Heat: The chili hits you with a balanced kick that’s bold yet approachable. The combination of chipotle powder and fresh jalapeños gives a smoky depth that lingers. It’s not scorching hot, but it’s unmistakably fiery. This is hands down the best version you'll ever make at home.
- Umami: A splash of Worcestershire sauce and a touch of soy sauce unlock a savory complexity that makes every bite sing. The beef’s natural fats mingle with the sauce, creating a mouthful of rich flavor. It’s the secret sauce that most recipes miss. If you’ve ever struggled with bland chili, you’re not alone — and I’ve got the fix.
- Texture: The beans are cooked to a silky consistency that contrasts with the crisp vegetables. The broth thickens into a luscious, velvety coat that clings to the meat. The final dish feels hearty but not heavy, a perfect balance of comfort and indulgence. Picture the way it coats your tongue like velvet.
- Ingredient Quality: Fresh, high‑quality ground beef and ripe tomatoes make a world of difference. Using organic beans adds a subtle earthy note that’s hard to replicate with canned versions. The difference is subtle but undeniable. Most recipes get this completely wrong. Here's what actually works.
- Make‑ahead Potential: The chili’s flavors deepen overnight, making it perfect for meal prep or a slow‑cook dinner. It stores beautifully in the fridge and freezer, and reheats to perfection. The next time you’re short on time, this dish will be your lifesaver. And now the fun part.
- Crowd Reaction: Friends and family line up for seconds, then thirds, because the taste is unforgettable. The dish is versatile—serve it over rice, with cornbread, or with a side of sour cream. The versatility is a game‑changer. Stay with me here—this is worth it.
Inside the Ingredient List
The Flavor Base
Ground beef is the backbone of any chili, providing a rich, meaty foundation. Opt for a 80/20 blend for optimal flavor and moisture; the fat renders into a silky sauce that coats each bean. If you’re watching calories, switch to lean beef, but be prepared for a slightly drier result. Skipping the beef entirely turns the dish into a vegetarian stew, but the depth of flavor will be noticeably less.
Onions and garlic are the aromatic duo that kickstarts the flavor profile. Sauté them until translucent and fragrant, allowing their natural sugars to caramelize. This step creates a sweet undertone that balances the heat. If you forget to sauté them, the chili will taste raw and lack complexity.
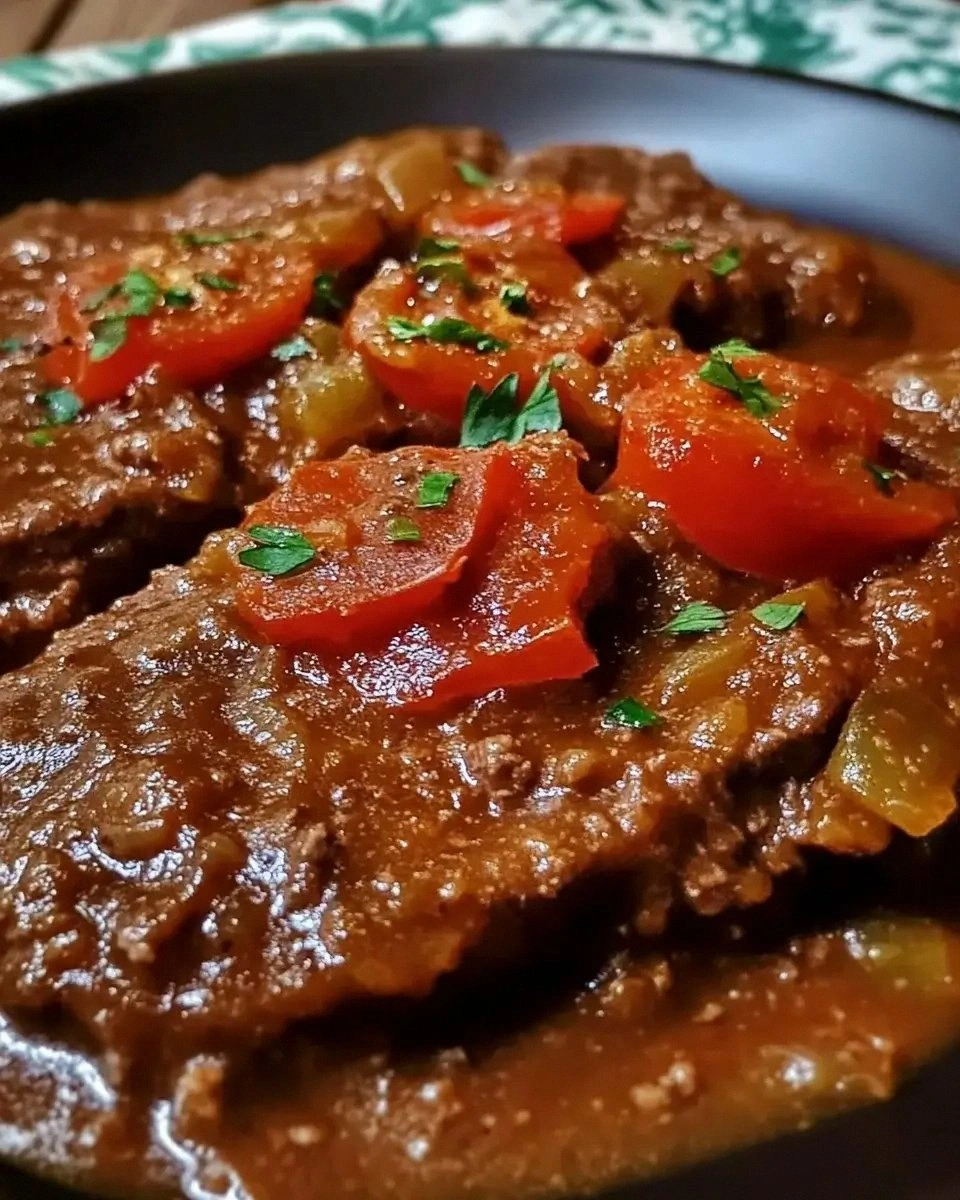
Tomatoes—both diced and paste—add acidity and body. The diced tomatoes bring juiciness, while the paste thickens the sauce and intensifies the tomato flavor. A pinch of brown sugar can counteract the acidity, giving the chili a subtle sweetness that complements the spices. If you omit the paste, the chili will be thinner and less cohesive.
The Texture Crew
Kidney beans and black beans contribute a hearty, creamy texture that balances the beef’s chewiness. Drain and rinse them to remove excess sodium and prevent a slimy consistency. If you prefer a smoother texture, pulse the beans in a blender before adding them to the pot. Skipping the beans will result in a thinner, less satisfying chili.
Corn kernels add a pop of sweetness and a pleasant bite. They’re especially welcome in summer, but they work wonderfully year‑round. If you’re allergic to corn, substitute with diced sweet potato for a different twist. Removing corn reduces the overall volume, so you might want to add an extra cup of broth.
The Unexpected Star
Worcestershire sauce is the unsung hero that brings umami and depth. It’s a small splash that makes a massive difference, infusing the chili with savory undertones that you can’t get from spices alone. If you’re vegan, use a mushroom-based sauce; it offers a similar depth. Omit it at your peril—your chili will feel flat.
Brown sugar is the subtle sweetener that tames acidity and rounds out the flavor. It also helps the spices caramelize slightly, adding a caramelized finish. If you’re lactose intolerant or prefer a cleaner palate, reduce the sugar to a teaspoon or skip it entirely. The chili will still be delicious but slightly more tart.
The Final Flourish
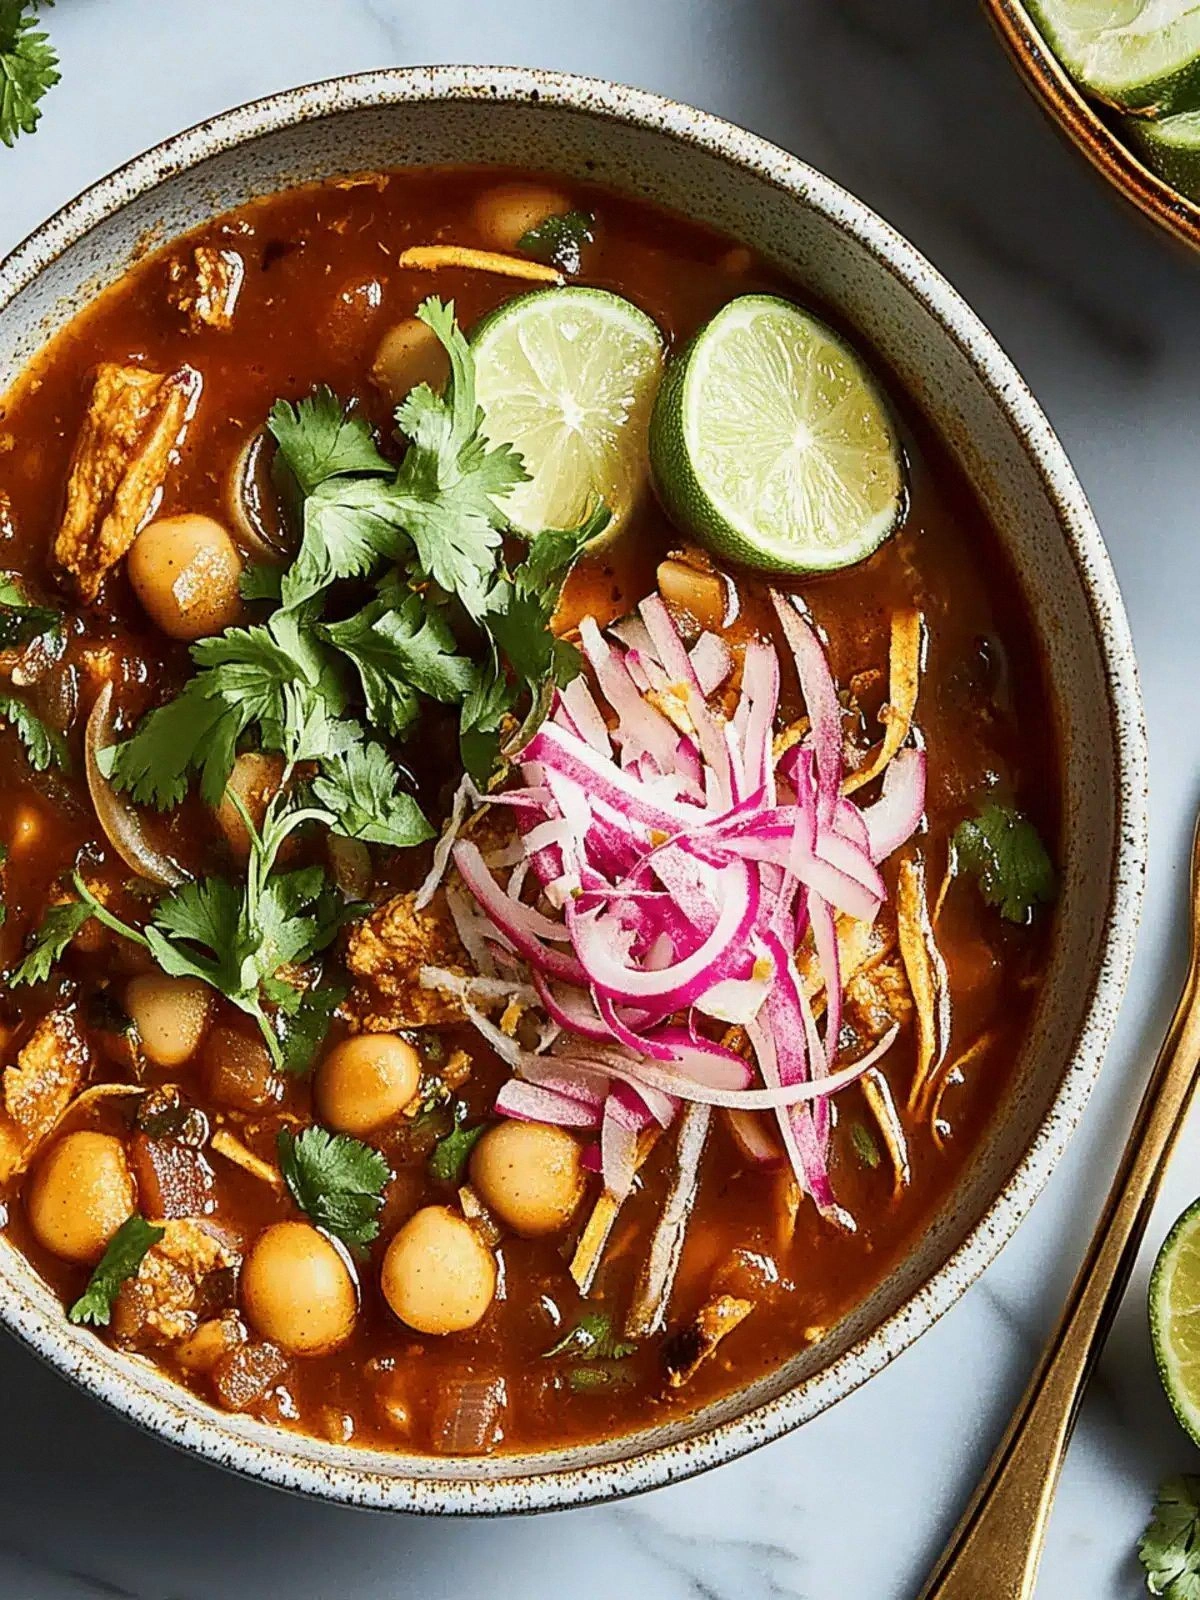
Fresh cilantro, lime wedges, and a dollop of sour cream are the finishing touches that elevate the dish from great to unforgettable. They add brightness, acidity, and creaminess that cut through the richness. If you’re not a fan of cilantro, parsley or basil can be used as alternatives. Skipping the fresh toppings will leave the chili feeling a bit dull.
Everything's prepped? Good. Let's get into the real action...

The Method — Step by Step
- Heat a large Dutch oven or heavy‑bottomed pot over medium heat. Add the olive oil and let it shimmer. Once the oil is hot, drop in the ground beef in a single layer, allowing it to sear before stirring. This step locks in juices and builds a flavorful crust. The beef should sizzle loudly, signaling that it’s time to start the flavor journey.
- Break up the beef with a wooden spoon and cook until it's browned on all sides, about 6–8 minutes. Drain any excess fat, but keep a tablespoon in the pot for sautéing the aromatics. A well‑seared base gives the chili a depth that can’t be replicated with raw meat. Remember, the browning reaction is where most of the flavor originates.
- Add the diced onions and minced garlic to the pot. Sauté until translucent and fragrant, about 3–4 minutes, stirring frequently. The onions should soften but not brown; they’re building the aromatic foundation. If you’re feeling adventurous, add a pinch of cayenne for an extra kick.
- Stir in the chili powder, cumin, smoked paprika, and oregano. Cook for 1 minute, allowing the spices to bloom. The aroma should be rich and inviting. This is the moment of truth—if the spices are under‑cooked, the chili will taste flat. Keep the heat low to avoid burning.
- Pour in the diced tomatoes, tomato paste, and beef broth. Stir to combine, scraping up any browned bits from the bottom of the pot. These bits are packed with flavor and should be incorporated. Bring the mixture to a gentle simmer.
- Add the kidney beans, black beans, corn, Worcestershire sauce, and brown sugar. Stir gently, then reduce the heat to low. Cover the pot and let it simmer for 25–30 minutes, stirring occasionally. The flavors should meld, and the chili should thicken. The edges will start pulling away from the pot, indicating readiness.
- Taste the chili and season with salt and pepper. Adjust the heat by adding more chili powder or fresh jalapeño if desired. This is the final adjustment—taste is the best judge. The chili should be robust, with a balanced heat that doesn’t overwhelm.
- Serve hot over rice, with a side of cornbread, or topped with shredded cheese, sour cream, and fresh cilantro. A squeeze of lime adds a bright, citrusy note. The dish is best enjoyed immediately, but it also stores well for future meals.
That's it — you did it. But hold on, I've got a few more tricks that'll take this to another level...
Insider Tricks for Flawless Results
The Temperature Rule Nobody Follows
Cooking chili at a steady low heat allows the flavors to develop fully without scorching the sugars. Keep the heat between 250°F and 275°F; this range ensures a gentle simmer that prevents bitterness. A friend once tried to speed it up with high heat, and the result was a burnt, acrid mess. The trick is patience—your chili will thank you for the slow, low approach.
Why Your Nose Knows Best
Smell is a powerful indicator of readiness. When the chili smells toasty and the spices have released their oils, it’s ready for the next step. If the aroma is sharp or raw, give it a few more minutes. Your nose can detect subtle changes that your eyes might miss.
The 5‑Minute Rest That Changes Everything
After you finish cooking, let the chili rest uncovered for 5 minutes. This allows the residual heat to finish cooking the beans and the flavors to settle. During this rest, the chili’s thickness will increase slightly, creating a richer mouthfeel. I’ve seen the difference in texture—without the rest, it feels watery.
A Splash of Acid for Brightness
Adding a splash of lime juice or vinegar at the end brightens the dish and balances the richness. The acidity cuts through the fat, leaving a clean finish. If you’re serving a crowd, offer lime wedges on the side so guests can adjust to their taste.
The Secret of Fresh Herbs
Stir in fresh cilantro just before serving to preserve its bright flavor. Fresh herbs add a burst of color and freshness that canned herbs cannot match. If you’re out of cilantro, parsley or basil can be used as alternatives. The key is to add them at the last moment.
The Quick Rinse Trick
Rinsing beans before adding them to the chili removes excess sodium and prevents a slimy texture. A quick rinse also helps the beans absorb the spices more effectively. Skipping this step can result in a thicker, saltier chili that’s harder to balance.
Creative Twists and Variations
This recipe is a playground. Here are some of my favorite ways to switch things up:
Spicy Chipotle Kick
Add a diced chipotle pepper and a tablespoon of adobo sauce for a smoky heat that’s perfect for chili con carne lovers. The chipotle adds depth and a subtle sweetness that balances the spice. This variation is great for a dinner party where guests crave bold flavors.
Mexican Street Chili
Swap the beef for ground pork and add a splash of tequila for an extra layer of complexity. Top with diced avocado and a sprinkle of cotija cheese. The tequila infusion gives the chili a unique, almost citrusy undertone that transports you straight to the streets of Mexico.
Vegetarian Delight
Replace the beef with crumbled tempeh or textured vegetable protein (TVP). Use vegetable broth instead of beef broth and add a handful of chopped spinach for extra nutrition. This version maintains the hearty texture while offering a plant‑based alternative.
Cheese‑Infused Chili
Stir in a cup of shredded pepper jack or Monterey Jack cheese during the last 5 minutes of simmering. The cheese melts into a silky sauce that coats the beans and beef. Serve with a side of tortilla chips for a cheesy, indulgent experience.
Sweet Potato Chili
Dice a sweet potato and add it in the first 10 minutes of simmering. The sweet potato adds natural sweetness and a velvety texture. This twist is especially comforting during cooler months.
Breakfast Chili
Serve the chili over a bowl of scrambled eggs and top with a dollop of sour cream. Add a sprinkle of chives for a fresh finish. This hearty breakfast option is perfect for a lazy weekend morning.
Storing and Bringing It Back to Life
Fridge Storage
Let the chili cool completely before transferring it to an airtight container. Store in the refrigerator for up to 4 days. The flavors will deepen, making each spoonful even more satisfying. When ready to eat, reheat on the stove over low heat, stirring occasionally.
Freezer Friendly
Divide the chili into portioned containers and freeze for up to 3 months. Thaw overnight in the refrigerator before reheating. This method preserves the texture and flavor, so you can enjoy a fresh batch anytime.
Best Reheating Method
Add a splash of water or broth before reheating to prevent the chili from drying out. Gently bring it to a simmer, stirring until heated through. The added liquid helps the chili regain its silky consistency. Serve immediately for the best experience.