I was standing in the middle of a chaotic kitchen, surrounded by a mountain of chocolate chips, a half‑baked cake, and a stack of empty snack bags that had seen better days. The smell of burnt sugar wafted through the air, and I muttered, “This is how not to make dessert.” That night, a friend dared me to turn my culinary misstep into a triumph, promising that if I could master the perfect chocolate crepe, I would be crowned the reigning dessert champion of our apartment. I didn’t know that I was about to rewrite the rules of indulgence.
Picture this: a golden‑brown sheet of batter sliding into a hot pan, the sizzle rising like applause from the kitchen floor. The steam curls into the air, carrying a faint scent of vanilla and cocoa, while the surface begins to bubble and set, forming a silky canvas. I watch the edges lift, the crepe turning a glossy caramel shade, and I know I’m close to pure bliss. The texture feels light enough to melt in your mouth but firm enough to hold a generous filling without collapsing. Each breath brings you closer to a moment where flavor and form dance in perfect harmony.
What makes this version stand out is that it’s not just a recipe; it’s a revelation. I’ve spent months tweaking the ratio of butter to milk, the timing of the whisk, and the heat of the pan to achieve a crepe that is simultaneously airy and chocolatey. The result is a delicate, melt‑in‑your‑mouth experience that outshines every other chocolate crepe I've ever tasted—whether from a bakery or a YouTube tutorial. It’s the kind of dessert that turns a simple weekend into a celebration. I dare you to taste this and not go back for seconds.
I’m not going to give you a generic list of steps. I’ll walk you through each nuance, each tactile cue, and each aroma that signals progress. By the end, you’ll wonder how you ever made it any other way. And trust me, you’ll want to share this with anyone who has ever struggled to get the perfect chocolate crepe. The secret lies in the subtle balance of ingredients and the precise rhythm of the cooking process. Let’s dive in and elevate your dessert game.
What Makes This Version Stand Out
- Flavor: The combination of rich cocoa, sweet vanilla, and a hint of salt creates a depth that lingers on the palate. The batter’s subtle sweetness is balanced by the natural bitterness of cocoa, resulting in a complex profile that satisfies both sweet and chocolate cravings.
- Texture: The batter’s smooth consistency, achieved by whisking until there are no lumps, produces a crepe that is airy yet sturdy. The edges caramelize just enough to give a slight crunch without compromising the softness of the center.
- Ease: This method requires no fancy equipment—just a non‑stick skillet and a whisk. The ingredients are pantry staples, and the process is straightforward enough for a novice or a seasoned pro.
- Versatility: Whether you’re filling them with fresh berries, whipped cream, or a drizzle of ganache, these crepes adapt seamlessly to any flavor profile.
- Crowd Appeal: At parties, guests will marvel at the professional look and decadent taste. The crepes are an instant conversation starter and a crowd‑pleaser.
- Ingredient Quality: Using high‑grade cocoa powder and real butter elevates the flavor beyond the ordinary. The small but crucial details—like using room‑temperature eggs—make a noticeable difference.
- Make‑Ahead Potential: The batter can be prepared up to 24 hours ahead, allowing you to focus on the finishing touches when you’re ready to serve.
- Visual Appeal: The glossy finish and golden edges look like a mini masterpiece, making them perfect for Instagram or a fancy dinner table.
Alright, let’s break down exactly what goes into this masterpiece…
Inside the Ingredient List
The Flavor Base
The 360 ml of milk is the liquid backbone of the batter, providing moisture and helping the cocoa dissolve evenly. A full glass of milk gives the crepe a tender crumb and a subtle dairy richness that pairs beautifully with the chocolate. If you’re lactose intolerant, swap the milk for a plant‑based alternative like oat or almond milk; just be sure it’s unsweetened to keep the flavor profile balanced.
The Texture Crew
Three large eggs are the glue that holds everything together. They add structure, lift, and a silky mouthfeel. The eggs should be at room temperature for a smoother batter; cold eggs can cause the mixture to curdle. The 45 g of melted butter adds a glossy sheen and a buttery depth that enhances the overall flavor.
The Unexpected Star
The 2 teaspoons of vanilla extract might seem ordinary, but it unlocks the chocolate’s full potential by adding a warm, aromatic undertone. Vanilla balances the cocoa’s bitterness and creates a more rounded taste. A dash of sea salt (½ tsp) is essential; it elevates the sweetness and brings out the chocolate’s complexity.
The Final Flourish
The 100 g of flour is the structural core, giving the batter its body. Use a fine‑sifted flour to avoid lumps and ensure a silky batter. The 40 g of cocoa powder is the star ingredient that defines the dessert. Choose a high‑quality Dutch‑process cocoa for a smoother, richer chocolate flavor that won’t taste bitter.
Everything’s prepped? Good. Let’s get into the real action…
The Method — Step by Step
- Whisk the Dry: In a large bowl, combine the flour, cocoa powder, sugar, and salt. Sift them together to break up any clumps, ensuring a smooth batter. This step eliminates lumps that could ruin the crepe’s texture. The dry mix should look like fine, even flour.
- Combine Wet Ingredients: In a separate bowl, whisk the eggs, milk, melted butter, and vanilla until fully blended. The mixture should be a uniform color, indicating the fats and liquids have emulsified. Keep this mixture cold until ready to combine to prevent the batter from becoming too runny. The aroma of vanilla should already hint at the dessert’s sweet promise.
- Merge Wet and Dry: Pour the wet mixture into the dry ingredients slowly, whisking continuously. The goal is a silky batter with no lumps. If the batter seems too thick, add a splash of milk to reach a pourable consistency. Once smooth, let the batter rest for 10–15 minutes; this relaxes the gluten and allows the cocoa to fully hydrate.
- Heat the Pan: Preheat a non‑stick skillet over medium heat. Lightly coat the surface with a teaspoon of butter or oil, then wipe away any excess with a paper towel. The pan should be hot enough that a drop of batter sizzles instantly. This ensures a golden edge and prevents sticking.
- First Pour: Ladle about ¼ cup of batter onto the center of the pan. Quickly tilt the pan to spread the batter thinly and evenly, covering the surface with a thin sheet. The batter should spread into a circle about 6–7 inches in diameter. This thinness is key to a delicate, airy crepe.
- Cook the First Side: Let the crepe cook for 1–2 minutes until the edges lift and the top turns opaque. Flip it gently with a spatula and cook for an additional 30 seconds. The flip should be smooth; if the crepe sticks, it’s not ready. The aroma will shift from buttery to a toasted chocolate scent.
- Repeat: Repeat steps 5–7 until the batter is exhausted. Keep the pan at a steady medium heat; too high will burn the edges, too low will make them soggy. Store finished crepes on a plate lined with parchment and cover with a clean towel to keep them warm.
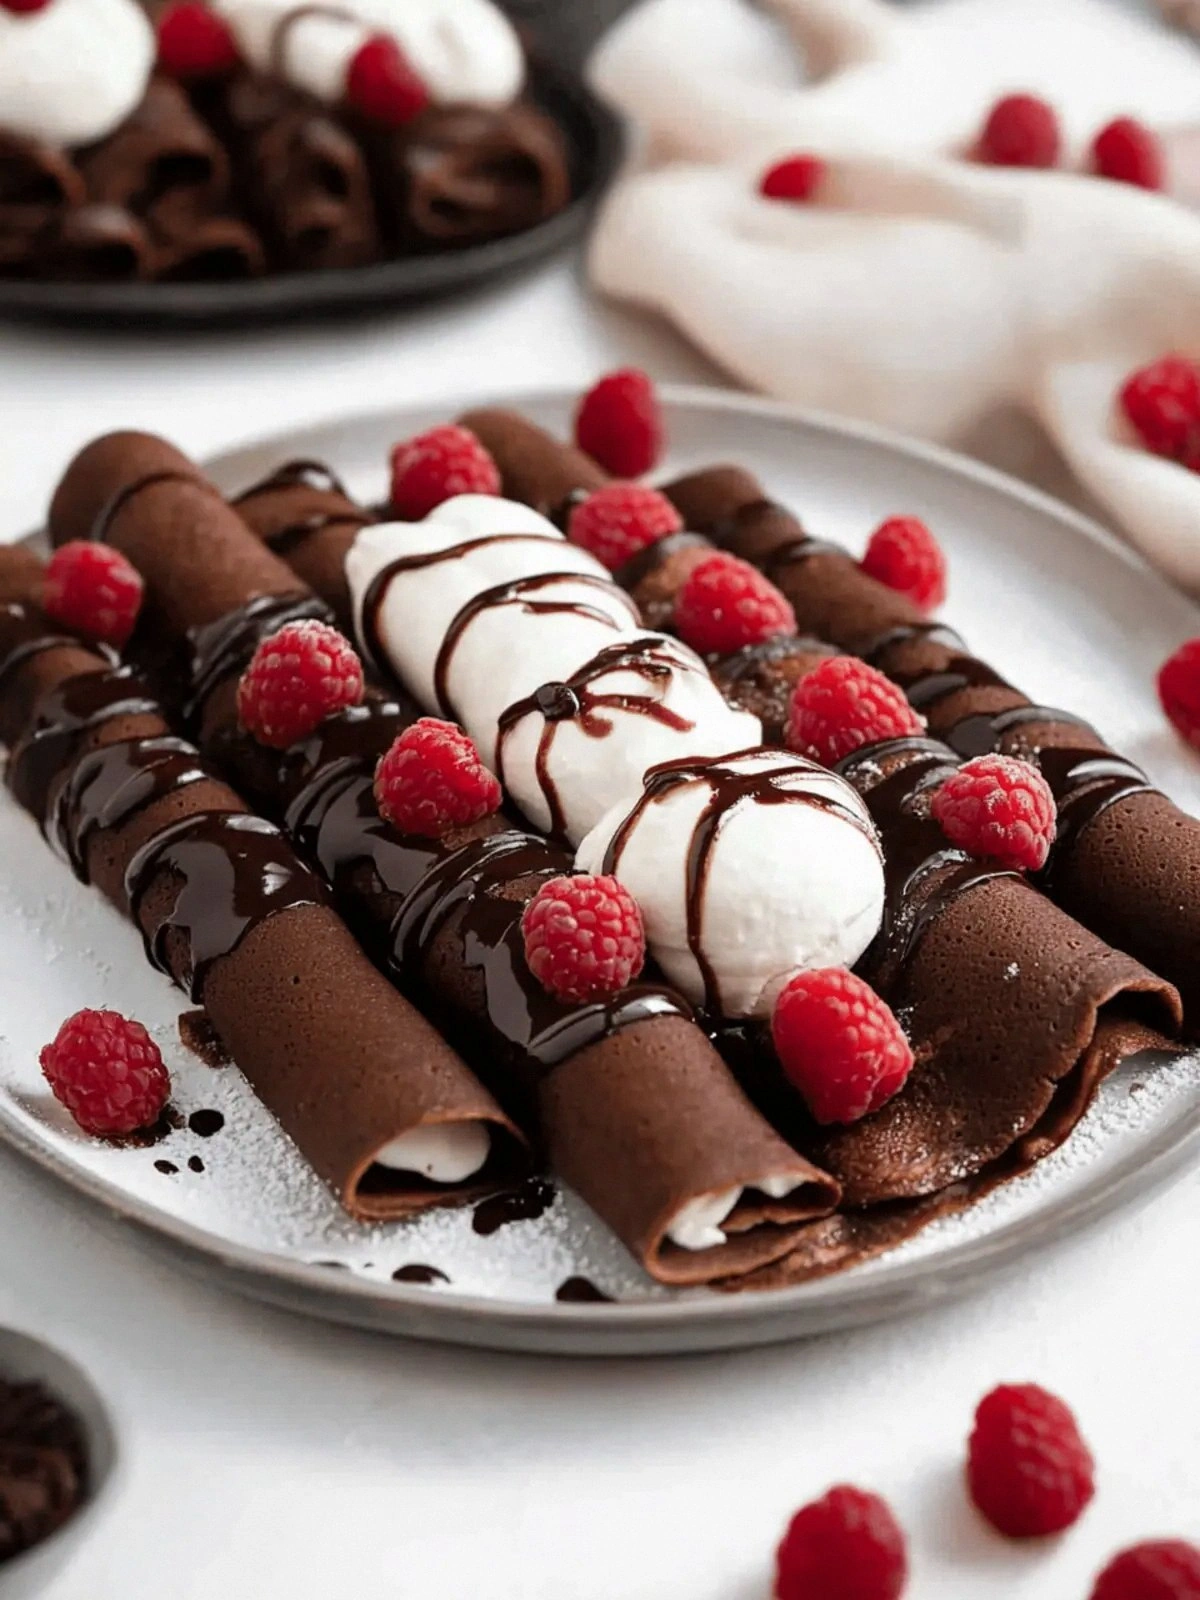
- Assemble: Layer the crepes with your choice of filling—fresh berries, whipped cream, chocolate ganache, or even a simple dusting of powdered sugar. Fold or roll as desired, and serve immediately for the best texture.
- Final Touch: A drizzle of melted chocolate or a sprinkle of sea salt can elevate the flavor profile. Serve with a side of fresh fruit or a scoop of vanilla ice cream for contrast. The finish should look like a small, edible masterpiece.
That’s it— you did it. But hold on, I've got a few more tricks that'll take this to another level…
Insider Tricks for Flawless Results
The Temperature Rule Nobody Follows
Many cooks underestimate the importance of pan temperature. A skillet that’s too hot will burn the outside while leaving the inside raw, whereas a cooler pan will produce soggy crepes. Aim for a medium heat and test with a small drop of batter; it should sizzle softly and spread without scorching. Keep the heat steady—adjust the flame as needed but avoid drastic changes that could affect the batter’s setting.
Why Your Nose Knows Best
Your sense of smell is a reliable guide. As the batter cooks, you’ll notice a deep, chocolatey aroma that signals the crepe is ready to flip. If the smell is faint, give it a minute longer. If it’s overpowering, the heat is too high. Trust your nose; it’s the quickest way to avoid burnt edges.
The 5-Minute Rest That Changes Everything
After whisking the batter, let it rest for at least 10 minutes. This resting period allows the flour to fully absorb the liquids and the gluten to relax. A batter that rests will spread more evenly and produce a smoother, more tender crepe. Skipping this step can result in a denser, tougher texture.
The Right Pan Size
A 10‑inch skillet works best for these crepes. It’s large enough to accommodate a generous spread but not so big that the batter drips off the edges. If you use a smaller pan, the batter will be thicker and harder to flip. A larger pan can cause the batter to spread too thin and become fragile.
The Final Flourish: Butter Finish
Just before serving, brush each crepe with a thin layer of melted butter. This adds a glossy shine and a subtle buttery flavor that enhances the chocolate base. It also prevents the crepe from drying out, keeping it moist and luscious until the last bite.
Creative Twists and Variations
This recipe is a playground. Here are some of my favorite ways to switch things up:
Nutty Crunch
Add a handful of chopped toasted almonds or hazelnuts to the batter. The nuts add a delightful crunch and a nutty undertone that pairs beautifully with the chocolate. Serve with a drizzle of caramel sauce for extra indulgence.
Spiced Delight
Stir in a pinch of cayenne pepper or a dash of cinnamon. The heat or warmth adds a surprising depth to the chocolate, creating a flavor profile reminiscent of a warm chocolate mug with a hint of spice.
Fruit Fusion
Fill the crepes with fresh strawberries, blueberries, or sliced kiwi. The acidity of the fruit balances the sweetness and adds a refreshing contrast. Top with a light dusting of powdered sugar for a classic touch.
Lemon Zest Twist
Grate a teaspoon of lemon zest into the batter. The citrus brightens the chocolate, giving it a fresh, zesty finish. This variation works well with a raspberry coulis or a lemon‑infused whipped cream.
Chocolate Ganache Core
Fill each crepe with a swirl of rich chocolate ganache before folding. The ganache melts into the warm crepe, creating a decadent, gooey center. Finish with a dusting of cocoa powder or a sprinkle of edible gold dust for an extra wow factor.
Storing and Bringing It Back to Life
Fridge Storage
Store the assembled crepes in an airtight container in the refrigerator for up to 3 days. Wrap them loosely with parchment paper to prevent sticking. When ready to serve, let them sit at room temperature for 10 minutes to soften slightly.
Freezer Friendly
For longer storage, freeze the crepes individually on a baking sheet, then transfer to a freezer bag. They can stay frozen for up to 2 weeks. To thaw, leave them in the refrigerator overnight, then reheat gently.
Best Reheating Method
Reheat the crepes in a preheated 350°F oven for 5–7 minutes, or in a skillet over low heat. Add a tiny splash of water before reheating; the steam will restore moisture and keep the crepe from drying out. A quick brush of melted butter after reheating will revive the glossy finish.