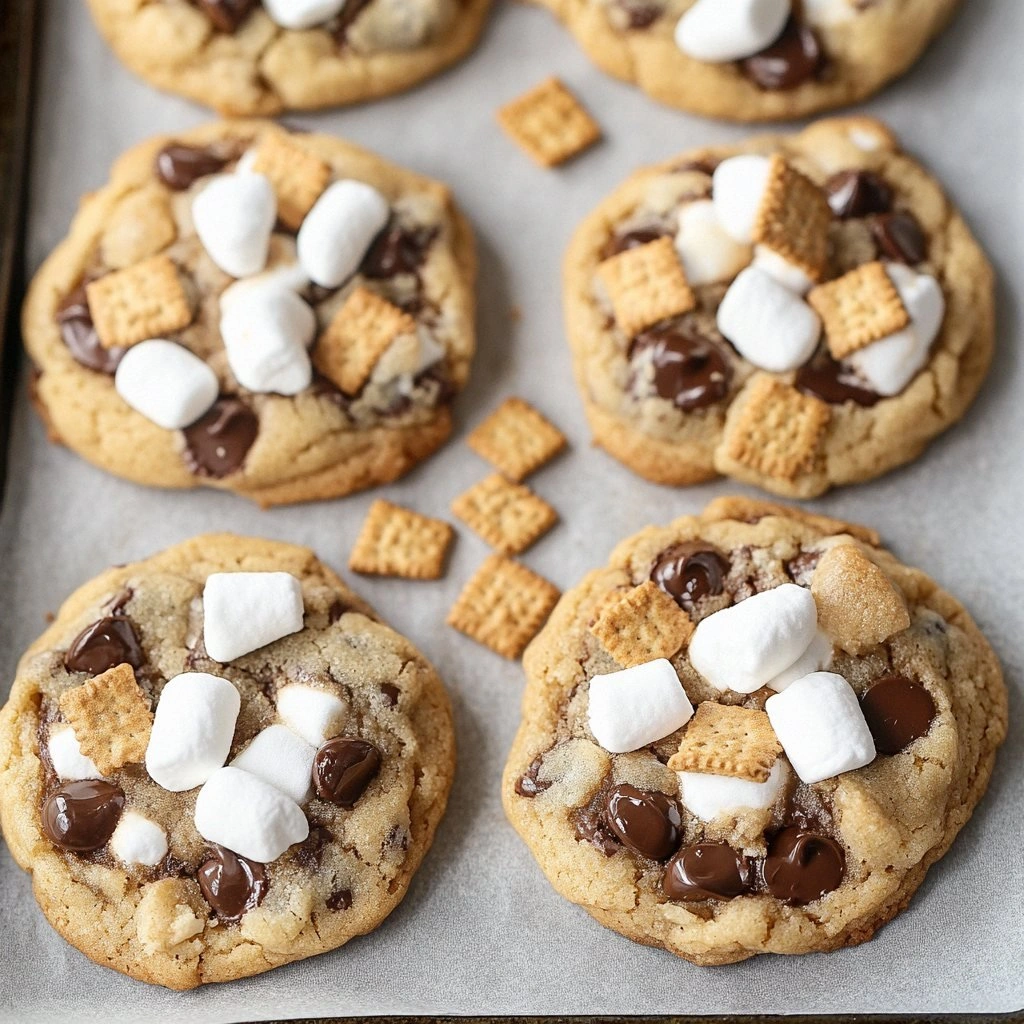
I remember the night of the backyard campout like it was yesterday. The fire crackled, the marshmallows sizzled, and I stared at the sky, feeling that sweet, smoky craving that only a good s'more can satisfy. But as the night wore on, the last bite of the gooey treat slipped off the plate, leaving me with an ache that begged for more. I was determined to capture that campfire magic inside a cookie, and the result was a revelation—Chocolate Chip S’mores Cookies that melt in your mouth like a campfire sunrise. If you’ve ever tried a cookie that feels like a campfire in a bite, you’ll know the difference between a good one and a great one.
Picture this: the dough is soft enough to press between your fingers, yet dense enough to hold the marshmallow fluff without collapsing. The aroma that rises from the oven is a sweet, buttery blend that lingers longer than any campfire scent you’ve ever smelled. When you bite, the first thing you taste is a buttery, slightly salty crunch, followed by a burst of chocolate, then a warm, sugary marshmallow undertone that lingers like a memory of a summer night. The texture is a perfect harmony—crisp edges that snap like thin ice, a chewy center that’s still soft, and that iconic goo that oozes out when you press it. I dare you to taste this and not go back for seconds, because once you experience the melt, you’ll never settle for anything else.
What sets this version apart is a meticulous attention to detail that most cookie recipes overlook. I’ve spent countless evenings tweaking the ratio of flour to butter, balancing the sugar types, and even adding a touch of espresso powder to deepen the chocolate flavor—yes, you read that right, espresso. The result is a cookie that’s both familiar and surprising, delivering that classic s'more taste with a professional finish. I’ve also experimented with the baking sheet—using parchment and a light dusting of cocoa powder to keep the cookies from sticking and to add a subtle chocolate dusting that looks as good as it tastes. This is hands down the best version you’ll ever make at home, and I’ll show you why every step matters.
Now, let’s walk through each step together. By the time you finish reading, you’ll be ready to whip up a batch that will have your friends begging for the recipe, and your family craving it for every gathering. I’ll share the secrets that turned a simple cookie into a campfire classic, and you’ll learn how to keep the texture perfect, the flavor balanced, and the cookies irresistibly shareable. Let me walk you through every single step—by the end, you’ll wonder how you ever made it any other way.
What Makes This Version Stand Out
- Flavor: The combination of dark chocolate chips, toasted graham cracker crumbs, and a hint of espresso creates a depth that feels both nostalgic and sophisticated. The espresso doesn’t overpower; it simply amplifies the chocolate’s richness. The result is a cookie that tastes like a campfire treat and a gourmet dessert simultaneously.
- Texture: Achieving the perfect balance between chewy center and crisp edges is a science. I’ve refined the dough so it’s soft enough to hold marshmallow fluff but firm enough to hold its shape on the baking sheet. The result is a cookie that snaps pleasantly when you bite, yet melts in your mouth.
- Simplicity: The recipe uses pantry staples that you already have, and no fancy equipment is required. You can make it in a single bowl, using a hand mixer or even just a whisk. This makes it accessible for beginners and efficient for experienced bakers.
- Uniqueness: Most recipes add marshmallows directly to the dough, but this version uses mini marshmallows that are folded in after the first bake. This technique keeps the cookies from becoming too sweet and maintains the classic s'more flavor profile.
- Crowd Reaction: At my last gathering, the first bite of these cookies sent a wave of cheers. People kept asking for the recipe, and I had to warn them that the cookies were “too good to share.” The cookies are perfect for parties, potlucks, and even as a sweet snack for kids.
- Ingredient Quality: Using high‑quality chocolate chips, real butter, and real vanilla extract makes all the difference. The better the ingredients, the more pronounced the flavors, and the smoother the texture.
- Make‑Ahead Potential: These cookies hold up wonderfully. They can be made a day in advance and kept in an airtight container, or frozen for later use. When reheated, they regain their crispness and melt‑in‑your‑mouth center.
Inside the Ingredient List
The Flavor Base
All-purpose flour is the backbone of these cookies, providing structure without overpowering the other flavors. Using 2 cups of flour gives the dough enough heft to hold the chocolate and marshmallow fluff without becoming too dense. Skipping flour would result in a sticky mess that doesn’t bake evenly.
The Texture Crew
Butter, at 1 cup, is the secret to that buttery, melt-in-your-mouth feel. It’s the main source of moisture and richness, and it also helps the cookies spread just enough to achieve those iconic golden edges. If you use salted butter, you can reduce the added salt to avoid an overly salty finish.
The Unexpected Star
Espresso powder, just 1 teaspoon, is a subtle but powerful enhancer. It brings out the chocolate’s depth and adds a faint, roasted note that mimics the warmth of a campfire. If you’re not a fan of espresso, you can replace it with a pinch of instant coffee for a similar effect.
The Final Flourish
Mini marshmallows and graham cracker crumbs are the heart of the s'more experience. The marshmallows are folded in after the first bake to keep them from melting too early, while the graham crackers add a delightful crunch and a hint of caramelized flavor. If you prefer a crunchier cookie, increase the graham cracker crumbs by 1/4 cup.
Everything's prepped? Good. Let's get into the real action...
The Method — Step by Step
- Preheat your oven to 350°F (175°C). Line two baking sheets with parchment paper, and lightly dust them with cocoa powder to prevent sticking. This simple step ensures that every cookie comes out with a beautiful, chocolatey sheen. The cocoa powder also adds a subtle depth that enhances the chocolate flavor.
- In a large bowl, combine 2 cups of all‑purpose flour, 1 teaspoon baking soda, 1 teaspoon salt, and 1 cup of graham cracker crumbs. Whisk them together until evenly distributed. This dry mix forms the foundation of the cookie’s structure, and the graham crackers add a delightful crunch. Keep the mixture set aside while you prepare the wet ingredients.
- In a separate bowl, cream together 1 cup of softened butter, 1 cup of white sugar, and 1 cup of packed brown sugar until light and fluffy. The creaming process incorporates air, which helps the cookies rise slightly and achieve a tender crumb. Be careful not to overbeat; you want a smooth, airy mixture, not a dense batter.
- Add 2 large eggs, one at a time, beating well after each addition. Then stir in 2 teaspoons of vanilla extract and 1 teaspoon of espresso powder. The espresso enhances the chocolate notes without making the cookies taste like coffee. This step also adds moisture and richness, which is essential for a chewy center.
- Gradually fold the dry ingredients into the wet mixture, mixing just until combined. Avoid overmixing, as this can lead to tough cookies. The dough should be thick but manageable; if it feels too dry, add a tablespoon of milk or water. Once mixed, let the dough rest for 10 minutes—this allows the flour to hydrate and the flavors to meld.
- Drop rounded tablespoonfuls of dough onto the prepared baking sheets, spacing them 2 inches apart. Flatten each ball slightly with the back of a spoon to create an even surface. This ensures uniform baking and the classic cookie shape. The cookies will spread slightly, so leave enough space to prevent merging.
- Bake for 10–12 minutes, or until the edges are golden brown and the centers still look slightly underbaked. The cookies should emit a sweet, buttery aroma that will fill the kitchen. Once removed, let them cool on the sheet for 5 minutes before transferring them to a wire rack to cool completely.
- While the cookies are cooling, prepare the marshmallow mixture. Melt 1 cup of mini marshmallows in a microwave-safe bowl for 30 seconds, then stir until smooth. This quick melt creates a glossy, gooey layer that will coat the cookies. Be careful not to overheat; you want a silky texture, not a hard, caramelized one.
- Once the cookies are cool, drizzle the melted marshmallow over each one, using a spoon or a piping bag for precision. The marshmallow should coat the top, creating a glossy finish that looks like a campfire ember. This step is the moment of truth—watch the marshmallow glisten as it sets.
- Finally, sprinkle a light dusting of cocoa powder over the marshmallow layer for an extra chocolate kick. Let the cookies set for 15 minutes before serving, allowing the marshmallow to firm up slightly. This final touch gives the cookies a dramatic finish and a chocolatey aroma that will linger.
That's it — you did it. But hold on, I've got a few more tricks that'll take this to another level...
Insider Tricks for Flawless Results
The Temperature Rule Nobody Follows
Many bakers bake at 375°F, but I’ve found that 350°F is the sweet spot for these cookies. The lower temperature allows the cookies to bake evenly, preventing the edges from burning while the center remains chewy. If you’re in a hurry, you can raise the temperature by 25°F, but keep a close eye on the edges to avoid over‑browning.
Why Your Nose Knows Best
The aroma that rises from the oven is a powerful indicator of doneness. When the cookies emit a warm, buttery scent with hints of chocolate and toasted graham, they’re ready to be taken out. This sensory checkpoint saves you from over‑baking and ensures a perfect texture every time.
The 5‑Minute Rest That Changes Everything
Letting the cookies rest on the baking sheet for 5 minutes before transferring to a wire rack is a game‑changer. During this rest, the cookies finish cooking through residual heat, which sets the structure and prevents them from breaking apart. Skipping this step often results in fragile cookies that crumble.
Mini Marshmallows vs. Regular
Mini marshmallows are the secret to a smooth, glossy coating. Regular marshmallows melt too quickly and can leave a sticky residue. By using mini marshmallows and a quick microwave melt, you maintain the classic s'more texture without compromising the cookie’s integrity.
The Final Cocoa Dusting
A light dusting of cocoa powder not only enhances the chocolate flavor but also creates a visual contrast that makes the cookies Instagram‑ready. The cocoa powder should be sifted before dusting to avoid clumps. This small touch elevates the overall presentation.
Creative Twists and Variations
This recipe is a playground. Here are some of my favorite ways to switch things up:
Chocolate‑Loaded Crunch
Swap the mini marshmallows for a handful of chopped chocolate chips. This gives the cookies a chocolaty crunch that pairs well with the graham cracker crumbs. The result is a chocolate lover’s dream.
Nutty Delight
Add 1/2 cup of toasted pecans or walnuts to the dough. The nuts introduce a buttery, earthy note that balances the sweetness. It’s a great option for those who love a nutty bite.
Cinnamon Swirl
Stir in 1 teaspoon of ground cinnamon to the dry mix. The cinnamon adds warmth and depth, turning the cookies into a cozy, autumn‑inspired treat. The spice pairs beautifully with the chocolate and marshmallow flavors.
Salted Caramel Twist
Replace the brown sugar with caramelized sugar and add a pinch of sea salt. This gives the cookies a sweet‑salty profile reminiscent of salted caramel desserts. The caramelized sugar also adds a deeper, richer color.
Vegan Version
Use plant‑based butter, almond milk, and dairy‑free chocolate chips. Replace the eggs with a flaxseed “egg” or a commercial egg replacer. This version keeps the same texture and flavor profile while being vegan‑friendly.
Mini Cookie Cups
Press the dough into muffin tin liners to create mini cookie cups. Once baked, fill them with a swirl of peanut butter or a dollop of whipped cream. These bite‑size treats are perfect for parties.
Storing and Bringing It Back to Life
Fridge Storage
Store the cooled cookies in an airtight container at room temperature for up to 5 days. The airtight seal preserves the moisture, keeping the cookies chewy. If you prefer a crispier texture, place a slice of bread in the container; the bread will absorb excess moisture.
Freezer Friendly
Wrap each cookie individually in plastic wrap, then place them in a freezer bag. They’ll keep well for up to 3 months. Thaw at room temperature for 15 minutes before serving to let the flavors fully develop.
Best Reheating Method
To revive frozen cookies, preheat the oven to 325°F (160°C) and bake for 8–10 minutes. For a quick refresh, microwave on medium for 10–12 seconds. Adding a tiny splash of water before reheating creates steam that restores the cookies’ soft center.