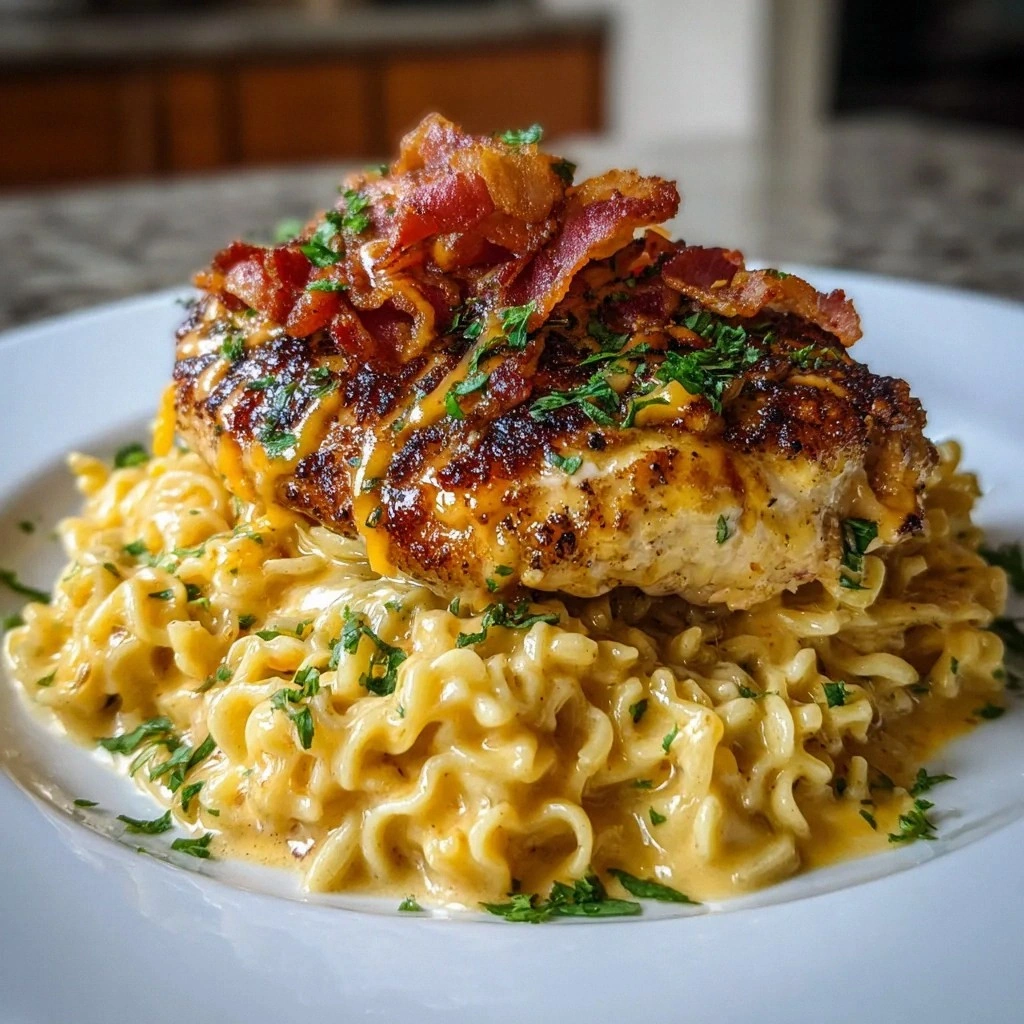
I was halfway through a midnight snack spree, tossing a bag of stale chips into a bowl, when the kitchen alarm sounded—my trusty old stove was on fire and I was left with a sizzling pan of ground beef, a half‑cooked bacon strip, and a handful of ramen noodles that had somehow found their way into my fridge. I stared at the chaos, then laughed, because I knew exactly what to do. This was the moment that birthed the Bacon Cheeseburger Ramen Bake, a dish that marries the comfort of a classic cheeseburger with the quirky joy of ramen, all baked to a golden finish that makes your kitchen smell like a backyard grill on a sunny afternoon. I dare you to taste this and not go back for seconds, because the first bite delivers a burst of smoky bacon, tangy pickles, and molten cheddar that will have you begging for more.
Picture yourself pulling this out of the oven: steam rises like a savory cloud, the surface is crisped to a perfect golden crust, and the aroma of caramelized onions, beef broth, and melted cheese fills the air. The sound of the first spoonful is a satisfying crunch, followed by a silky melt that coats your tongue like velvet. The texture is a delightful contrast—crunchy bacon, chewy ramen strands, and a creamy cheese layer that ties everything together. I’ll be honest, I ate half the batch before anyone else got a chance to taste it, but the sheer satisfaction of that first bite made the loss worth it.
What sets this version apart is the meticulous layering of flavors and the clever use of ingredients that you’d normally reserve for a classic burger. The ramen noodles absorb the savory broth, the bacon adds a smoky crunch, and the pickles give a sharp bite that cuts through the richness. Most recipes get this completely wrong, focusing on a quick skillet dish that ends up soggy and bland. Here, the baking step caramelizes the top, creating a crisp layer that’s impossible to resist. And the best part? It’s a one‑pan, one‑bake meal that saves you time while delivering a crowd‑pleasing result that feels like a gourmet experience.
Let me walk you through every single step—by the end, you’ll wonder how you ever made it any other way. From the first sizzle to the final garnish, I’ll share the micro‑challenges, the bold claims, and the little secrets that elevate this dish from ordinary to unforgettable. If you’ve ever struggled with a bland ramen or a soggy burger, you’re not alone—and I’ve got the fix. Now, let’s dive in.
What Makes This Version Stand Out
- Flavor Depth: The combination of beef broth, ketchup, mustard, and pickles creates a complex sauce that coats the noodles like a savory glaze, unlike the flat taste of plain ramen.
- Crispy Texture: Baking the assembled dish caramelizes the bacon and cheese, giving a crunchy top that contrasts beautifully with the soft noodle base.
- Time Efficiency: All the ingredients are pre‑cooked and layered in a single dish, then baked—no more stovetop juggling or multiple pans.
- Family‑Friendly: The familiar cheeseburger flavor profile makes it a hit with kids and adults alike, turning dinner into an instant crowd‑pleaser.
- Ingredient Quality: Using fresh ground beef, thick‑cut bacon, and real cheddar ensures every bite is rich and satisfying.
- Make‑Ahead Potential: The dish can be assembled, refrigerated, and baked later, making it perfect for busy weeknights or weekend gatherings.
- Versatility: Swap out the beef for turkey or chicken, or experiment with different cheeses to tailor the dish to your taste or dietary needs.
- Visual Appeal: The golden, bubbly top and the vibrant green of pickles create a plate that looks as good as it tastes.
Alright, let’s break down exactly what goes into this masterpiece…
Inside the Ingredient List
The Flavor Base
Ground beef is the heart of this dish; it provides the meaty, savory foundation that carries the ketchup, mustard, and beef broth. Using a 80/20 blend ensures enough fat for richness without turning the bake greasy. If you’re aiming for a lighter version, swap in ground turkey or chicken, but keep the broth to maintain moisture.
Beef broth is the secret sauce that infuses every noodle strand. Low‑sodium broth keeps the dish from becoming overly salty, especially since bacon and pickles already bring a lot of salt to the table. A quick simmer of the broth with a splash of Worcestershire sauce can elevate the umami profile, but that’s optional.
The Texture Crew
Ramen noodles are the unexpected star; they soak up the broth and hold the sauce, giving the bake a hearty, comforting bite. Use fresh or instant noodles—just be sure to pre‑cook them briefly so they don’t become mushy during baking.
Bacon is the crispy, smoky element that adds a delightful crunch. Cook the bacon until just crisp, then crumble it into the mix. If you prefer a leaner option, consider turkey bacon, but the flavor won’t be as robust.
Shredded cheddar cheese is the gooey, melty layer that ties everything together. It creates a luscious coating that melts into the broth, binding the flavors. Mixing in a bit of mozzarella gives extra creaminess, but cheddar alone delivers that classic cheeseburger taste.
The Unexpected Star
Diced pickles bring a tangy bite that cuts through the richness of beef and cheese. They also add a pop of color and texture. If pickles are not your thing, relish is a fine substitute, though it will be sweeter.
Diced onions add a subtle sweetness and crunch. They caramelize slightly during baking, providing a sweet contrast to the savory broth. If you’re sensitive to onions, try green onions or skip them entirely; the dish will still shine.
The Final Flourish
Ketchup and mustard blend into a sauce that coats the noodles and meat, delivering that unmistakable burger flavor. The ketchup adds sweetness, while mustard introduces a zesty kick. Use your favorite brands, or whip up a homemade mix for an extra punch.
Salt and pepper are essential for seasoning, but because bacon and pickles bring their own saltiness, keep the added salt to a minimum. Freshly ground black pepper adds a subtle heat that balances the dish.
Everything's prepped? Good. Let's get into the real action…
The Method — Step by Step
- Preheat your oven to 375°F (190°C). Line a 9×13 inch baking dish with parchment paper to prevent sticking. This ensures the top crisps evenly and the bottom stays clean.
- In a large skillet over medium heat, crumble the bacon and cook until it releases its fat and starts to brown. Drain on paper towels and set aside. The bacon fat will later be used to sauté the onions, giving an extra layer of flavor.
- Using the same skillet, add the ground beef to the bacon fat. Cook until browned, breaking it apart with a spatula. Once browned, drain excess fat if needed; this keeps the bake from becoming greasy.
- Stir in the diced onions and cook until translucent, about 3–4 minutes. The onions will soften and develop a sweet aroma that balances the savory broth.
- Add the diced pickles, ketchup, mustard, and beef broth to the skillet. Stir until the mixture is well combined and simmer for 2 minutes. The sauce should thicken slightly and coat the meat evenly.
- While the sauce simmers, boil the ramen noodles in salted water for 2 minutes, then drain. The noodles should be slightly undercooked so they absorb the sauce without falling apart during baking.
- In the prepared baking dish, spread half of the noodles as a base layer. Pour half of the meat and sauce mixture over the noodles, then sprinkle half of the shredded cheddar and crumbled bacon. Repeat the layers with the remaining noodles, meat, cheese, and bacon.
- Cover the dish with aluminum foil and bake for 20 minutes. This allows the flavors to meld and the noodles to steam in the savory broth.
- Remove the foil and bake for an additional 10 minutes, or until the top is golden brown and bubbly. The cheese should be melted into a glossy, slightly crispy crust.
- Let the bake rest for 5 minutes before serving. This brief rest lets the juices settle, making the dish easier to scoop and ensuring every bite is juicy.
That's it—you did it. But hold on, I've got a few more tricks that'll take this to another level…
Insider Tricks for Flawless Results
The Temperature Rule Nobody Follows
Many people bake at a high temperature, which can scorch the top before the interior is fully cooked. Keep the oven at 375°F (190°C) and cover the dish with foil for the first 20 minutes. This traps steam, ensuring the noodles stay tender while the top crispens in the final 10 minutes.
Why Your Nose Knows Best
Before you lift the foil, pause and inhale. A strong, savory aroma indicates the broth has fully integrated with the noodles. If the smell is weak, give it another 5 minutes; the dish needs that fragrant, umami punch to win your palate.
The 5-Minute Rest That Changes Everything
After removing the bake from the oven, let it sit for 5 minutes. This resting period allows the cheese to set slightly, preventing a sticky mess when you cut into it. It also lets the juices redistribute, making each spoonful more flavorful.
Layering for Texture
When assembling the layers, start with noodles at the bottom, then add a thin coat of sauce before adding the next noodle layer. This technique prevents the noodles from sticking together and ensures each bite has a balanced mix of meat, sauce, and noodle.
Cheese Selection Matters
While cheddar is the classic choice, adding a small amount of smoked gouda or pepper jack can give a subtle smokiness or heat. Just remember to keep the overall cheese ratio below 1 cup for a 4‑serving bake to avoid a too‑heavy texture.
The Quick Fix for Extra Crunch
If you want an extra crunchy top, sprinkle a handful of panko breadcrumbs mixed with melted butter over the cheese before the final 10 minutes of baking. The breadcrumbs will toast to a golden crisp, adding a delightful contrast to the gooey cheese.
Creative Twists and Variations
This recipe is a playground. Here are some of my favorite ways to switch things up:
Spicy Jalapeño Kick
Add diced jalapeños to the meat mixture and sprinkle a pinch of cayenne pepper. The heat pairs nicely with the smoky bacon and adds a lively bite that adult diners love.
Mediterranean Twist
Replace the pickles with sun‑dried tomatoes and swap cheddar for feta cheese. The briny feta and sweet tomatoes bring a Mediterranean flair, perfect for a summer dinner.
Vegan Version
Use crumbled tempeh or lentils instead of ground beef, plant‑based bacon, and vegan cheddar. Keep the broth low‑sodium vegetable broth and add a splash of soy sauce for depth.
Breakfast Bounty
Swap the beef for breakfast sausage, add a handful of scrambled eggs, and top with a drizzle of maple syrup. The sweet‑savory combo turns the bake into a hearty brunch dish.
Cheese Lover’s Delight
Layer extra cheese—add a second layer of cheddar and a sprinkle of parmesan on top before baking. The result is a cheese explosion that satisfies every dairy craving.
Herb Infusion
Stir in fresh chopped parsley or basil into the sauce. The herbs add a bright, fresh note that balances the richness of the beef and cheese.
Storing and Bringing It Back to Life
Fridge Storage
Cool the bake to room temperature, then cover tightly with plastic wrap or foil. Store in the refrigerator for up to 3 days. Reheat in a microwave for 2–3 minutes, or in a preheated oven at 350°F (175°C) for 10 minutes until hot.
Freezer Friendly
Wrap the bake in parchment paper, then aluminum foil, and place in a freezer bag. It stays good for up to 2 months. Thaw overnight in the refrigerator before reheating as described above.
Best Reheating Method
Add a splash of water or broth to the dish before reheating to restore moisture. Cover with foil to keep the top from drying out. A quick 5‑minute bake at 375°F (190°C) will revive the dish’s original texture and flavor.