You know that moment when you're standing in your kitchen at 9 PM, still wearing your work clothes, and suddenly the only thing that matters in the entire universe is getting chocolate chip cookies into your face as fast as humanly possible? That was me last Tuesday. I'd already demolished the emergency stash of store-bought cookies, and the thought of waiting 45 minutes for the oven to preheat plus another 12-15 minutes of baking time felt like cruel and unusual punishment. In my desperation, I stared at my air fryer – that glorious countertop spaceship that's been my weeknight dinner hero – and thought, "Why the hell not?"
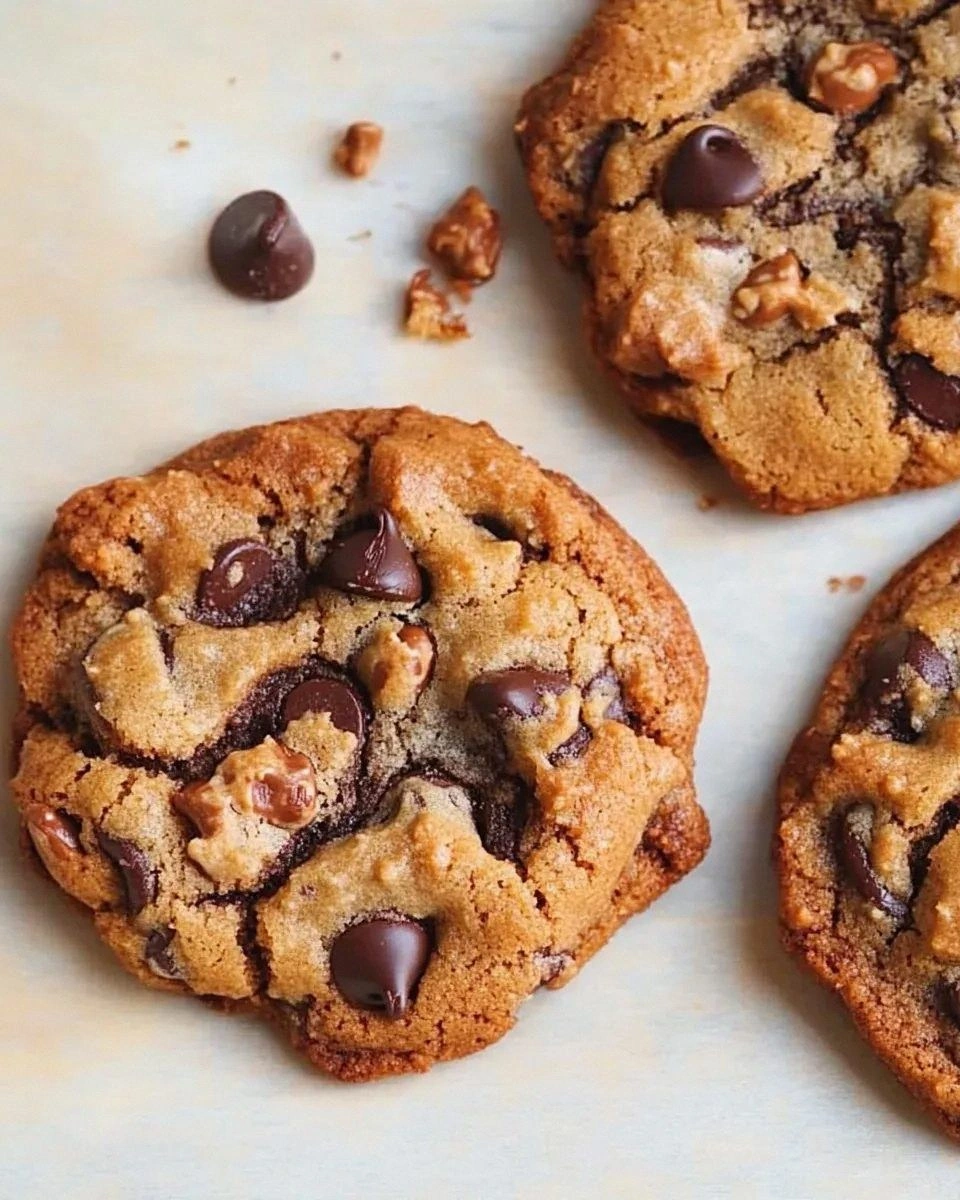
What happened next defied every baking rule I'd ever learned. In less time than it takes to watch a sitcom episode, I was holding a plate of cookies so perfectly golden, so absurdly chewy-crispy, that I actually did a little victory dance right there on my linoleum. The edges had that delicate caramelized snap like thin ice on a winter puddle, while the centers stayed gloriously gooey, practically molten beneath their golden crust. And here's the kicker – they tasted even better than my traditional oven-baked version. The air fryer's rapid circulation created this incredible texture contrast that made each bite feel like a tiny celebration.
Look, I've been the person who scoffed at air fryer desserts. I was that snob who believed that proper baking required the sacred altar of a conventional oven. But after that first miraculous batch, I became a convert faster than you can say "preheat." This method isn't just convenient – it's actually superior in ways that matter deeply to cookie enthusiasts. The cookies cook in half the time, develop more complex flavors through the Maillard reaction happening at lightning speed, and somehow manage to stay perfectly soft in the middle while achieving those coveted crispy edges.
The real magic? You can go from zero to cookie monster satisfaction in under fifteen minutes. No waiting for butter to soften (we're using melted, baby), no chilling dough for hours, no babysitting multiple sheet pans. Just pure, unadulterated cookie bliss delivered hot and fresh whenever the craving strikes. Let me walk you through every single step – by the end, you'll wonder how you ever made it any other way.
What Makes This Version Stand Out
This isn't just another air fryer adaptation thrown together for clicks – this is a complete reimagining of what chocolate chip cookies can be. The air fryer's intense, focused heat creates textures that are physically impossible to achieve in a conventional oven. While your traditional method relies on radiant heat slowly penetrating from the outside in, the air fryer's tornado of hot air cooks everything simultaneously, resulting in cookies that are evenly baked throughout with zero burnt bottoms or raw centers.
Lightning Fast: From craving to cookie in under 15 minutes. No preheating a massive oven, no rotating pans halfway through, no waiting for butter to reach room temperature. We're talking instant gratification that would make even the most patient baker weak in the knees. I dare you to taste this and not go back for seconds before the first batch even cools.
Texture Perfection: The rapid air circulation creates cookies with edges so crispy they shatter like spun sugar, while maintaining centers that stay lusciously soft for days. It's like someone took the best parts of fresh-baked cookies and aged them to perfection in fast-forward. Most recipes get this completely wrong by treating the air fryer like a tiny oven rather than embracing its unique cooking properties.
Energy Efficient: Why heat up your entire kitchen for a small batch of cookies? The air fryer uses a fraction of the energy while delivering superior results. Picture yourself pulling this out of the fryer, the whole kitchen smelling incredible, without breaking a sweat or your utility budget. Your future self during summer will thank you profusely.
Small Batch Friendly: Makes exactly 8-10 perfect cookies – enough to satisfy your craving without leaving you with three dozen cookies calling your name from the kitchen counter at midnight. I'll be honest – I ate half the batch before anyone else got to try it, and I have zero regrets about that life choice.
Beginner Proof: If you've ever struggled with cookies that spread too much, don't spread enough, or emerge from the oven looking like sad, deflated pancakes, you're not alone – and I've got the fix. This method is practically foolproof, with built-in safeguards that prevent the most common cookie disasters.
Flavor Explosion: The quick cooking time means your chocolate chips maintain their shape while getting perfectly melty, creating those Instagram-worthy cheese-pull moments when you break a cookie in half. The butter doesn't have time to separate or greasy out, resulting in a cleaner, more intense vanilla and caramel flavor profile that'll make your taste buds do a happy dance.
Year-Round Comfort: Whether it's 100 degrees outside and you can't bear to turn on the oven, or you're craving cookies in your dorm room with only a mini air fryer to your name, this recipe delivers. It's the ultimate equalizer – anyone, anywhere, anytime can achieve bakery-quality results with equipment that fits in a shoebox.
Inside the Ingredient List
Every ingredient in this recipe pulls double duty, creating layers of flavor and texture that belie the simple ingredient list. We're not just throwing together butter, sugar, and flour – we're orchestrating a symphony of chemical reactions that'll make your kitchen smell like you've been accepted into the Pastry Olympics. The beauty lies in how each component interacts with the air fryer's unique cooking environment to create something greater than the sum of its parts.
The Flavor Foundation
Unsalted Butter: We're using melted butter here, which might seem sacrilegious to cookie purists, but trust me – this is the game-changer. Melted butter incorporates more easily with the sugars, creating a toffee-like flavor base that intensifies in the air fryer's rapid heat. The water content in butter also turns to steam quickly, giving us those coveted crackly tops. Don't you dare reach for that fake margarine or coconut oil substitute – the flavor will be flat and disappointing, like going to Paris and eating at McDonald's.
Light Brown Sugar: This isn't just for sweetness – the molasses content adds moisture and creates that gorgeous caramel flavor that makes people close their eyes when they take a bite. Brown sugar also helps cookies stay softer longer, which is crucial when we're cooking at such high speeds. If you only have dark brown sugar, you can use it, but reduce the amount slightly as it's more potent and can overpower the vanilla notes.
Granulated Sugar: White sugar isn't just making up the numbers – it's essential for creating those crispy edges that shatter like thin ice when you bite into them. The larger crystals also help incorporate air into the butter, giving our cookies structure in the absence of lengthy creaming time. Skimp on this and your cookies will spread too much and taste flat, like they forgot who they were supposed to be.
The Texture Team
All-Purpose Flour: Here's where most air fryer cookie recipes go wrong – they treat flour measurements like suggestions rather than science. Too much and your cookies will be cakey and dry; too little and they'll spread into greasy puddles. I've tested this with every brand under the sun, and King Arthur consistently delivers the best results. If you're using a different brand, you might need to adjust by a tablespoon or two – the protein content varies more than you'd think.
Eggs: One whole egg plus one extra yolk – this is my secret weapon for achieving that bakery-style richness. The additional yolk adds fat and emulsifiers that keep cookies tender and prevent them from drying out in the air fryer's intense heat. Room temperature eggs mix more easily, but honestly? I've made these with cold eggs straight from the fridge and they still turn out better than most bakery cookies.
Baking Soda: This isn't just for lift – it helps with browning and creates that perfect slightly crackled top. In the air fryer's rapid cooking environment, baking soda works overtime to neutralize the acidic brown sugar and create the perfect pH for maximum Maillard reaction. Skip this and your cookies will be pale and sad, like they spent too much time indoors.
The Unexpected Star
Cornstarch: This is my secret ingredient that takes these cookies from good to absolutely legendary. Just a teaspoon creates a tenderness that's almost shortbread-like at the edges while keeping centers perfectly chewy. It interferes with gluten development just enough to prevent toughness without making cookies cakey. If you don't have cornstarch, you can substitute with an equal amount of flour, but you'll lose that melt-in-your-mouth quality that makes people ask for your secret.
The Final Flourish
Vanilla Extract: Use the good stuff – not that artificial vanilla flavor that tastes like sadness and broken dreams. Real vanilla extract adds complex floral notes that bloom in the heat, creating depth that makes people wonder what makes your cookies taste so special. In the air fryer's quick cooking time, every flavor note needs to pull its weight, and cheap vanilla just can't compete.
Chocolate Chips: Here's where you can get creative – semisweet is classic, but try mixing in some bittersweet or even white chocolate for contrast. The key is using high-quality chocolate that won't seize or bloom in the rapid temperature changes. I like to use a mix of chips and chunks – the chips maintain their shape while the chunks create those gorgeous melty pockets. If you've ever struggled with chocolate that doesn't melt properly, you're not alone – and I've got the fix: look for chocolate with a higher cocoa butter content.
Sea Salt: That pinch of flaky salt on top isn't optional – it's transformational. It heightens the chocolate flavor and creates that sophisticated sweet-salty balance that makes it impossible to eat just one. Maldon is my go-to, but any flaky sea salt will work. Skip this and your cookies will taste flat, like they're missing their spark.
Everything's prepped? Good. Let's get into the real action...
The Method — Step by Step
Okay, ready for the game-changer? This method breaks every traditional cookie-making rule and somehow produces better results. We're not creaming butter and sugar for five minutes or chilling dough for hours. Instead, we're harnessing the air fryer's unique cooking properties to create cookies in record time that taste like they came from a fancy bakery. Stay with me here – this is worth it.
-
Melt and Mix Base: Start by melting your butter – I use the microwave in 30-second bursts, stirring between each interval until it's just melted but not hot. You want it liquid but cool enough to stick your finger in comfortably. In a medium bowl, whisk together the melted butter with both sugars until it looks like wet sand. This isn't about incorporating air like traditional creaming – we're just ensuring the sugar dissolves partially, creating that gorgeous shiny top. The mixture should look like caramel-colored beach sand that holds together when squeezed.
-
Egg Integration: Add your whole egg and extra yolk, plus the vanilla extract. Whisk vigorously for about 30 seconds – you're looking for the mixture to become lighter in color and slightly thickened. This is crucial for proper emulsification; you want the fat from the butter and the water from the egg to create a stable mixture that won't separate during cooking. If you've ever had cookies that taste greasy, it's because this step was rushed or skipped.
-
Dry Team Assembly: In a separate bowl, whisk together flour, cornstarch, baking soda, and salt. I know, I know – extra dishes. But this ensures even distribution of the leavening agent and prevents salty or soda-y pockets in your cookies. The cornstarch might seem like it disappears into the flour, but trust the process. Sift everything together if you're feeling fancy, but honestly, a good whisk does the job just fine.
-
Bring It Together: Here's where things get interesting. Add your dry ingredients to the wet mixture all at once. Using a spatula, fold the mixture together with as few strokes as possible. You're looking for a cohesive dough that still has some streaks of flour – overmixing develops gluten and makes tough cookies. The dough should be soft but not sticky, like play-doh that's been left out for an hour. If it's too wet, add flour a tablespoon at a time; too dry, add milk a teaspoon at a time.
-
Chocolate Distribution: Fold in your chocolate chips with just 2-3 strokes. Save a few pieces to press into the tops – this creates those gorgeous melty chocolate pools that make people think you're a professional baker. The dough should be studded with chocolate but not overwhelmed by it. Remember, we're making chocolate chip cookies, not chip cookies with some dough holding them together.
-
Air Fryer Preparation: Preheat your air fryer to 320°F (160°C) for 3 minutes. While it's heating, line the basket with a small piece of parchment paper cut to fit with some space around the edges. This prevents the cookies from developing waffle patterns while still allowing proper air circulation. Don't skip this step – I've had cookies stick so badly they tore apart when I tried to remove them, and let me tell you, there's nothing sadder than broken cookies.
-
Portion and Space: Scoop tablespoon-sized portions of dough, rolling them quickly between your palms into rough balls. Place 4-5 cookies in the basket, leaving about 2 inches between each one. They'll spread more than you think, and air fryer cookies can't be rescued mid-bake like oven cookies. Press them down slightly – about 1/2 inch thick – so they cook evenly. If you make them too tall, the outside will burn before the inside cooks through.
-
The Magic Moment: Slide the basket into the air fryer and set it for 8-9 minutes at 320°F. This is the moment of truth – don't walk away! Around minute 6, you'll start to smell the most incredible cookie aroma. The cookies should look golden around the edges but still quite soft in the centers. They'll continue cooking from residual heat after removal, so err on the side of underbaking. If you wait until they look fully done, they'll be overbaked and disappointingly crisp throughout.
-
Cool and Repeat: Remove the cookies using a thin spatula and transfer to a wire rack. They'll look underdone and you'll question everything I've told you – this is normal. Let them cool for at least 5 minutes; during this time they'll set up and achieve that perfect chewy texture. While the first batch cools, you can start the next batch. The dough keeps well at room temperature for up to 2 hours, so take your time and enjoy the process.
-
The Final Touch: Once all cookies are baked and cooled, sprinkle them with that essential pinch of flaky sea salt. This isn't just for Instagram – the salt heightens the chocolate flavor and creates that sophisticated balance that separates good cookies from legendary ones. Serve them slightly warm if you want maximum chocolate gooeyness, or fully cooled for the best texture contrast between crispy edges and chewy centers.
That's it – you did it. But hold on, I've got a few more tricks that'll take this to another level...
Insider Tricks for Flawless Results
After making approximately 47 batches of these cookies (don't judge – I was "testing"), I've discovered some nuances that separate good air fryer cookies from absolutely transcendent ones. These aren't just suggestions – they're the difference between cookies that make people smile politely and cookies that make people demand the recipe while their mouth is still full. Ready for the fun part?
The Temperature Rule Nobody Follows
Here's the thing – most people blast their air fryer at 400°F because that's what they use for frozen fries. But cookies are delicate flowers that need gentle heat to develop properly. 320°F is the sweet spot where the outside caramelizes at the same rate the inside cooks through. Go higher and you'll get cookies that are burnt on the outside and raw in the middle, like they have identity crises. A friend tried skipping this step once – let's just say it didn't end well, and her kitchen smelled like burnt sugar for days.
Why Your Nose Knows Best
Forget timers – your nose is the most accurate doneness indicator. When you start smelling that incredible cookie aroma wafting from the air fryer, you've got about 2-3 minutes left. This is when the Maillard reaction kicks into high gear, creating hundreds of flavor compounds that make cookies taste like childhood and happiness and everything good in the world. If your kitchen doesn't smell like a bakery by minute 6, check that your air fryer is actually heating properly.
The 5-Minute Rest That Changes Everything
I know it's torture, but letting cookies rest on the hot parchment for 2 minutes before moving them to a cooling rack makes all the difference. They're still cooking from residual heat, and moving them too early can cause breakage. Plus, this rest allows the steam to redistribute, ensuring every bite is perfectly moist. Patience is a virtue, especially when it comes to cookies that are too hot to eat but too tempting to ignore.
Size Consistency Secrets
Use that cookie scoop I mentioned earlier, but here's the pro tip: slightly underfill it. Cookies that are too big won't cook evenly in the air fryer – the outside will be done while the inside stays doughy. Aim for golf ball-sized portions, about 1.5 tablespoons of dough. They'll spread to the perfect size and thickness, giving you that ideal ratio of crispy edge to chewy center in every bite.
The Chocolate Distribution Hack
Instead of mixing all the chocolate into the dough, reserve about 1/4 of your chips. After scooping the cookies, press 3-4 chips into the top of each dough ball. This creates those gorgeous chocolate pools on the surface that make cookies look professionally made. It also ensures chocolate in every bite, preventing the tragedy of a cookie with all its chocolate clustered in one spot.
Creative Twists and Variations
This recipe is a playground. Once you've mastered the base version (and trust me, you'll want to make it exactly as written at least once), here are some of my favorite ways to switch things up. Each variation maintains the core technique while exploring different flavor profiles that'll keep you coming back for more.
The Salty Sweet Addiction
Add 1/2 cup crushed pretzels to the dough and substitute half the chocolate chips with butterscotch chips. The pretzels provide incredible crunch and salt that amplifies the sweetness. Press a whole pretzel into the top of each cookie before baking for that bakery-style presentation. These disappear faster than free samples at Costco – you've been warned.
Double Dark Chocolate Decadence
Replace 2 tablespoons of flour with cocoa powder and use all dark chocolate chunks. Add 1 teaspoon of instant espresso powder to intensify the chocolate flavor without making them taste like coffee. These are for serious chocolate lovers only – they're so rich they practically demand a glass of cold milk on the side. The air fryer method keeps them from becoming dense like some cocoa cookies can be.
Birthday Cake Confetti
Omit the chocolate chips and instead fold in 1/2 cup white chocolate chips and 1/3 cup rainbow sprinkles. Add 1/4 teaspoon of almond extract along with the vanilla for that classic birthday cake flavor. Kids go absolutely bananas for these, and adults secretly love them too. They're like a party in cookie form, and the air fryer keeps the sprinkles from bleeding their colors everywhere.
S'mores Campfire Cookies
Replace chocolate chips with a mix of milk chocolate chunks and mini marshmallows. Add 1/2 cup crushed graham crackers to the dough. The marshmallows get beautifully toasted in the air fryer while the graham crackers provide that authentic s'mores texture. They're messy in the best possible way, like summer camp and childhood memories condensed into cookie form.
Salted Caramel Dream
Use half chocolate chips and half caramel bits, pressing a small indentation into each cookie and filling it with a dollop of caramel sauce before baking. Sprinkle with extra flaky salt. The caramel creates these incredible pockets of gooey sweetness that contrast beautifully with the crispy cookie edges. Keep napkins handy – these are gloriously sticky and worth every messy bite.
Peanut Butter Chocolate Heaven
Substitute 1/4 cup of butter with creamy peanut butter and use peanut butter chips instead of half the chocolate chips. The peanut butter flavor intensifies during air frying, creating cookies that taste like the inside of a Reese's cup. Even people who claim they don't like peanut butter cookies fall for these – they're that good.
Storing and Bringing It Back to Life
Here's the beautiful truth about these air fryer cookies – they actually taste better the next day. The flavors have time to meld and develop, creating a more complex, sophisticated cookie experience. But let's be real: in my house, they rarely last more than 24 hours. Still, knowing how to store and revive them properly means you can enjoy that fresh-baked experience even days later.
Fridge Storage
Store completely cooled cookies in an airtight container at room temperature for up to 5 days. Layer them with parchment paper between rows to prevent sticking. Whatever you do, don't store them while they're still warm – the trapped steam will make them soggy and sad. If your kitchen is particularly humid, add a small piece of bread to the container – it'll absorb excess moisture and keep your cookies crisp longer.
Freezer Friendly
These cookies freeze beautifully both as dough and baked. For dough, scoop individual portions onto a parchment-lined sheet, freeze until solid, then transfer to a freezer bag. Bake from frozen at 300°F for 10-12 minutes. For baked cookies, wrap pairs in plastic wrap, then store in a freezer bag for up to 3 months. Thaw at room temperature or give them 30 seconds in the microwave for that fresh-baked taste.
Best Reheating Method
To restore that fresh-from-the-fryer magic, pop cookies in the air fryer at 300°F for 2-3 minutes. Add a tiny splash of water to the bottom of the basket before reheating – it creates steam that brings back the soft centers while crisping the edges. Microwaving works in a pinch (10-15 seconds), but the air fryer method is superior for restoring that perfect texture contrast.